Chapter 4 Maintenance
HA-8190V 4-40
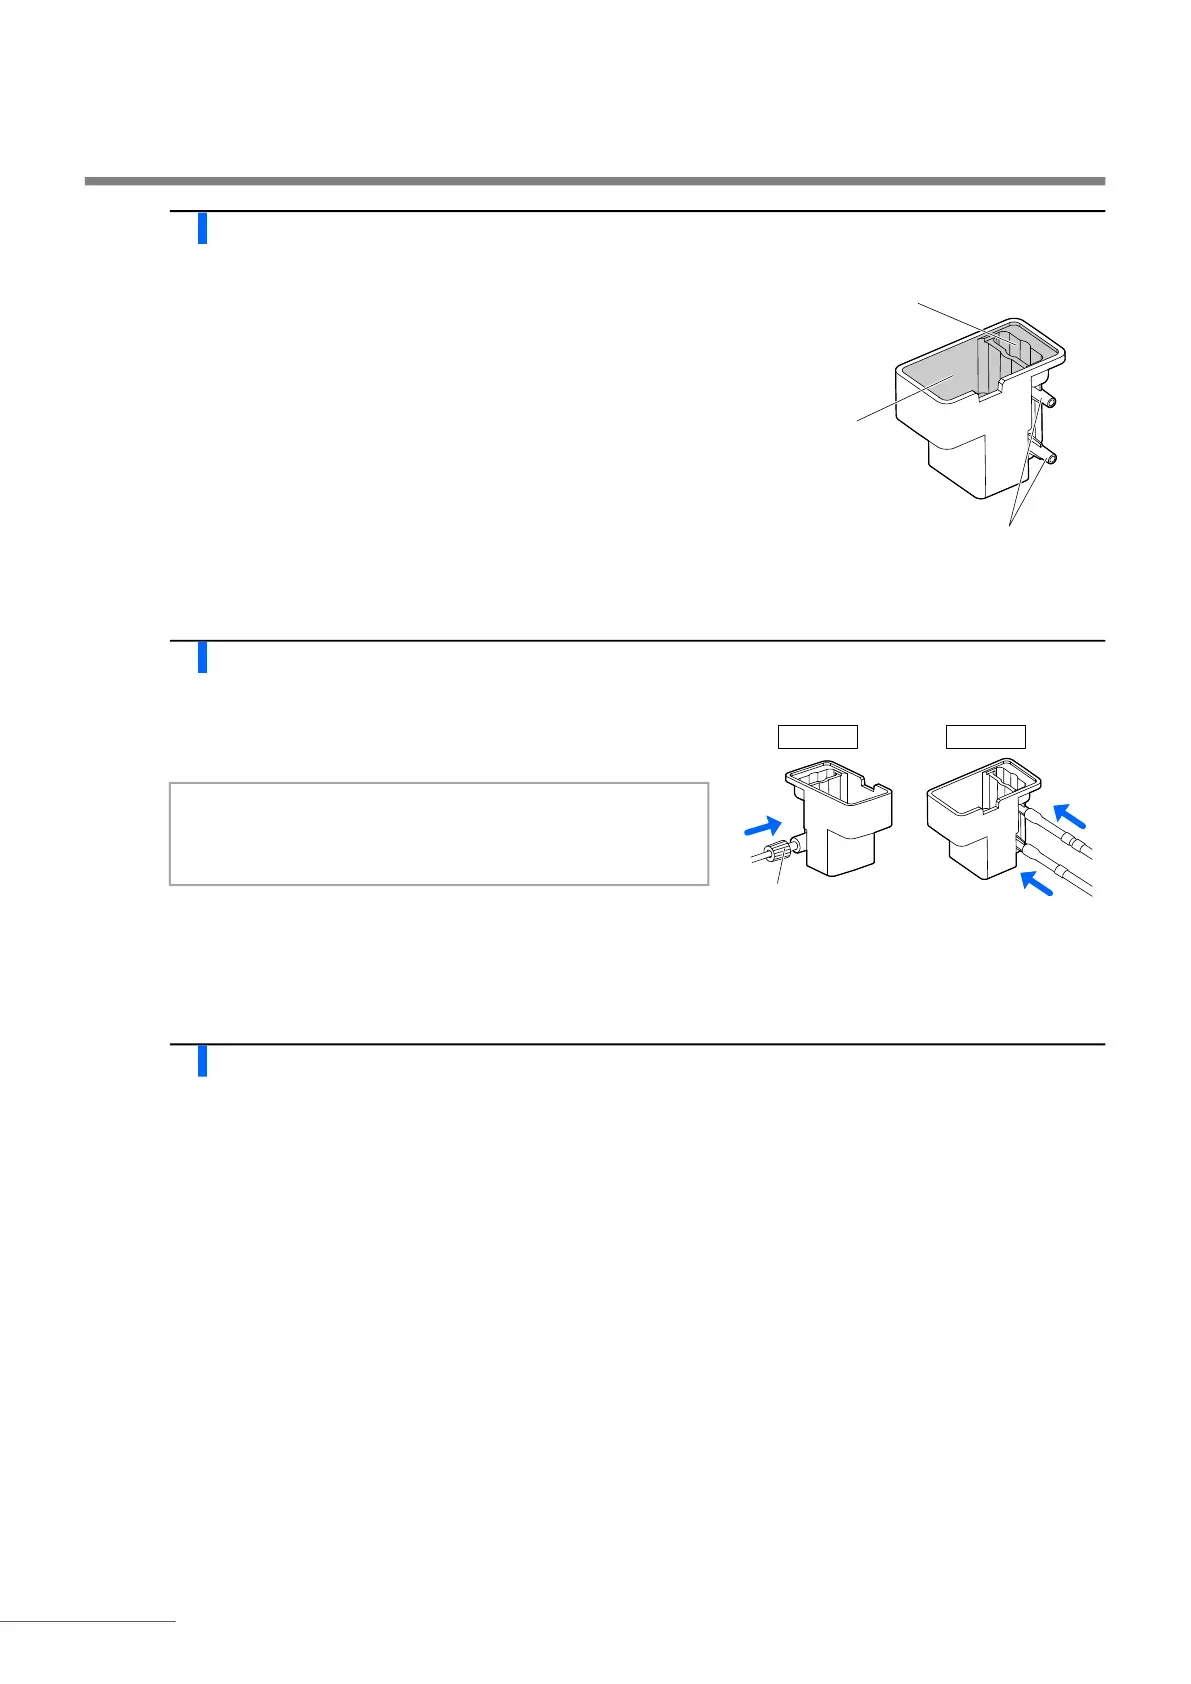
3 Clean the dilution container unit.
a Remove dirt and foreign matter from the dilution container, leak
container and tube ports.
• Remove sample residue and accumulated remnants of the rubber
cap.
• Carefully clean the bottoms of the dilution container and leak
container.
• Wipe with cotton swabs or gauze moistened with purified water
or rinse with purified water.
• Wipe off stubborn dirt by using gauze moistened with a neutral
detergent, and rinse off all detergent on the parts with purified
water.
4 Attach the dilution container unit.
a Connect the three tubes to the dilution container unit as shown on
the right.
b Attach the dilution container unit.
• Return the dilution container unit to its original position and press
it down to set properly in place.
5 Attach the dilution container cover.
See step 5 in “4.3.6. Cleaning the Dilution Container” on page 4-38.
Dilution container
Leak container
(in front of the
dilution container)
Tube ports
(Another tube port is located
on the other side.)
U
P
D
Tube with joint
Left side Right side
NOTE:
Do not tighten the joint on the left side excessively. The
tube may be crushed and cause abnormal chromatograms.