Chapter 4 Maintenance
HA-8190V 4-48
3 Remove air from the column by priming.
a Touch and wait about 30 seconds.
• Fluid pumping starts, and liquids and bubbles overflow from the
connection between the column and push screw.
• Continue pumping until bubbles disappear and only fluid
overflows.
• The <Pressure> value will be near “0 kg/cm
2
”.
b With liquid overflowing from the IN side, securely tighten the IN-side push screw by hand and immediately wrap
the OUT side of the column with tissue paper.
• Liquid will overflow from the OUT side of the column.
• The <Pressure> value will gradually rise and level off at about half the pressure indicated on the “CERTIFICATE
OF QUALITY”.
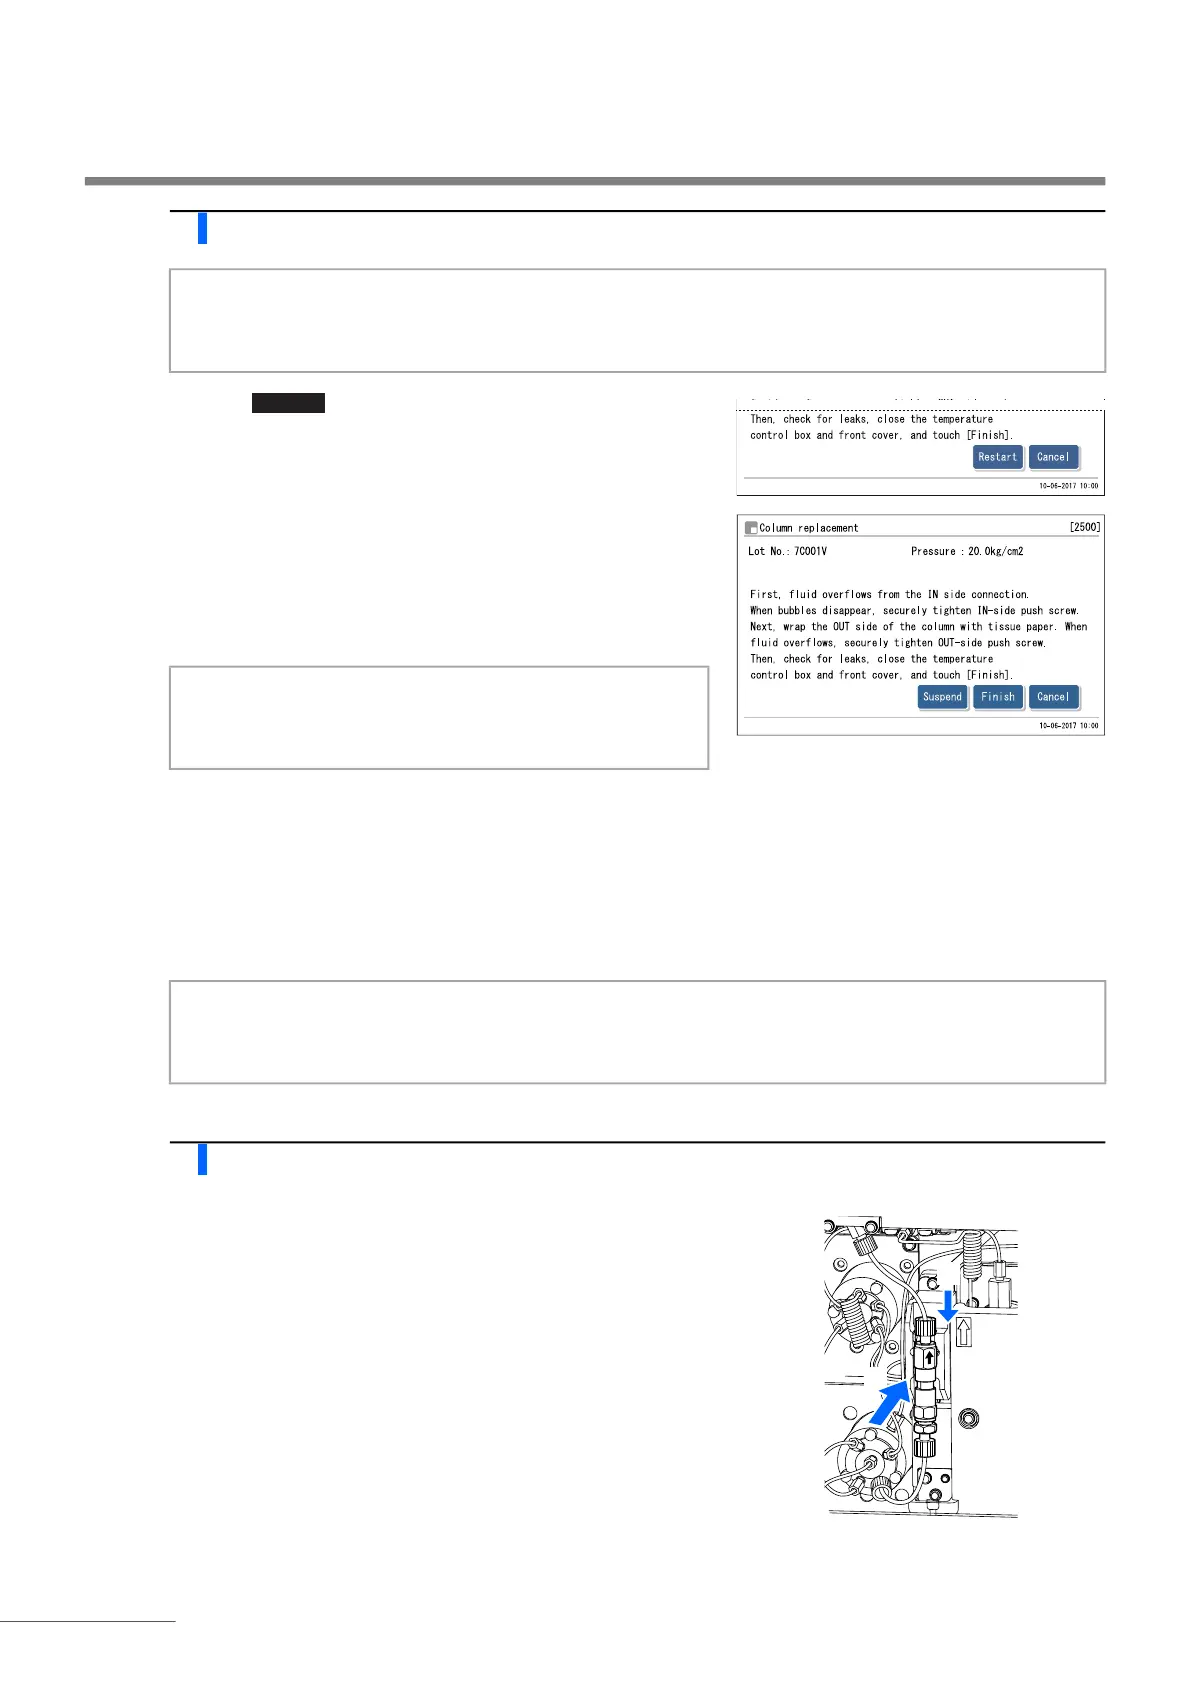
4 Tighten the column fully.
a Connect the push screw to the OUT side of the column.
• Insert the tube of the push screw into the column until the tube
stops, and then securely tighten the push screw by hand.
b Remove the tissue paper.
c Install the column into the column holder.
d Check that liquid does not leak from the connections on the IN
and OUT sides of the column.
• Retighten the push screws if liquid leaks.
e Close the temperature control box cover, then the front cover.
NOTE:
Before starting fluid pumping, ensure that the tube is inserted into the IN side of the column. If the tube is not
inserted enough, fluid may splatter during pumping.
NOTE:
Slightly loosen the push screw if liquid does not overflow
from the connection.
NOTE:
Tighten the push screw while fluid is overflowing. Bubbles remaining in the connection may cause abnormal
chromatograms.
 Loading...


