5.5 If This Happens
HA-8190V 5-31
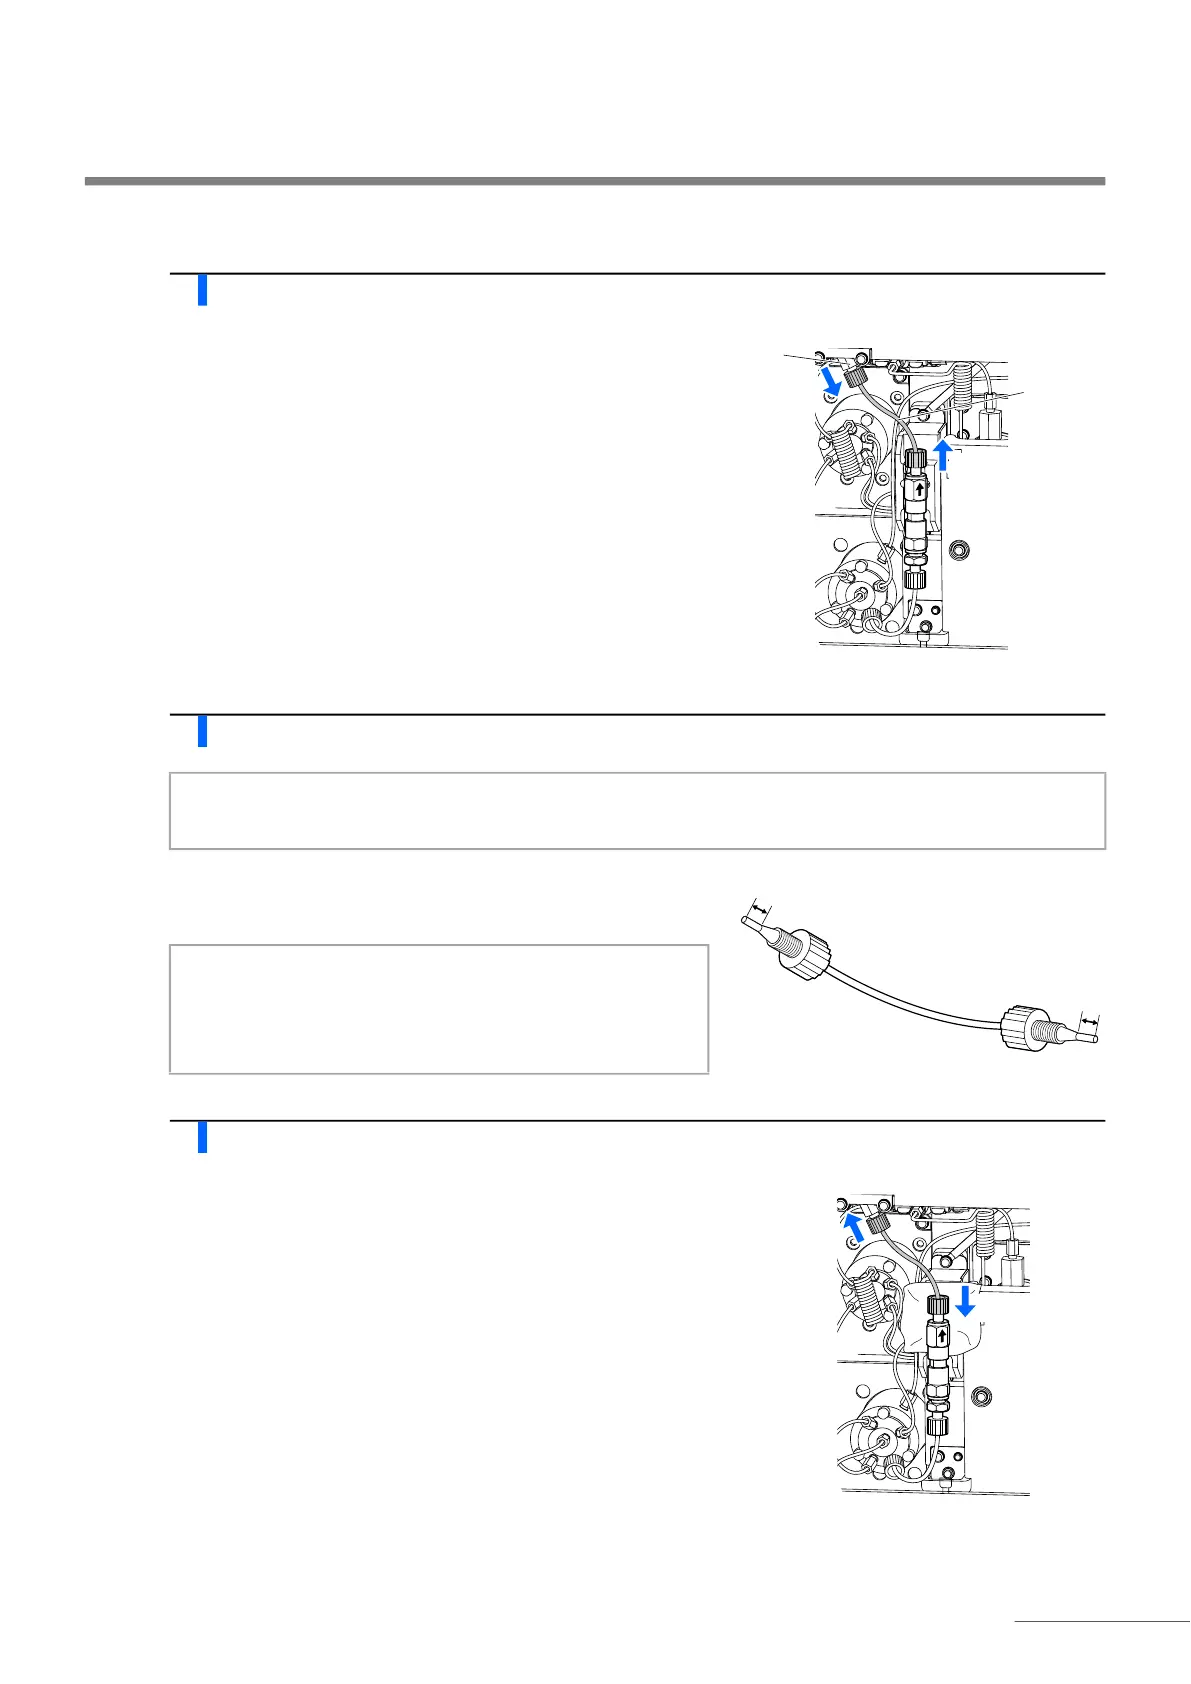
Replacing the column OUT tube (upper tube)
1 Remove the old tube.
a Turn the push screw at the joint shown on the right by hand to
remove the tube from the joint.
b Turn the push screw at the top of the column by hand to remove
the tube from the column.
2 Prepare a spare tube.
a Insert both ends of a spare tube into the new push screws.
• Press the tube until it protrudes about 3 mm from the push screw.
3 Connect the spare tube to the column.
a Connect the push screw of the spare tube to the joint.
• Insert the tube into the joint until the tube, and then tighten the
push screw securely to avoid overflowing.
b Connect the push screw on the other end of the spare tube to the
column.
• Insert the tube into the column until the tube stops, and then
tighten the push screw lightly by hand.
• Do not fully tighten the push screw at this point.
c Wrap the connection between the tube and column with tissue
paper.
• Allow liquid to overflow from the connection.
• The tissue paper blots up any liquid that overflows during fluid
pumping.
NOTE:
The column OUT tube is 8.0 cm long. Prepare a tube with the proper length.
3 mm
3 mm
8.0-cm spare tube
NOTE:
Liquid may leak or an abnormal chromatogram may result
after replacing the tube unless both ends of the tube
protrude about 3 mm from the push screws.
 Loading...


