Chapter 5 Troubleshooting
HA-8190V 5-30
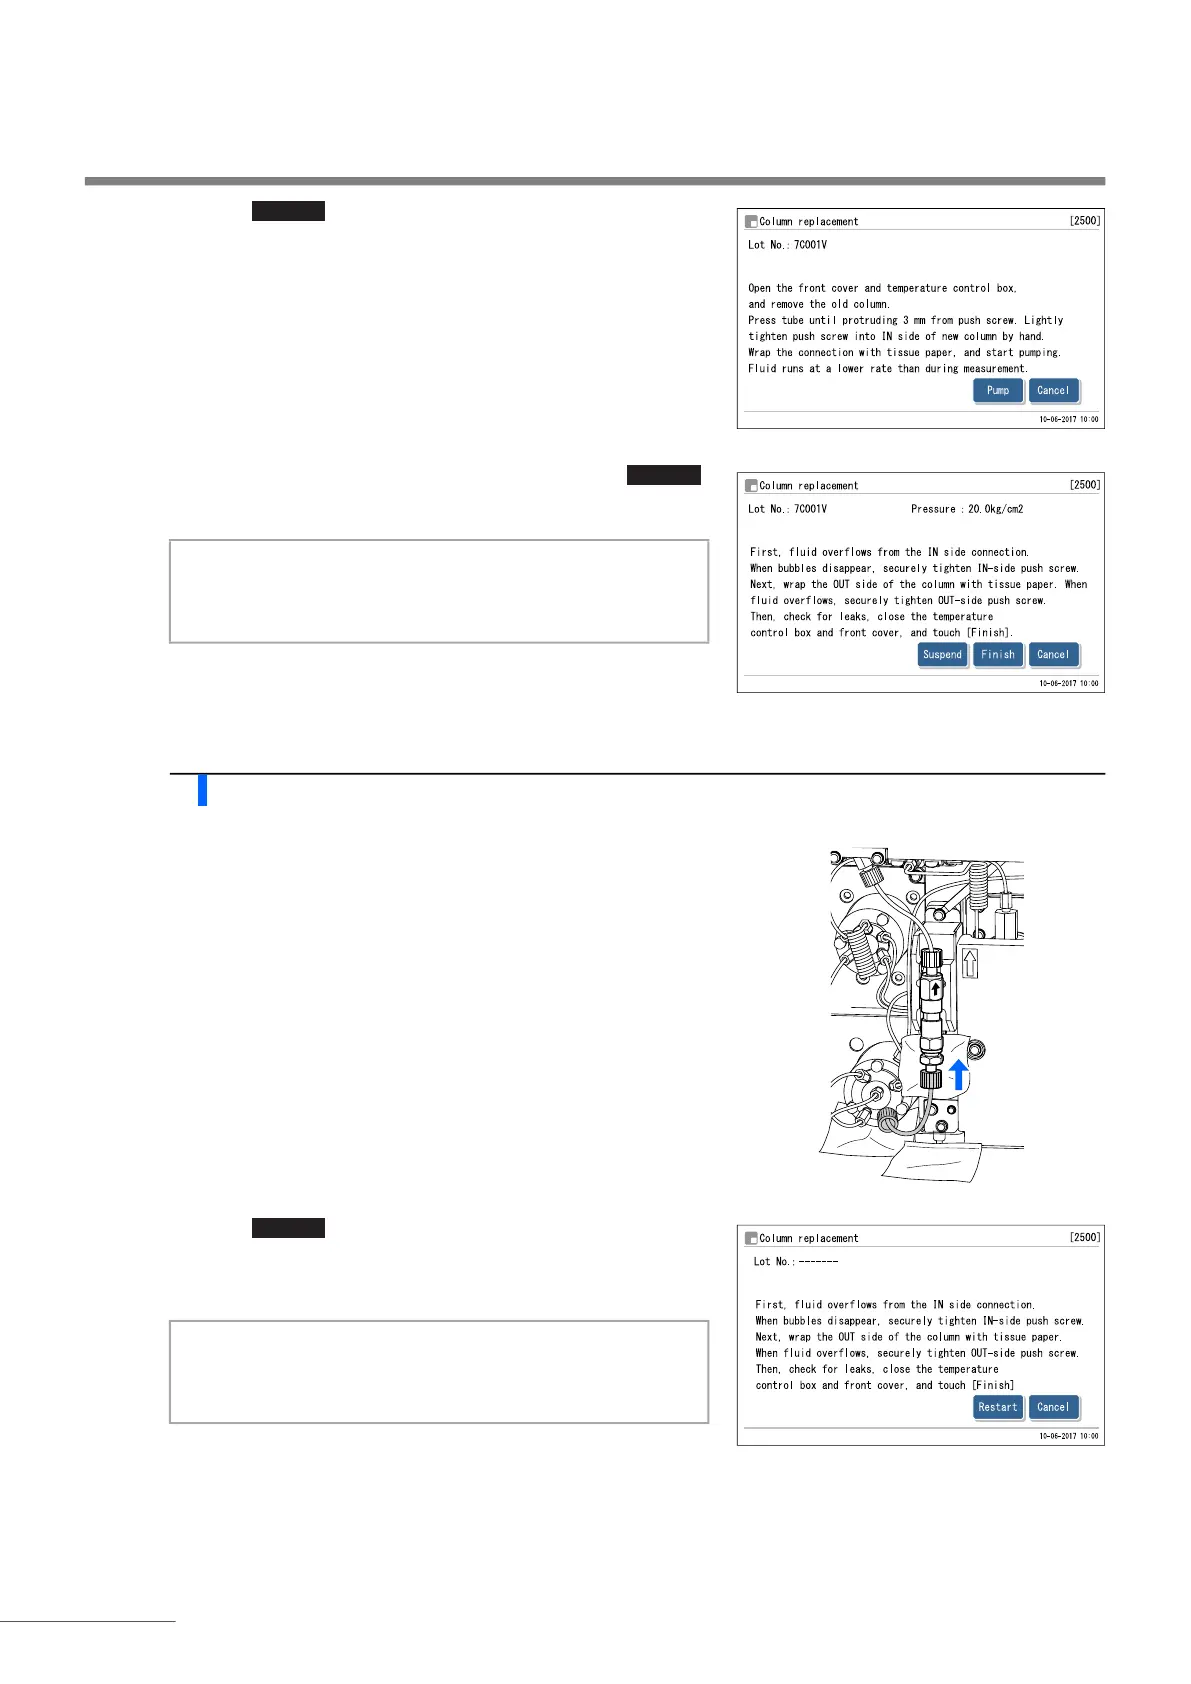
c Touch .
• Fluid pumping will start.
• Allow liquid to overflow from the connection.
• Wrap the tissue paper tightly around the end of the tube to avert
any splattering.
d When liquid begins to leak from the connection, touch .
• Fluid pumping will stop.
e Securely tighten the push screw that was connected in step 3-b.
• Blot up any liquid overflowing from the connection.
4 Connect the spare tube to the column.
a Connect the other push screw of the spare tube to the column.
• Check again that the tube protrudes about 3 mm from the push
screw, fit the push screw over the column, and then tighten the
push screw lightly by hand.
• Do not fully tighten the push screw at this point.
b Wrap the connection between the tube and column with tissue
paper.
• The tissue paper blots up any liquid that leaks during fluid
pumping.
c Touch .
• Fluid pumping will start.
• Allow liquid to overflow from the connection.
d Securely tighten the push screw that was connected in step 4-a while liquid is overflowing.
• Check that the liquid leak stops.
• Go to “ Completing maintenance” on page 5-33.
Pump
NOTE:
Slightly loosen the push screw if liquid does not overflow
from the connection.
Suspend
NOTE:
Slightly loosen the push screw if liquid does not overflow
from the connection.
Restart
 Loading...


