Version 6.4 201 March 2012
SIP User's Manual 14. Control Network
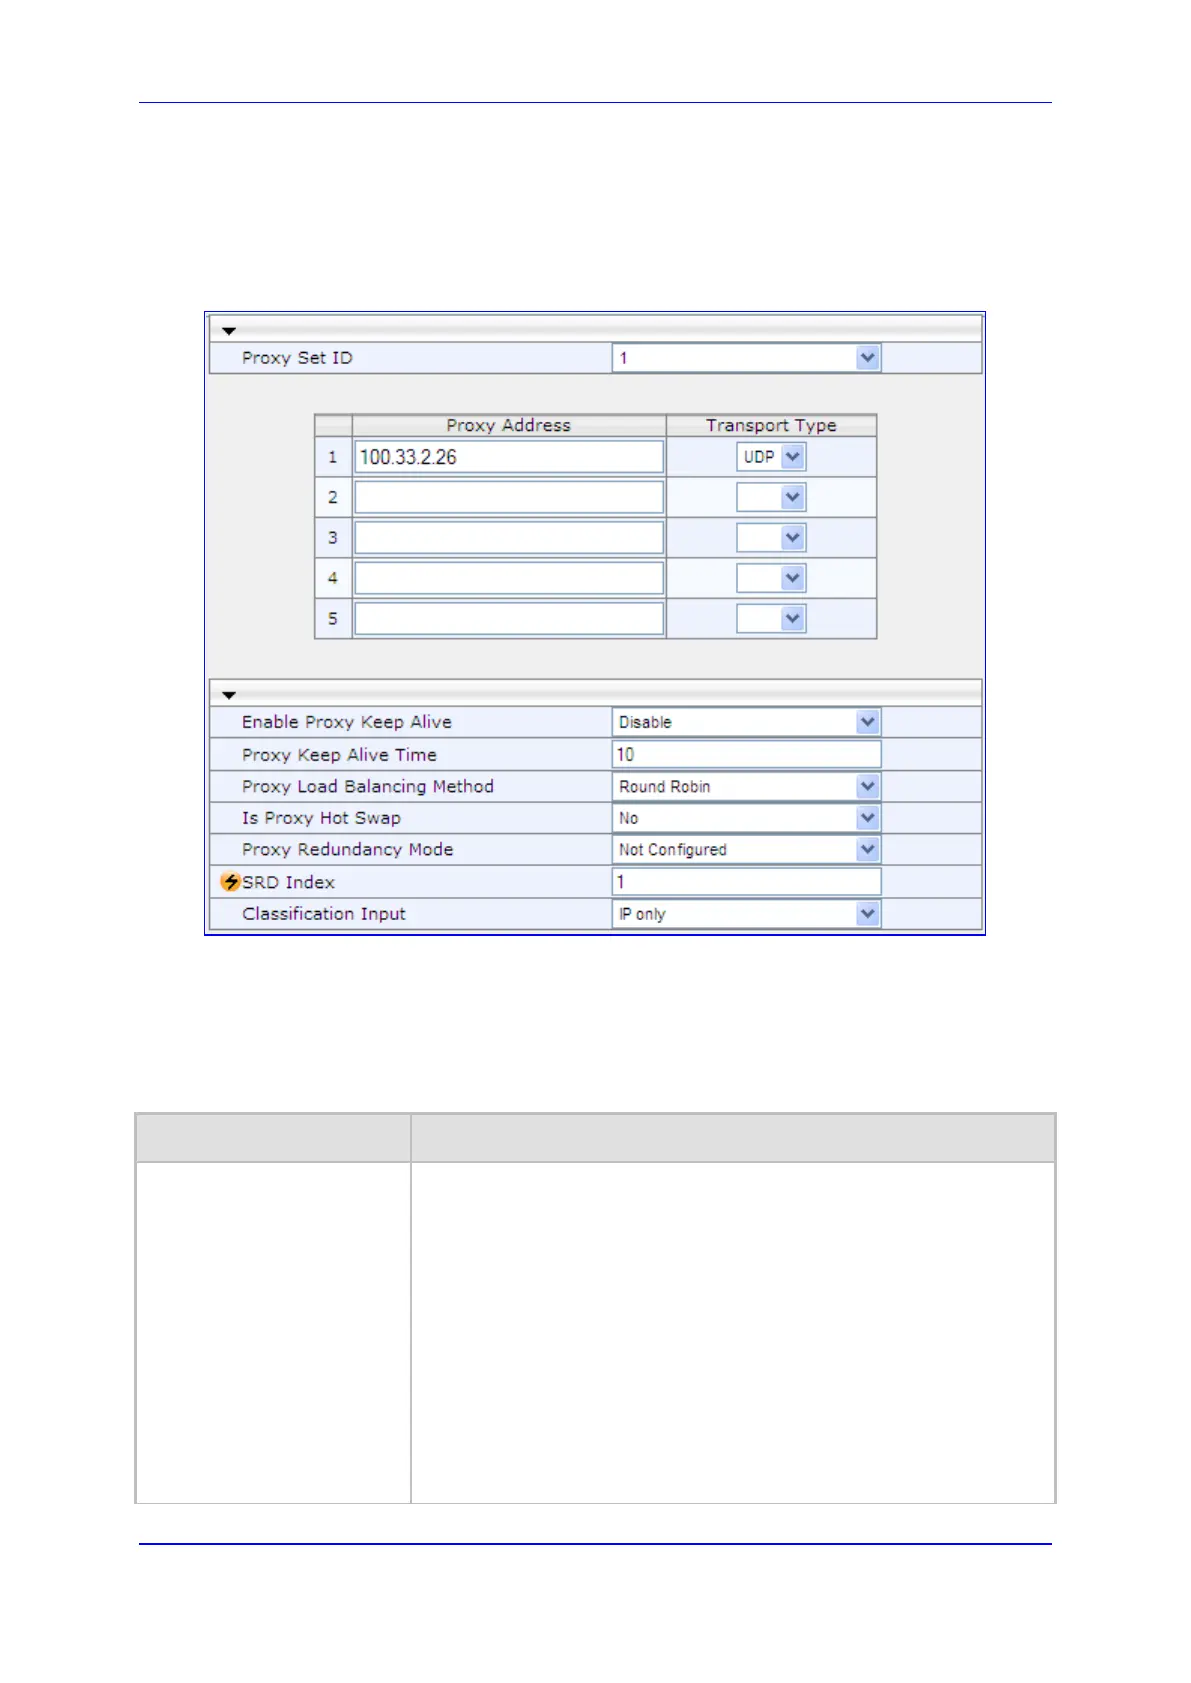
To add Proxy servers:
1. Open the Proxy Sets Table page (Configuration tab > VoIP menu > Control
Network submenu > Proxy Sets Table).
Figure 14-1: Proxy Sets Table Page
2. From the 'Proxy Set ID' drop-down list, select an ID for the desired group.
3. Configure the Proxy parameters according to the following table.
4. Click Submit to apply your changes.
5. To save the changes to flash memory, see 'Saving Configuration' on page 482.
Table 14-4: Proxy Sets Table Parameters
Parameter Description
Web: Proxy Set ID
EMS: Index
[ProxySet_Index]
The Proxy Set identification number.
The valid range is 0 to 31. The Proxy Set ID 0 is used as the default
Proxy Set.
Note:
Although not recommended, you can use both default Proxy Set
(ID 0) and IP Groups for call routing. For example, in the Trunk Group
Settings page (see 'Configuring Trunk Group Settings' on page 253)
you can configure a Serving IP Group to where you want to route
specific Trunk Group channels, and all other device channels then use
the default Proxy Set. You can also use IP Groups in the Outbound IP
Routing Table (see 'Configuring the Outbound IP Routing Table' on
page 271) to configure the default Proxy Set if the parameter
PreferRouteTable is set to 1.
To summarize, if the default Proxy Set is used, the INVITE message is
sent according to the following preferences:
 Loading...


