3 608 878 300 Tightening Technology | Bosch Rexroth AG 619/641
System 350 | 3 608 878 300/2019-03
7.7.3.2 Automatic configuration of the tightening channel
Automatic initial
commissioning
Automatic commissioning is active if there is no existing channel configuration. Here, the components
recognized by the tightening controller are transferred to the channel configuration without querying the
user and configured with a default value (SE, IM, LTU).
The PLC assignment table is generated automatically. To call up the configuration of the tightening
channel, select System
Tightening channel configurationor .
Automatic channel
configuration
Automatic channel configuration is active if the Automatic option is selected under Channel in the global
parameters (see Channel configuration (page 556)). Automatic channel configuration allows for example
to replace the ErgoSpin during operation (plug & run). The ErgoSpin data are then transferred to the
channel configuration without querying the user. All other components must be manually configured.
7.7.3.3 SE/CS PLC assignment table
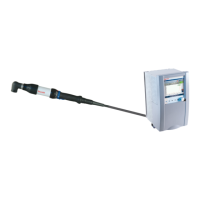
Control unit (SE) The PLC assignment table defines the assignment of the control signals to the tightening controller's
physical interfaces of the tightening controller (Arcnet, fast inputs/outputs, module slots) of the
SE352(M).
Programming the IM24V interface module in the type B1/B2 slot
Load the assignment table via System SE/CS PLC assignment table.
To ensure simple program selection, assign the signals in the Inputs group as follows:
• Prog0 to B1/B2 0.0
• Prog1 to B1/B2 0.1
Send the changed PLC assignment table to the SE.
To initialize other processes with the tightening sequence evaluation, assign the signals in the Outputs
group as follows:
• Ok to B1/B2 0.0
• Nok to B1/B2 0.1
Compact system (CS) The assignment is largely specified for the compact system and does not need to be changed for basic
commissioning. You can, however, optionally specify the input signal for the tool button on the hand-held
nutrunner.
For this, proceed as follows:
1. Load the assignment table via System SE/CS PLC assignment table.
2. Click the ErgoSpin 0.3 input.
3. Click << to remove the existing signal.
4. Click the desired input signal (e.g. ResRs).
5. Click the ErgoSpin 0.3 input.
6. Click >> to assign the signal.
The ResRs signal is displayed for the ErgoSpin 0.3 input (see Figure 7–43)
Automatic commissioning can be forced during later operation by simultaneously deleting the channel
configuration and PLC assignment table.
In doing so, the output drive components for the ESV and ESM are deleted automatically.
The PLC assignment table is generated automatically during automatic commissioning.
For information on offline configuration, see chapter Configuration SE/CS PLC assignment table
(page 580)
 Loading...