2
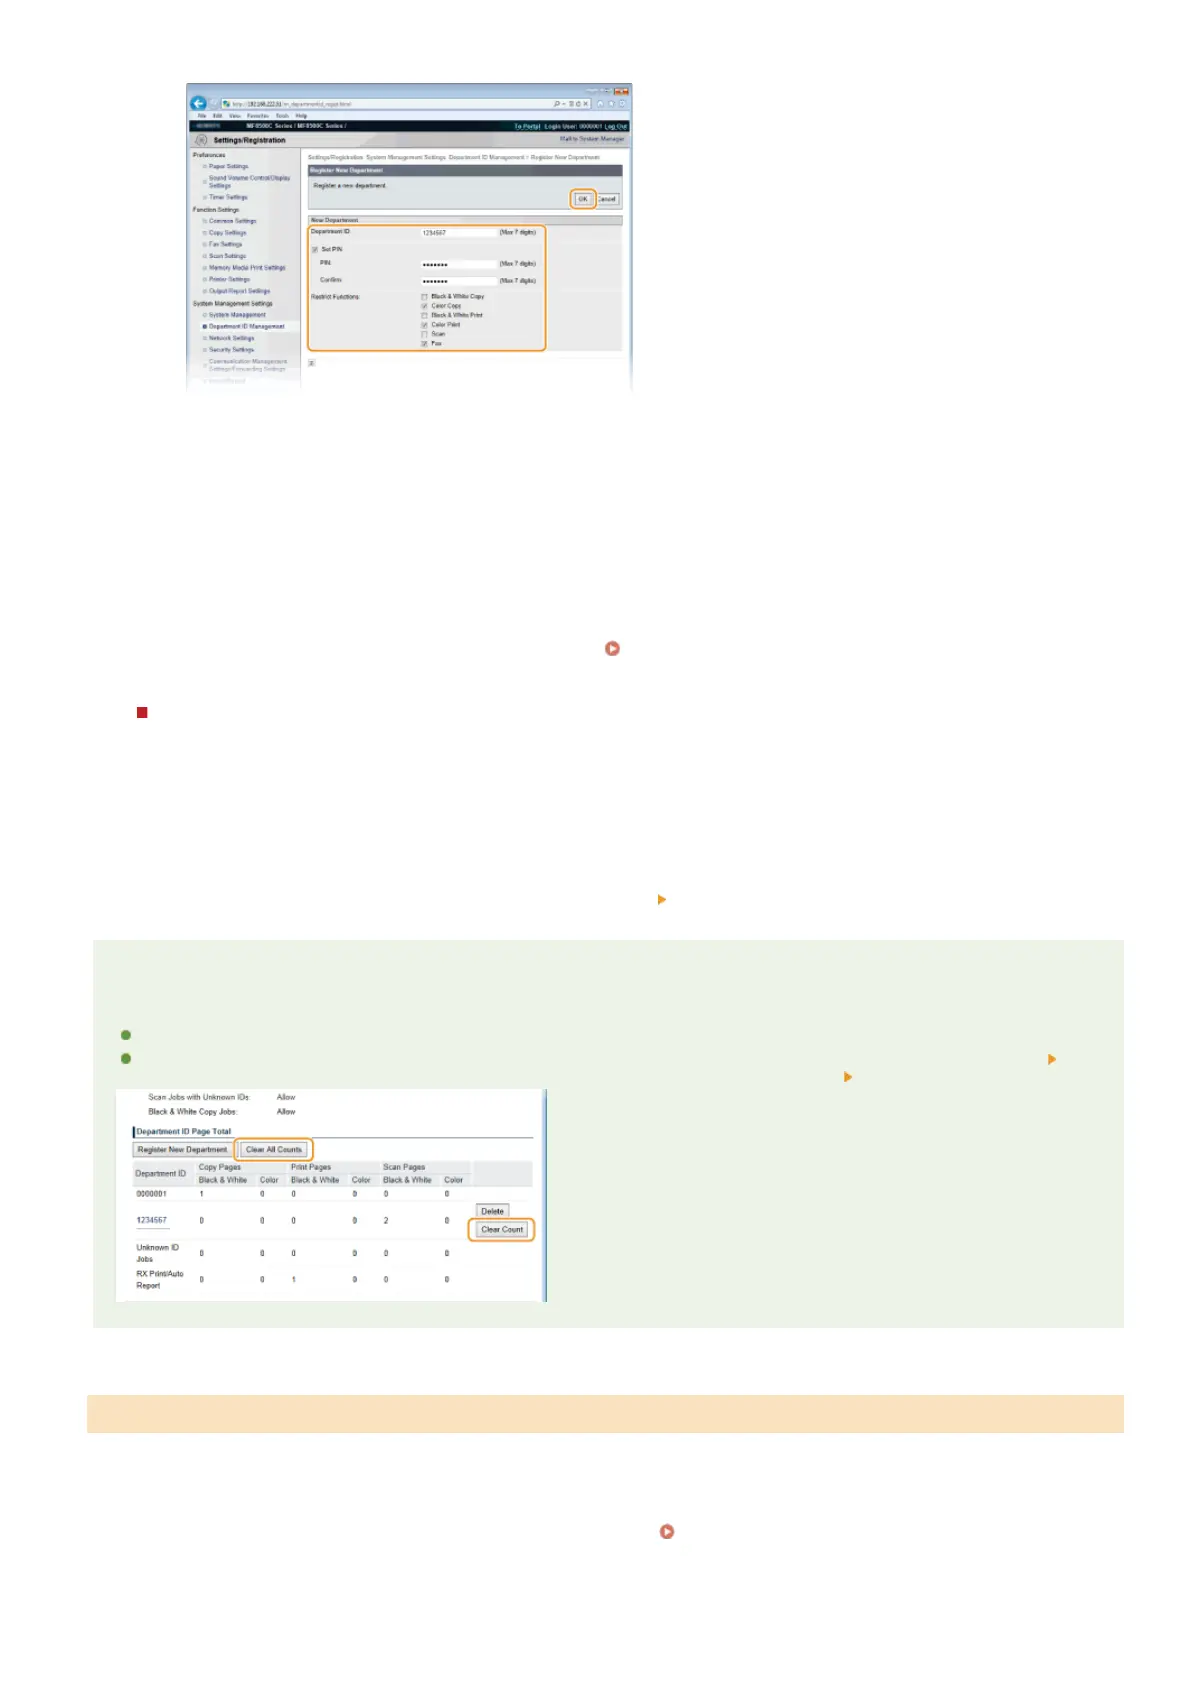
[Department ID]
Enter a number of up to seven digits for the Department ID.
[Set PIN]
To set a PIN, select the check box and enter a number of up to seven digits both in the [PIN] and [Confirm] text boxes.
[Restrict Functions]
Select the check box for the function that you want to disable for the Department ID.
NOTE:
If the [Scan] check box is selected, scanning documents to USB memory devices, e-mails, and shared folders is disabled.
You can also disable scanning documents to computers via <Computer> and <Remote Scanner>. However, you can only
disable scanning documents to computers for all users (
Blocking Jobs When Department ID Is Unknown).
Editing the settings of the registered Department ID
1
Click the corresponding text link under [Department ID] to edit.
2
Change the settings as necessary and click [OK].
NOTE:
Deleting a Department ID
Click [Delete] on the right of the Department ID you want to delete
click [OK].
NOTE
[Department ID Page Total]
You can check the total numbers of pages copied, printed, scanned, or faxed for each Department ID.
If you want to return the counts to zero, click the corresponding text link under [Department ID] and click [Clear Count]
[OK]. If you want to return the counts of all Department IDs to zero, click [Clear All Counts] [OK].
After you register as many Department IDs as necessary, enable Department ID Management.
Start the Remote UI and log on in System Manager Mode. Starting Remote UI
Click [Settings/Registration].
Enabling the Department ID Management
1
2
㻠㻜㻞㻌㻛㻌㻢㻣㻢