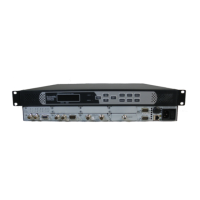
5 Use the Up and Down buttons to move the cursor to the pair location for the
embedded audio, Group 1 "Pr1" or "Pr2", Group 2 "Pr1" or "Pr2", Group 3 "Pr1"
or "Pr2," and Group 4 "Pr1" or "Pr2," then press the Enter button to edit the
assigned audio.
6 Use the Up and Down buttons to select the audio that is assigned to the pair,
"Off", "Aud 1 PCM", "Aud 1 Dig. Pass", "Aud 2 PCM," or "Aud 2 Dig. Pass", "Aud
3 PCM", "Aud 3 Dig. Pass", "Aud 4 PCM", "Aud 4 Dig. Pass." Press the Enter
button to save the selection.
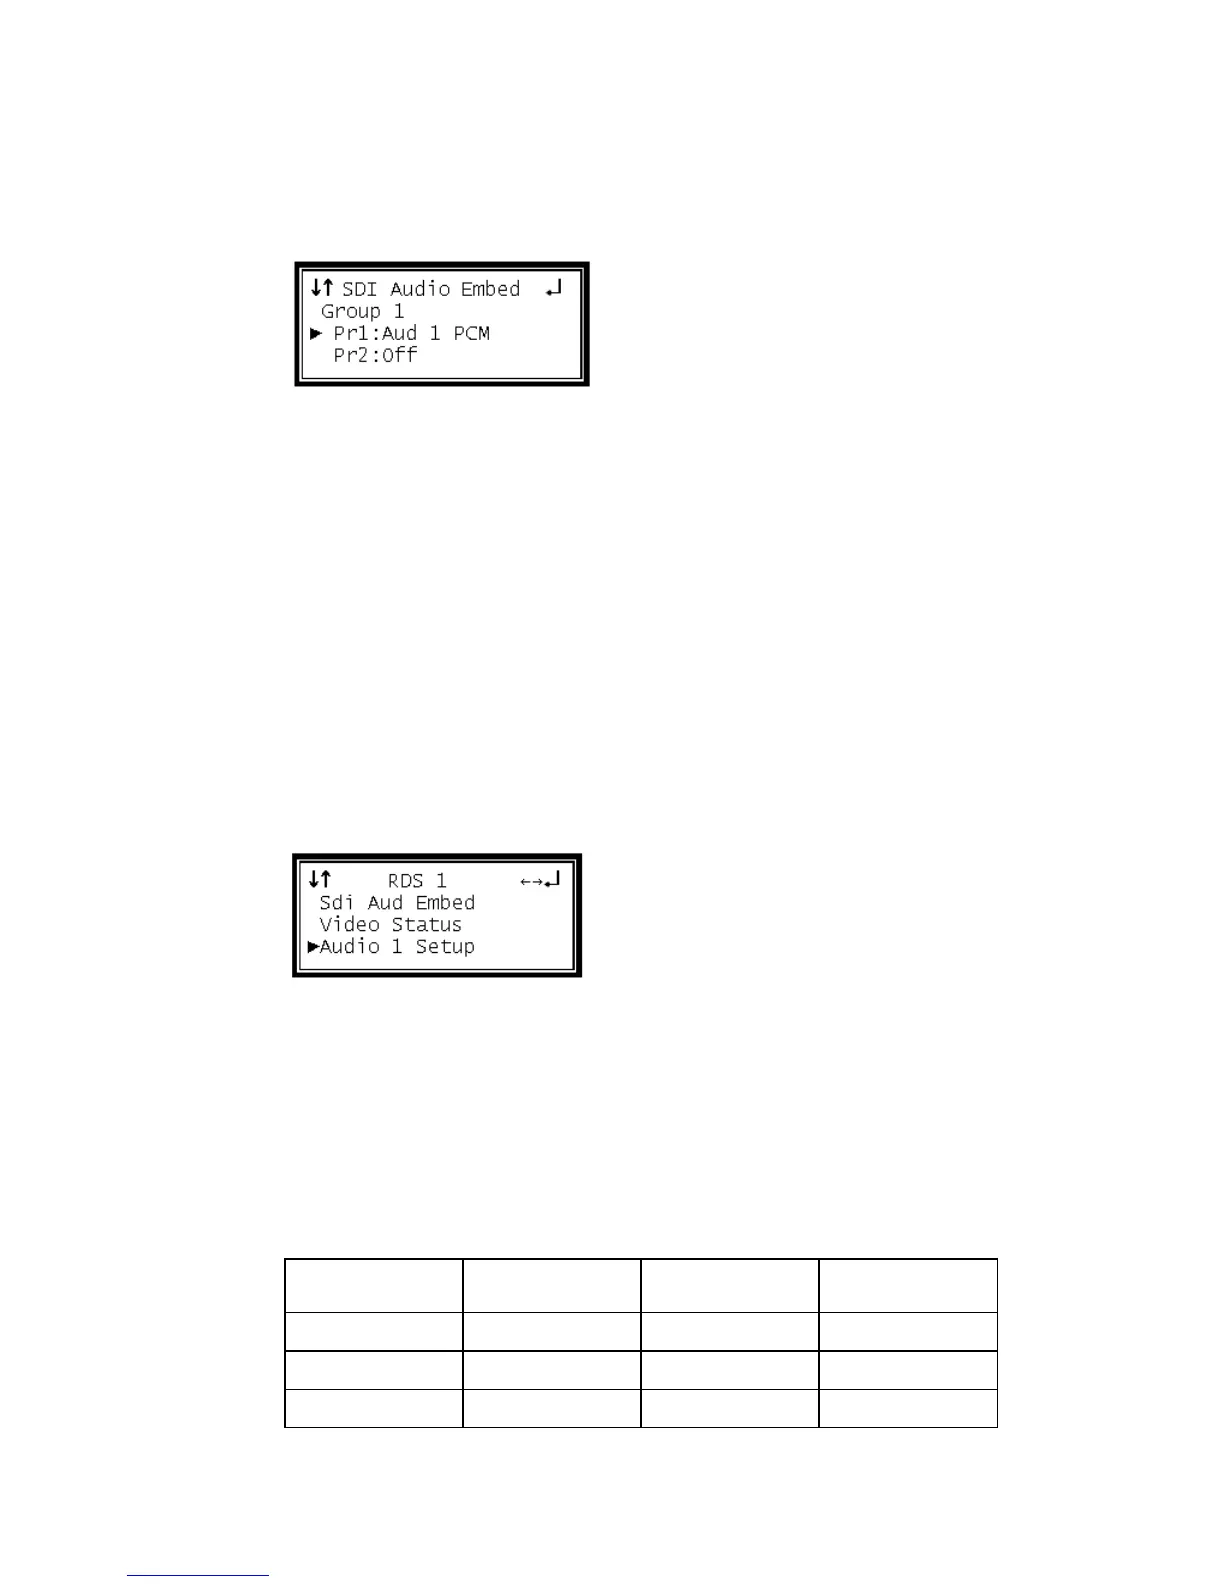
Audio 1 Setup
The following menus are used to setup the audio downmix settings.
Note: Refer to Appendix E - D9887B Receiver Audio Explanation (on page 241) for
the D9887B receiver Audio Explanation.
Note: These settings do not apply to Dolby E audio.
Use the following instructions to setup Audio 1-4.
1 Use the Up and Down buttons to move the cursor to "Audio 1 Setup," then press
the Enter button.
2 The current screen shows the status of the audio downmix settings, press the
Enter button again to display the Edit screen.
Mode
1 Use the Up and Down buttons to move the cursor to "Mode," then press the
Enter button.
2 Use the Up and Down buttons to select the desired downmix type ("Monitor",
"Transmission", and User"), then press the Enter button to save the selection.
Note: The following are set for each Mode: