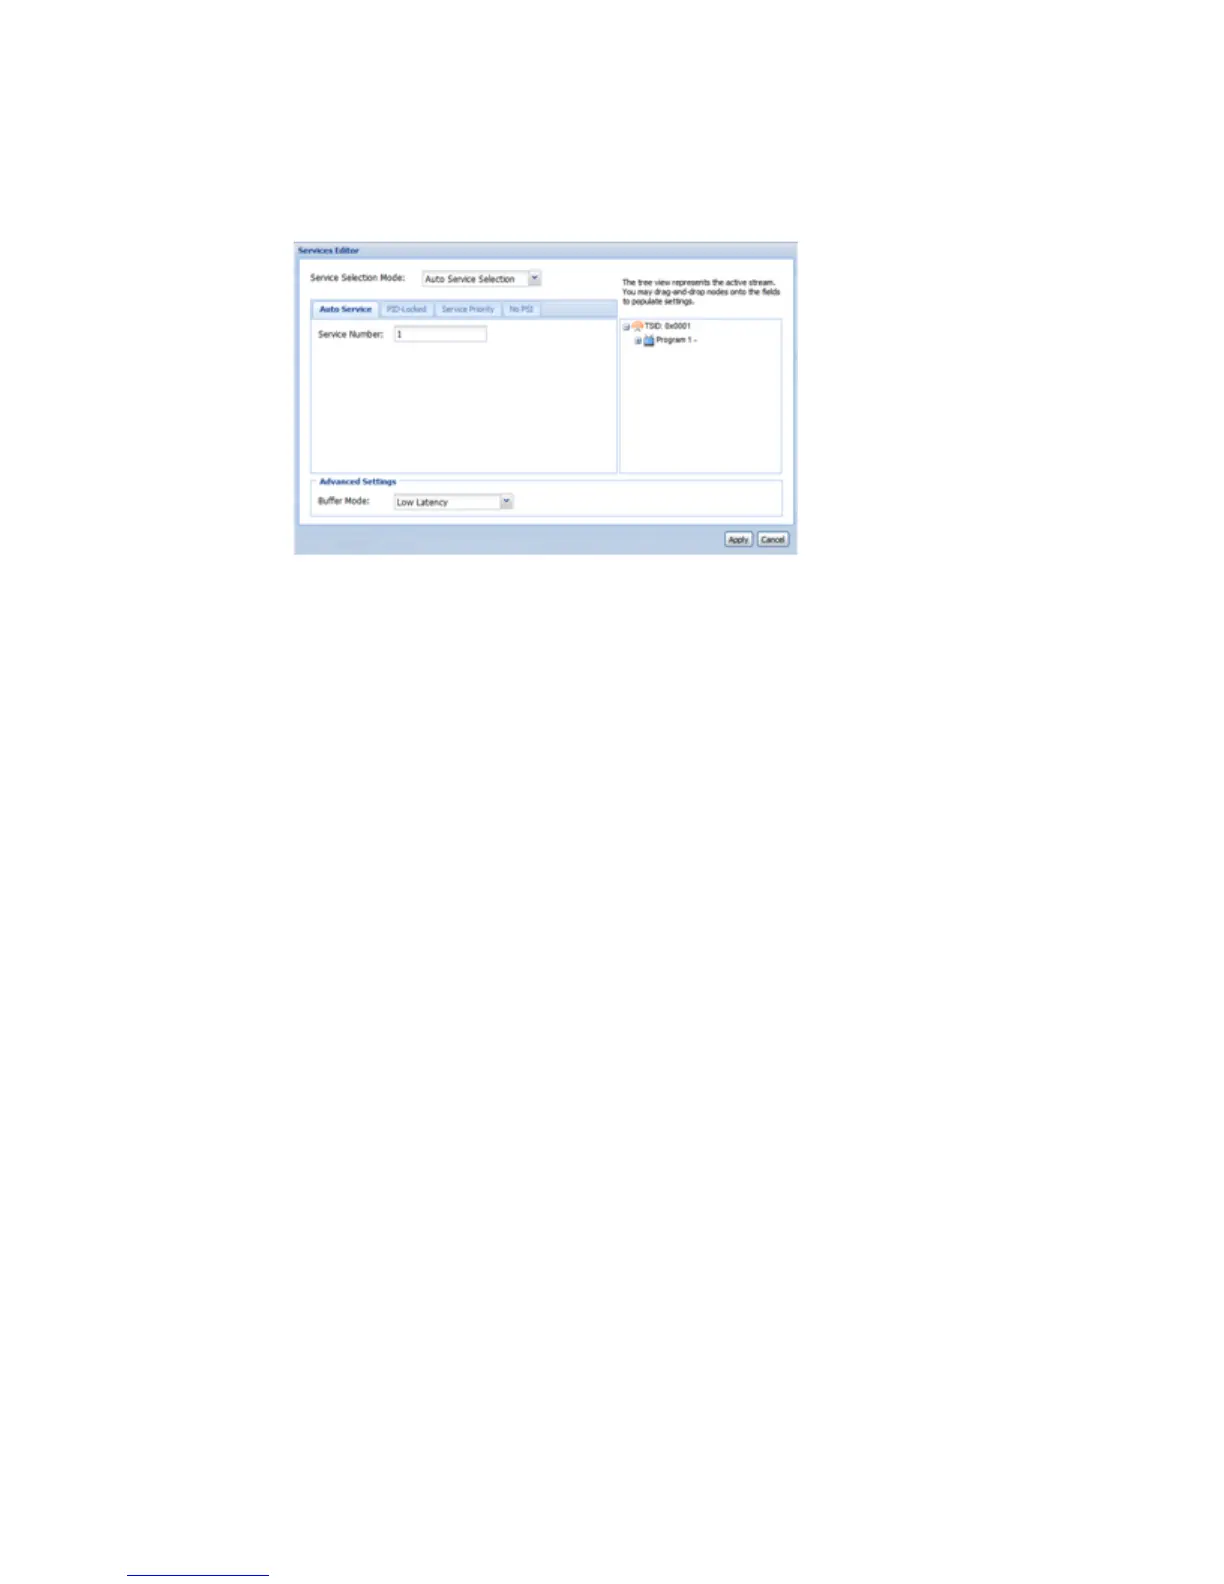
2 Under the "Services" heading, click on the Window button next to "Services."
3 A new window should pop up in the middle of the screen. Use the drop-down
menu at the top to choose the appropriate setup type.
4 In the section on the right, there is a list of services detected in the stream and an
Expand button to the left of each service.
5 Click the Expand button to view the contents of each service.
6 You can then drag and drop the PID values by simply clicking and holding them
as you drag the PID value to the appropriate box in the section on the left.
7 Fill in the remaining input boxes, then click the Apply button to save the
settings.
In PID-Locked mode, all of the entries should be entered as PIDs.
In Auto mode, the program number should be entered as the number of the
program in the TS.
In Priority mode, the service number is entered and the audio entries should be
entered as the number they are indexed by, in the TS.
In No PSI mode, all of the entries should be entered as PIDs with their
corresponding data type.
Note: Selecting a service (program) with drag and drop will also fill in the
associated audio programs in the service entry fields.
Audio Status and Downmix Settings
The audio downmix settings have three different configuration settings. These three
are: transmission, monitor, and user. To configure the audio downmix setting, use
the following steps:
1 Click on the RDS 1 or RDS 2 tab of the corresponding RDS that needs to be
configured.
Note: In a Configuration 1 D9887B receiver, there will only be a RDS 1 tab.