10.4.2.2 Type 00800 - 01200
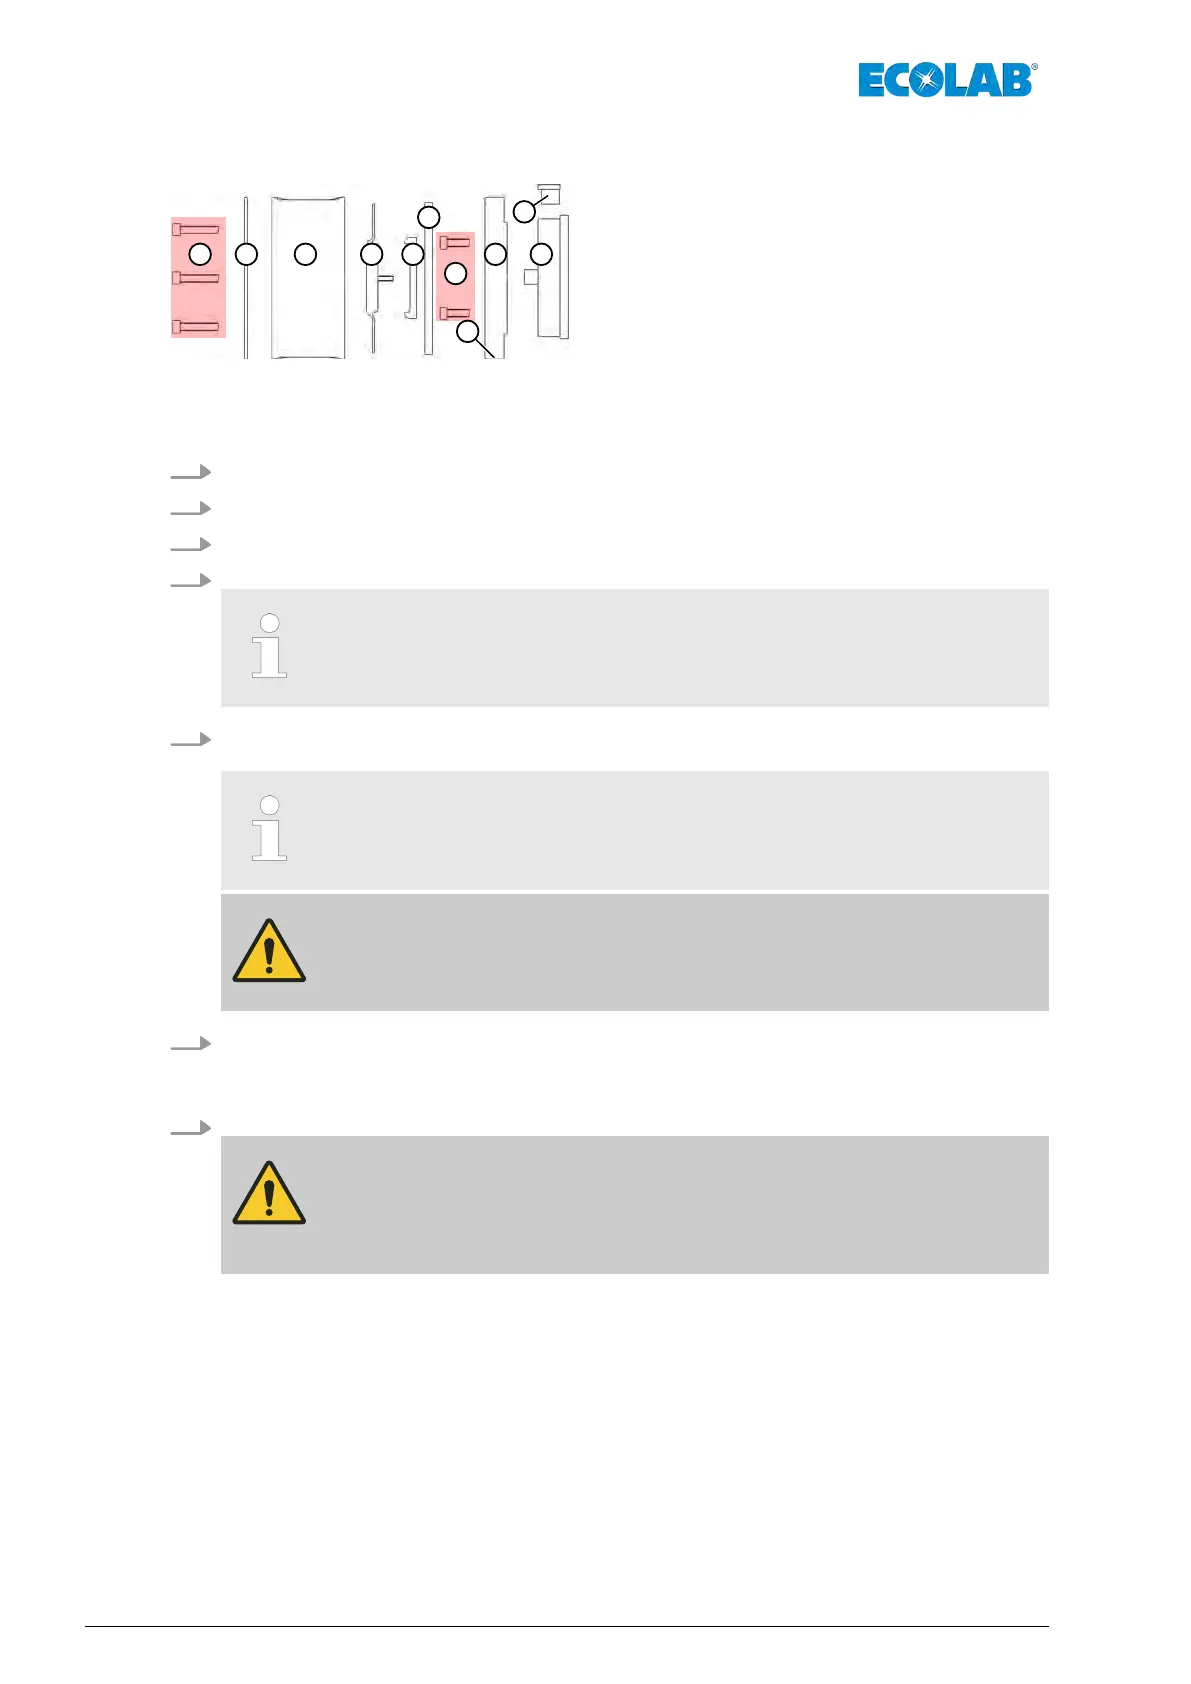
Fig. 16: Replacement of diaphragm and pump head - type
00800-01200
1 Metering head screws (6 x)
2 Cover plate
3 Pump head
4 Diaphragm
5 Supporting disk
6 Intermediate ring
7 Screws (4 x)
8 Adapter
9 Leakage hole
10 Adapter
11 Sealing plug
1. Undo fastening screws (no. 1).
2. Remove the cover plate (no. 2) on the metering head (no. 3).
3. Prise off the sealing plug (no. 10) using a screwdriver
.
4. Secure the piston rod (no. 9) using an SW 8 spanner wrench to prevent twisting.
If necessary, twist the diaphragm and intermediate ring to move the
wrench surface of the piston rod into the correct position.
5. Unscrew the diaphragm (no. 4) with intermediate ring (no. 8) and supporting disk
(no. 5).
When tightening the diaphragm, make sure that the fixing holes are
aligned with the intermediate ring.
CAUTION!
Only tighten the diaphragm by hand (do not use a tool).
6. Remove the spanner wrench and turn the diaphragm/intermediate ring unit clockwise
until the housing bore holes are in the correct position and the leakage bore hole
points downwards.
7. Tighten the metering head screws equally in a diagonal pattern.
CAUTION!
Tightening torque for metering head screws = 6±
1 Nm.
Check the torque of the metering head screws after 24 hours!
Maintenance
72MAN046590 Rev. 6-03.2022