EPSON EPL-N4000/EPL-N4000+ Chapter 4 Disassembly and Assembly
Rev.B 147
4.2.10 Tray1 Take Away Roll Assembly
(See “Retard and Take Away- Tray 2” on pa
e -263)
4.2.10.1 Removal
1. Remove the Duplex Unit, if one is installed.
2. Remove the EP Cartrid
e -192)
3. Remove Tray 1 and Tray 2.
4. Remove the Left Upper Cover Assembly. (“Left Upper Cover
Assembly” on pa
e -185)
5. Remove the Rear Cover Assembly. (“Rear Cover Assembly” on
pa
e -140)
6. Remove the MSI Support Assembly. (“MSI Support Assembly” on
pa
e -166)
7. Remove the retainin
stud that is located at
the lower ri
ht of the Tray, and remove the stud.
8. Remove the screw securin
clip to Tray 2, and remove
the clip.
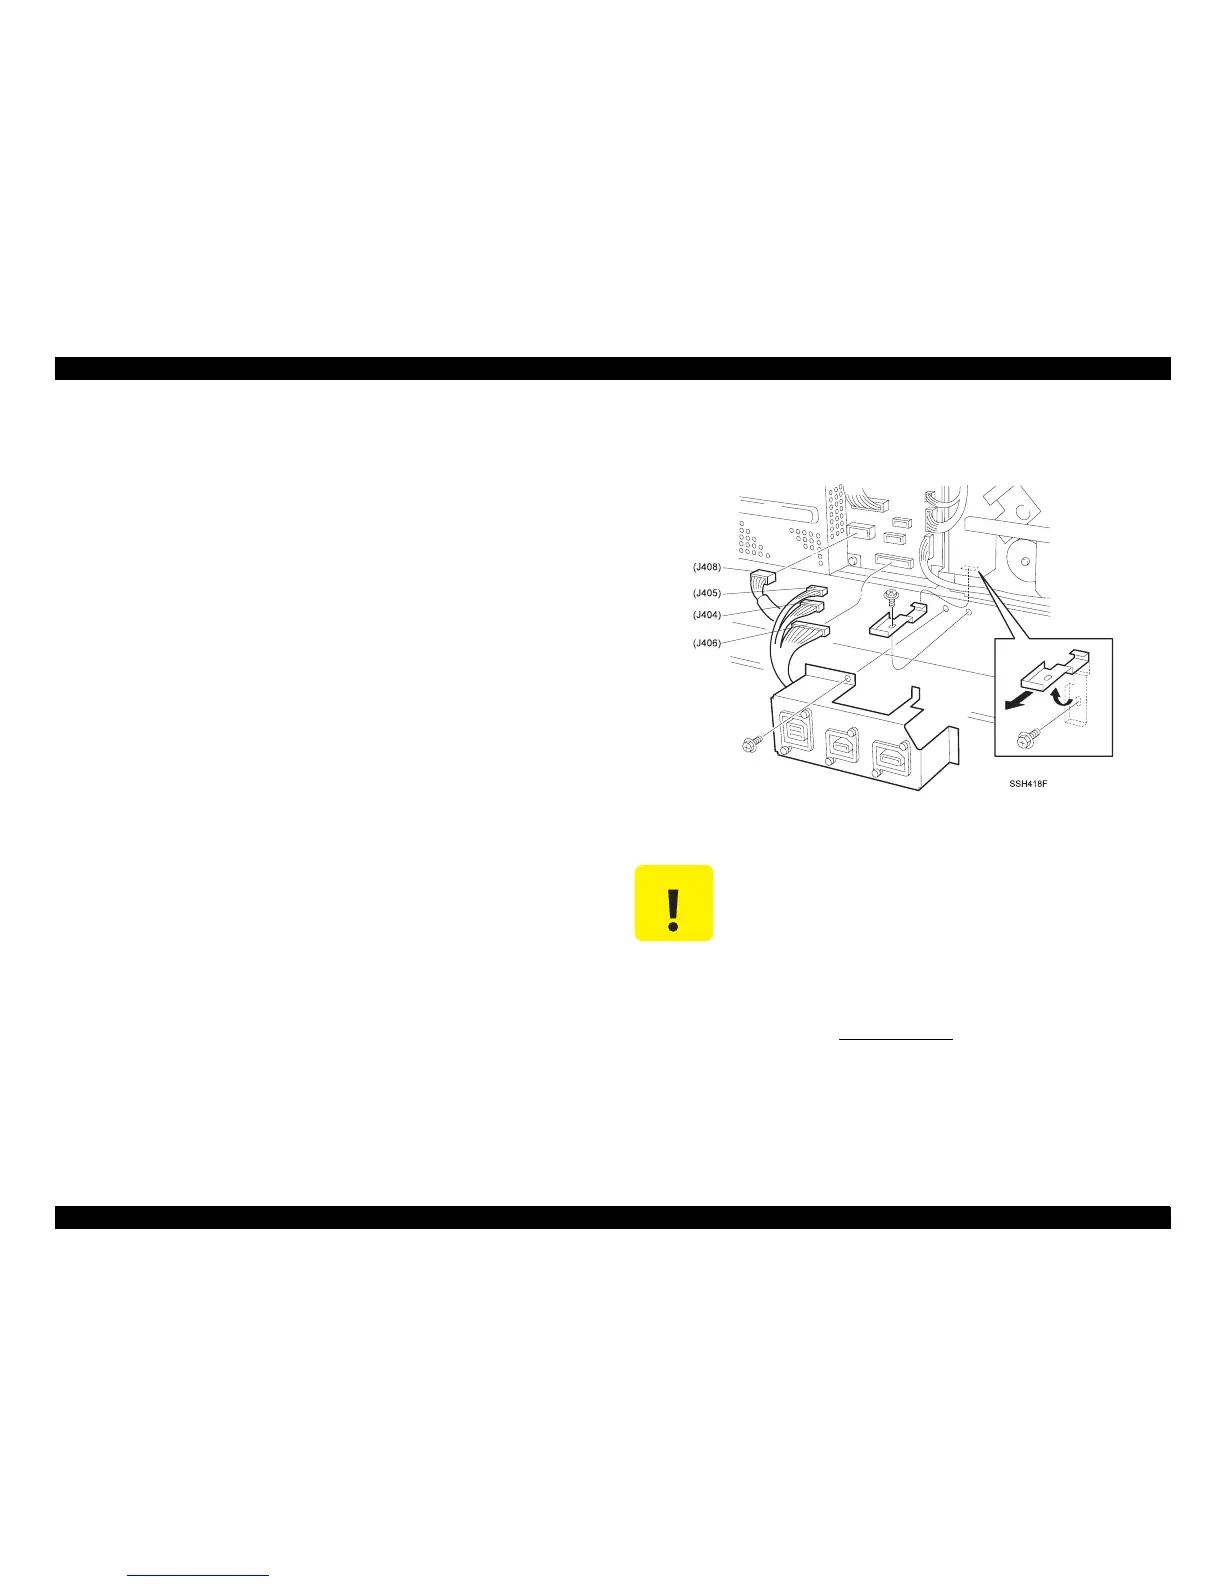
9. Disconnect P403, P404, P406, and P408 from the MCU PWB.
10. Remove the screw securin
the Option Connector Bracket the
frame, and remove the Bracket.
11. Remove the screw securin
clip that is located under
the Option Connector Bracket, and remove the clip. (Fi
ht)
12. Remove Tray 1 Lift Motor. (“Tray 1 Lift Up Motor” on pa
e -144)
Figure 4-17. Removal of Bracket
13. Lift the printer off of Tray 2.
14. Set the printer, with the ri
ht side down, on a level and stable work
surface.
The following steps has you lift the printer. The printer
is very heavy and requires two people to lift it. Do not
attempt to lift the printer by yourself.