EPSON EPL-N4000/EPL-N4000+ Chapter 4 Disassembly and Assembly
Rev.B 214
4.2.63 Main Power Switch
(See “Power Inlet and LVPS” on pa
e -283)
4.2.63.1 Removal
1. Remove the Top Cover Assembly.(“Top Cover Assembly” on
pa
e -139)
2. Remove the screw securin
the Main Switch Bracket to the Power
Supply Assembly.
3. Pull the Bracket and Switch up and away from the Power Supply.
4. Disconnect the four wires from the Switch.
5. Squeeze the two clips on the underside of the Switch while you slide
the Switch out the top of the Bracket.
Figure 4-79. Removal of Main Power Switch
4.2.63.2 Installation
1. Slide the Main Switch into the openin
in the top of the Main Switch
Bracket. It snaps into place.
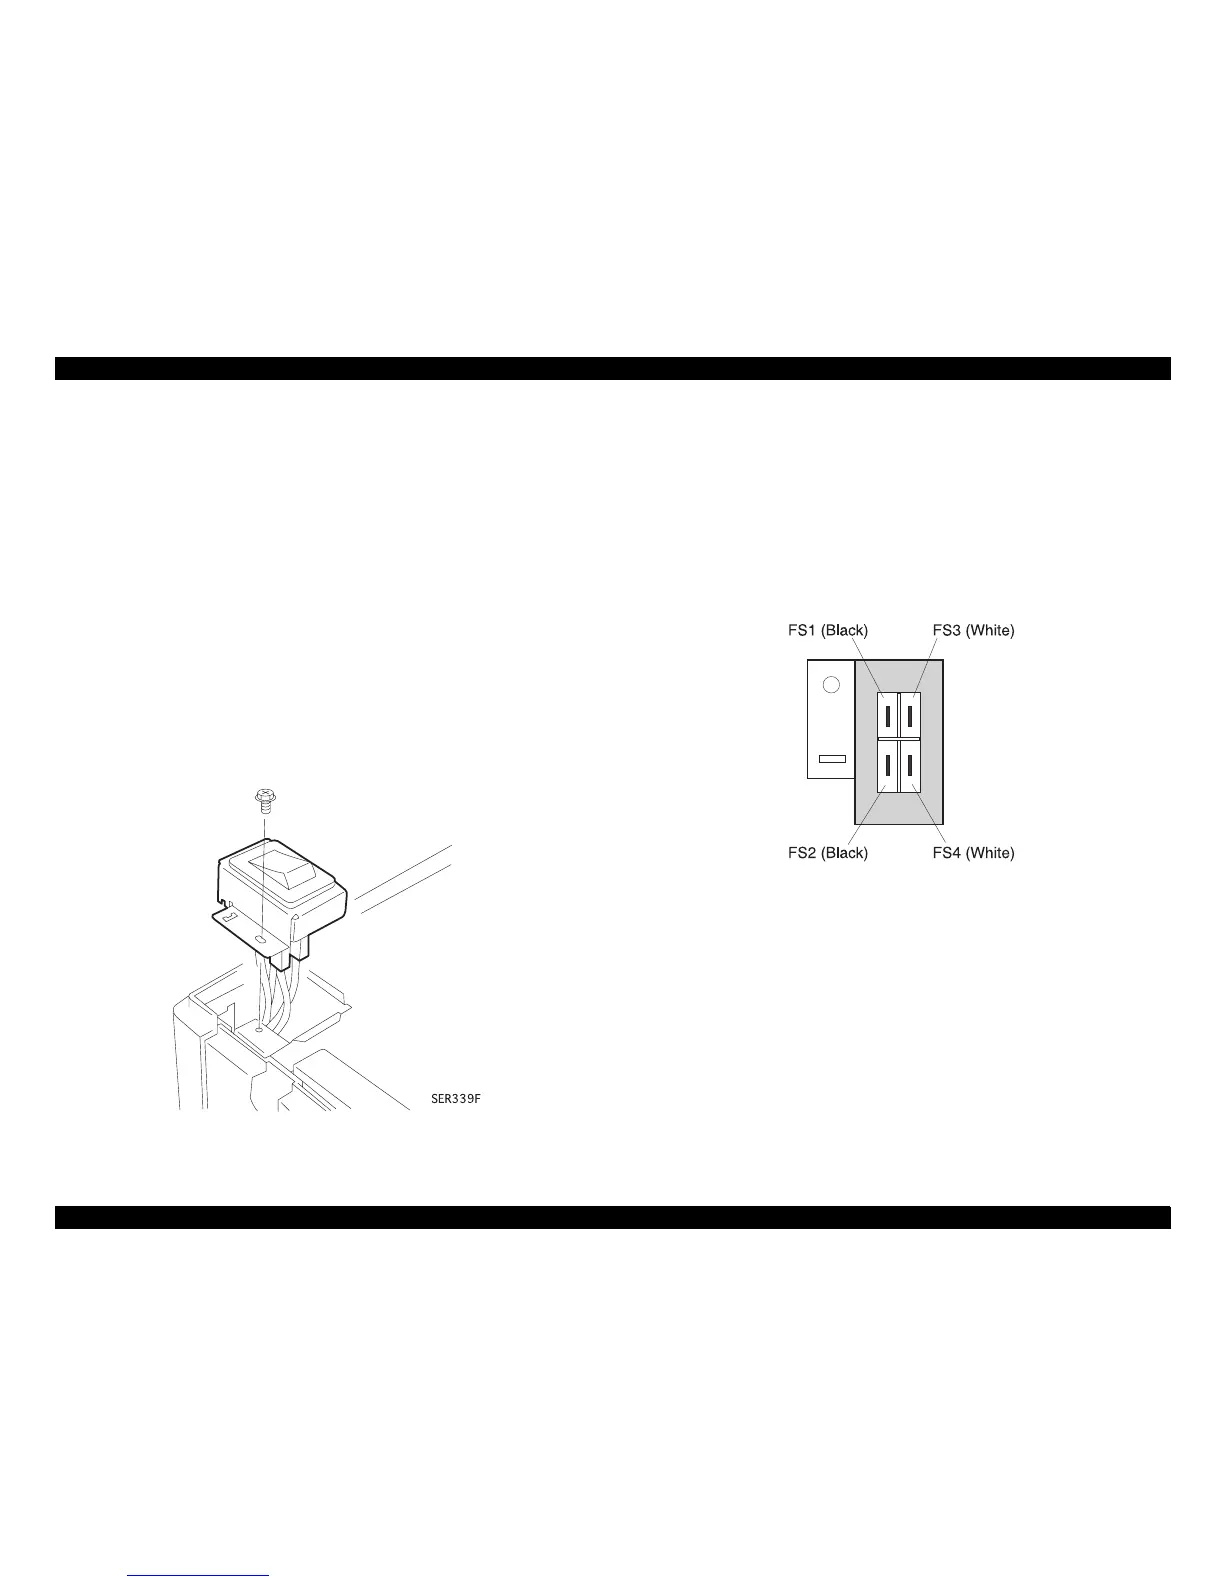
2. Reconnect the four wires to the Switch. Follow the illustration below
when reconnectin
the wires. The illustration represents the
underside of the Main Switch Bracket and Main Switch.
Figure 4-80. Pin position of Main Switch
3. Reinstall the Main Switch Bracket onto the Power Supply Assembly.
Make sure you ali
n the screw hole in the Bracket with the screw
hole in the Power Supply.
4. Use one screw to secure the Bracket to the Power Supply
Assembly.
5. Reinstall the Top Cover Assembly.(“Top Cover Assembly” on
pa