EPSON EPL-N4000/EPL-N4000+ Chapter 4 Disassembly and Assembly
Rev.B 217
4.2.66 High Voltage Power Supply(HVPS) Assembly
(See “HVPS and MCU PWB” on pa
e -284)
4.2.66.1 Removal
1. Remove the MCU PWB.(“MCU(Machine Control Unit) PWB” on
pa
e -220)
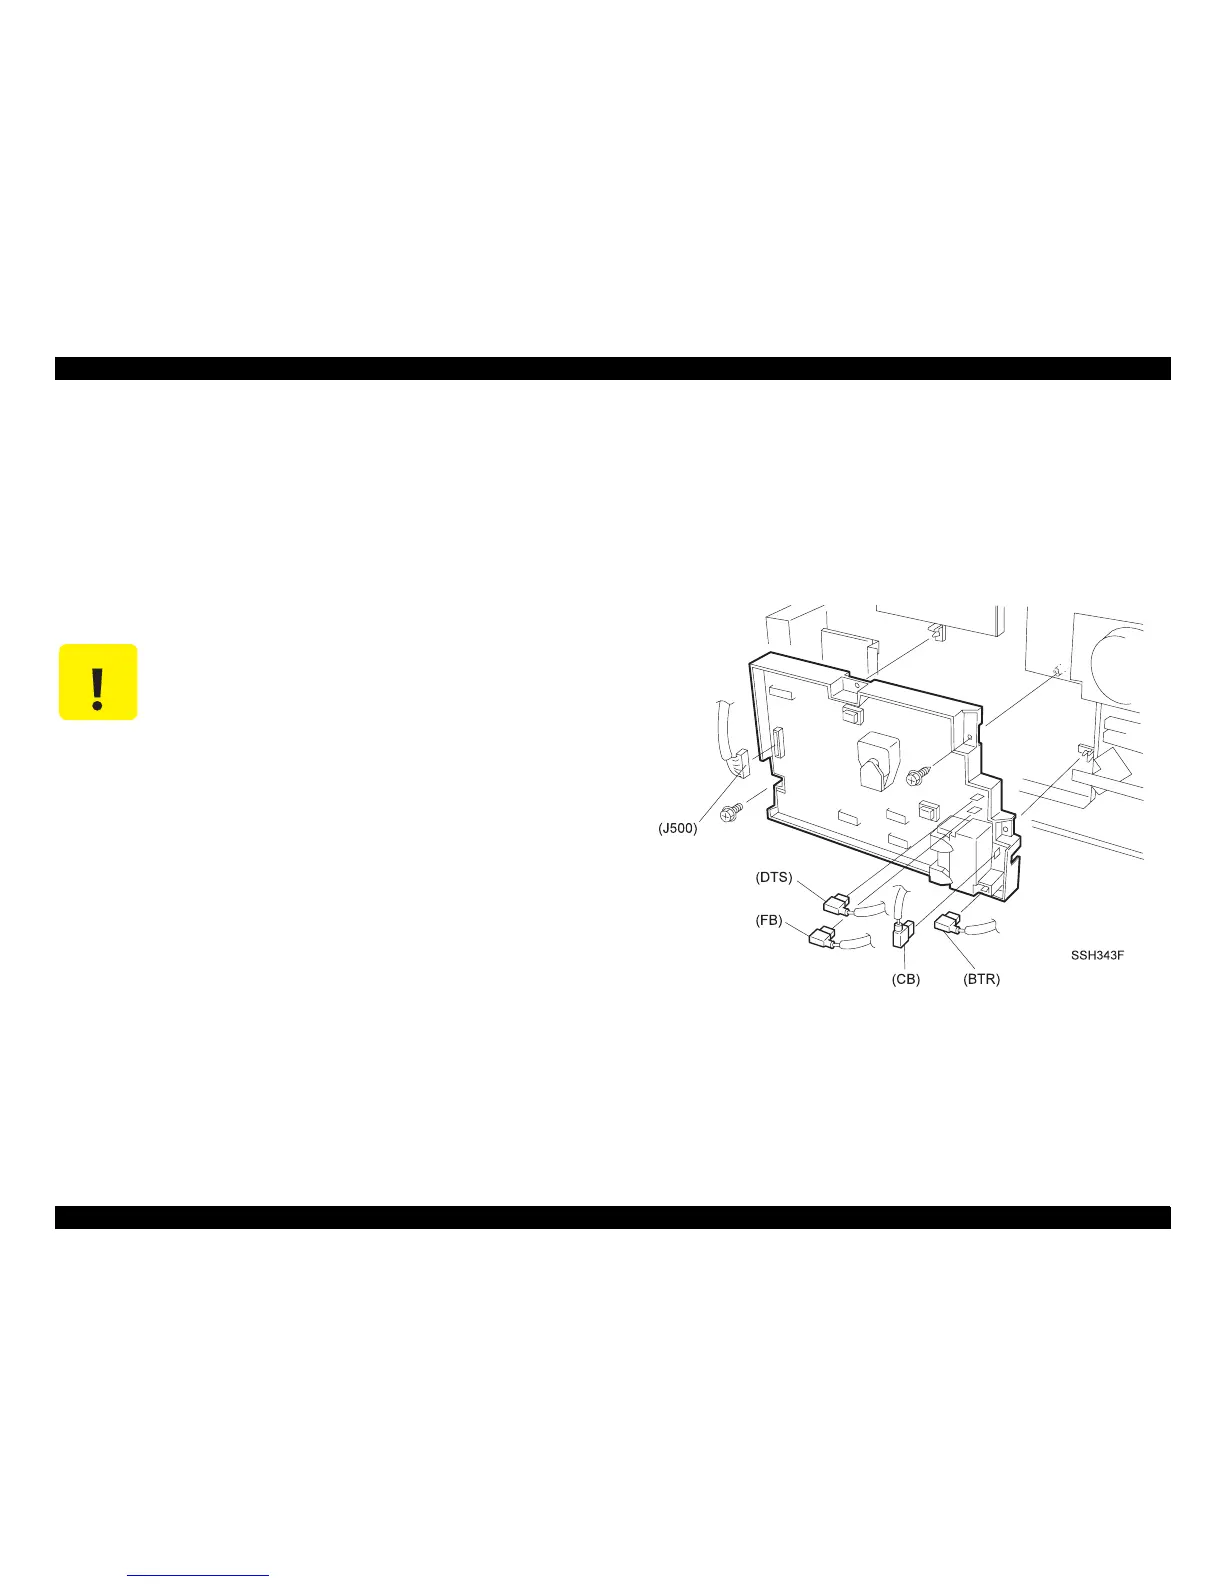
2. Disconnect J500, DTS, FB, CB, and BTR from the HVPS PWB.
3. Remove the two screws, one on the left side and one on the ri
ht
side, that secure the HVPS Assembly to the printer frame.
4. Pull out on the HVPS Assembly while your release the two clips,
one at the top and one on the ri
ht side, that secure the HVPS to the
printer frame.
5. Remove the HVPS Assembly from the frame.
4.2.66.2 Installation
1. Reinstall the HVPS Assembly onto the printer frame.
2. Ali
holes on the HVPS with the two tabs on the
frame. Make sure you do not trap any wire harnesses between the
HVPS Assembly and the printer frame.
3. Push the HVPS a
ainst the frame until the two clips snap into place.
4. Use two screws to secure the HVPS Assembly into place on the
printer frame.
5. Reconnect J500, DTS, FB, CB, and BTR to the HVPS PWB.
6. Reinstall the MCU PWB. (“MCU(Machine Control Unit) PWB” on
pa
e -220)
Figure 4-83. Removal of HVPS
CAUTION
The PWB is easily broken. Use care when removing
the P/Js from the HVPS PWB. Use your fingers to
hold down the PWB while you carefully disconnect
each P/J.