EPSON EPL-N4000/EPL-N4000+ Chapter 4 Disassembly and Assembly
Rev.B 197
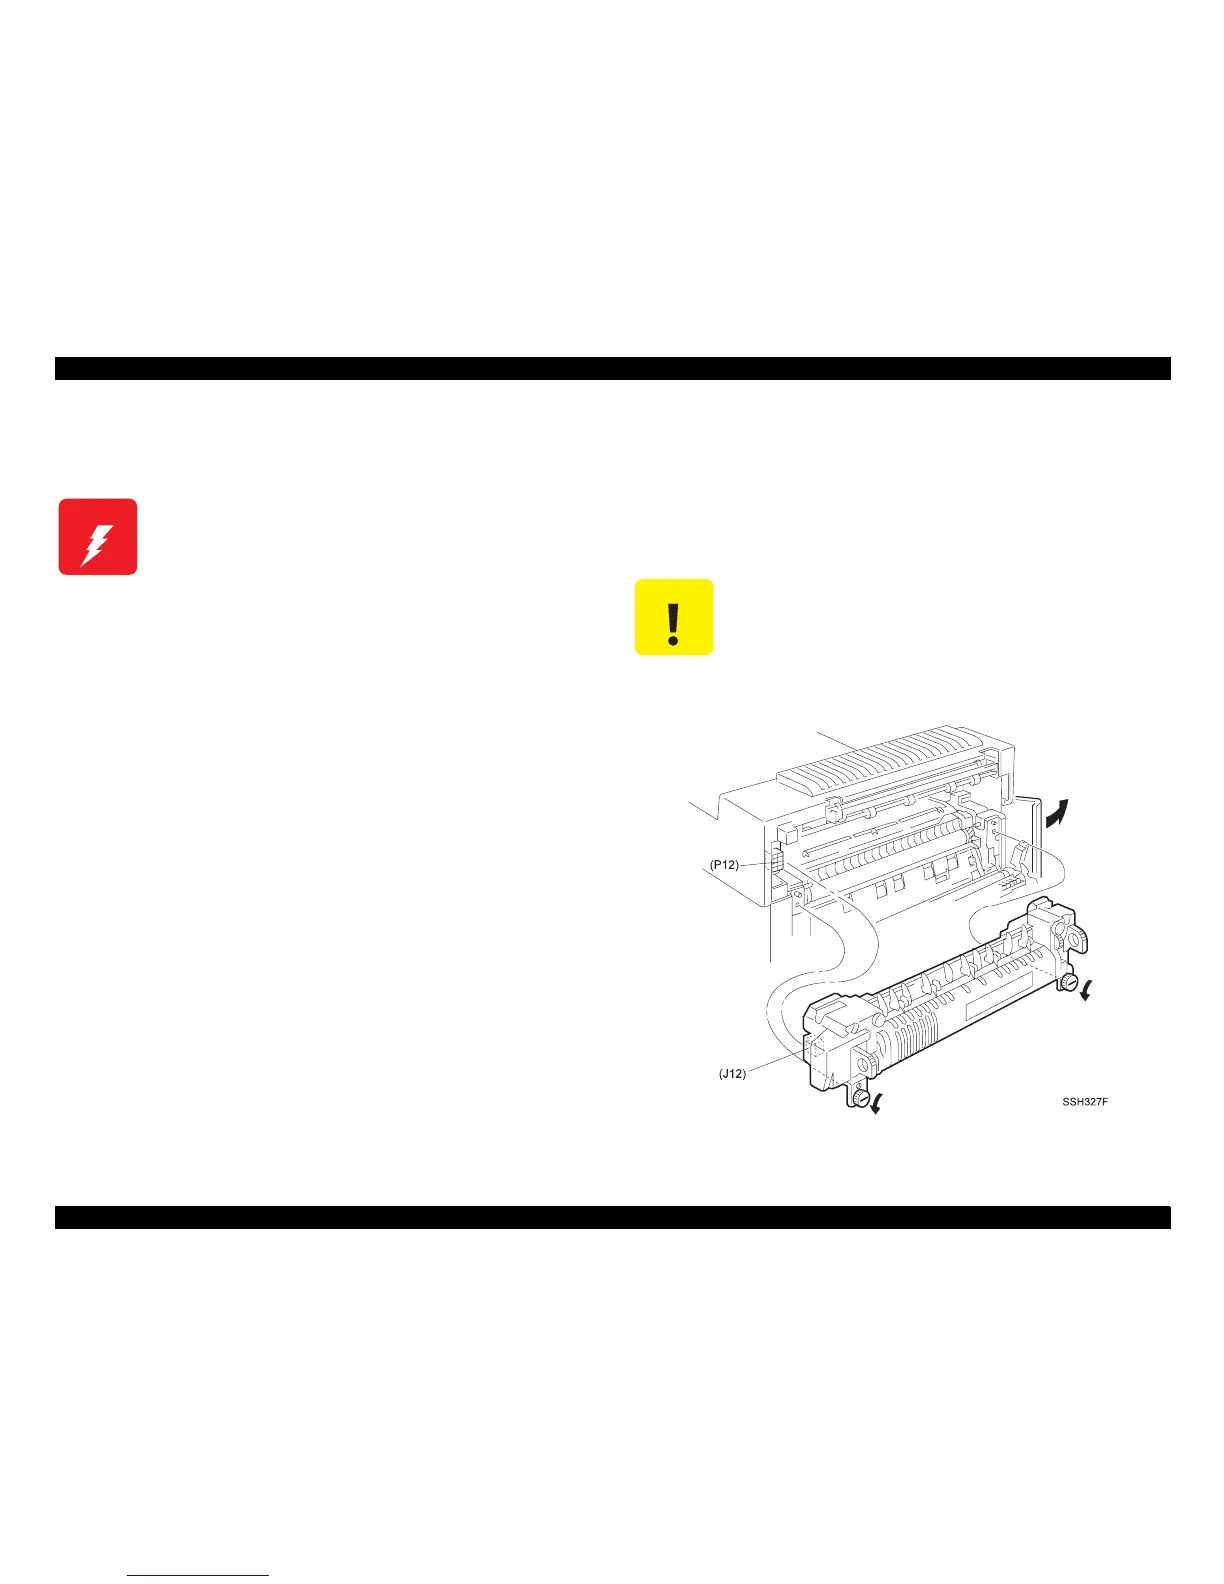
4.2.49 Fuser Assembly
(See “Fuser Assembly” on pa
e -276)
4.2.49.1 Removal
1. Open the Left Upper Cover.
2. Open the Left Front Cover.
3. Pull out the handles that are located on each end of the Fuser
Assembly.
4. Loosen the two thumb screws that secure the Fuser Assembly to
the printer frame.
5. Pull the Fuser out of the printer.
4.2.49.2 Installation
1. Open the Left Upper Cover.
2. Open the Left Front Cover
3. Position the Fuser Assembly with J12 on the left end of the
Assembly ali
ned with P12 mounted on the printer frame.
4. Hold on to the Fuser handles and slide the Fuser Assembly into the
printer frame.
5. Firmly push the Fuser Assembly to make sure J12 is mated
correctly with P12.
6. Ti
hten the two thumb screws to secure the Fuser Assembly to the
printer frame.
7. Close the Left Upper Cover and the Left Front Cover.
Figure 4-64. Removal of Fuser Assembly
W ARNING
The fuser is extremely hot. Switch off printer main
power and wait at least thirty minutes for the Fuser to
cool down before attempting to work on or remove
the Fuser Assembly.
If Fuser is exchanged, be sure to reset the Fuser
Counter. (See “Maintenance Mode” on page -46)