Setup & Operation 4. End Effectors
52 N6 Rev.2
4. End Effectors
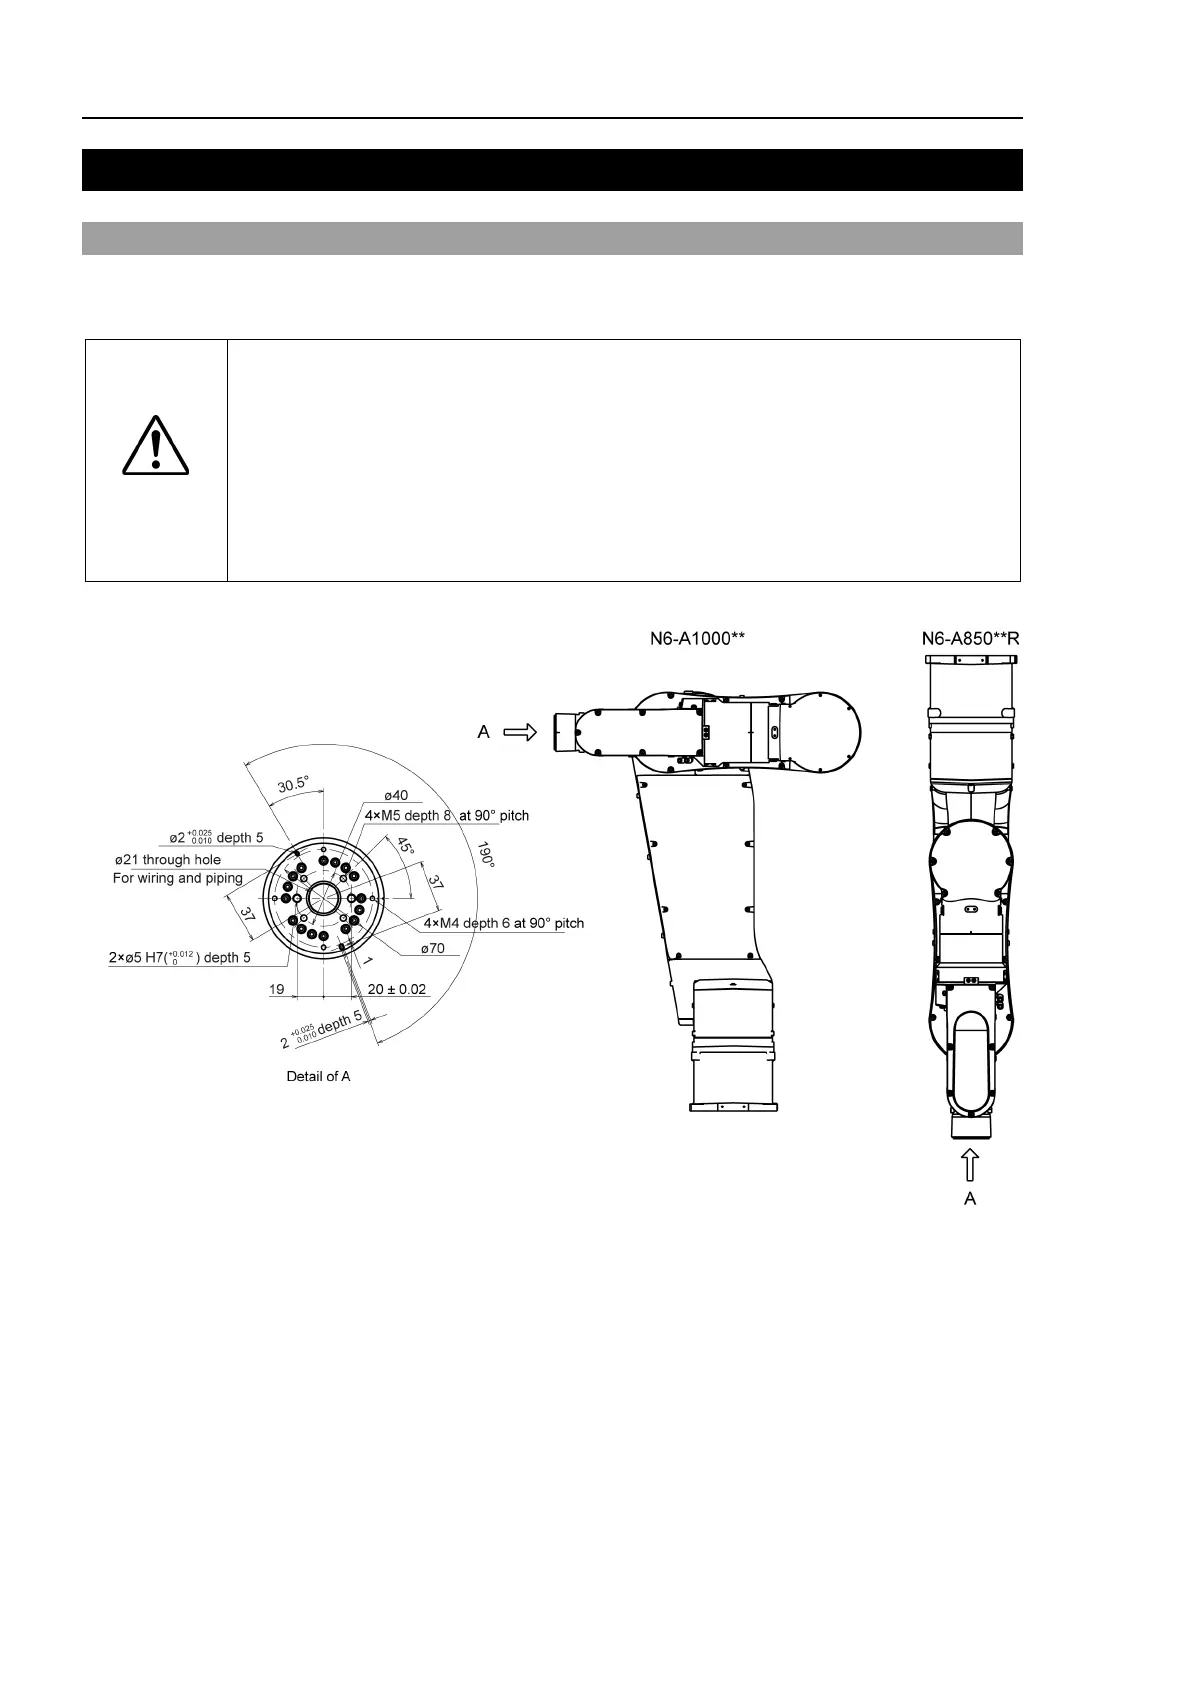
4.1 Attaching an End Effector
Create an end effector for your Manipulator. Flange dimensions of the wrist attached to
the end of Arm #6 is as below.
CAUTION
■
you use an end effector equipped with a gripper or chuck, connect wires and/or
pneumatic tubes properly so that the gripper does not release the work piece
when the power to the robot system is turned OFF. Improper connection of the
wires and/or pneumatic
tubes may damage the robot system and/or work piece
as the work piece is released when the Emergency Stop switch is pressed.
I/O outputs are configured at the factory so that they are automatically shut off (0)
by power disconnection, the Emergency Stop s
witch, or the safety features of the
Details of Wrist Flange
Arm #6
Attach an end effector to the end of the Arm #6 using the M5 bolts.
Screw depth of Arm #6 screw: 8 mm
Layouts
When you operate the Manipulator with an end effector, the end effector may interfere
with the Manipulator body depending on the outer diameter of the end effector, the size of
the work piece, or the position of the arms. When designing your system layout, pay
close attention to the interference area of the end effector.

 Loading...


