Maintenance 6. Battery
N6 Rev.2 327
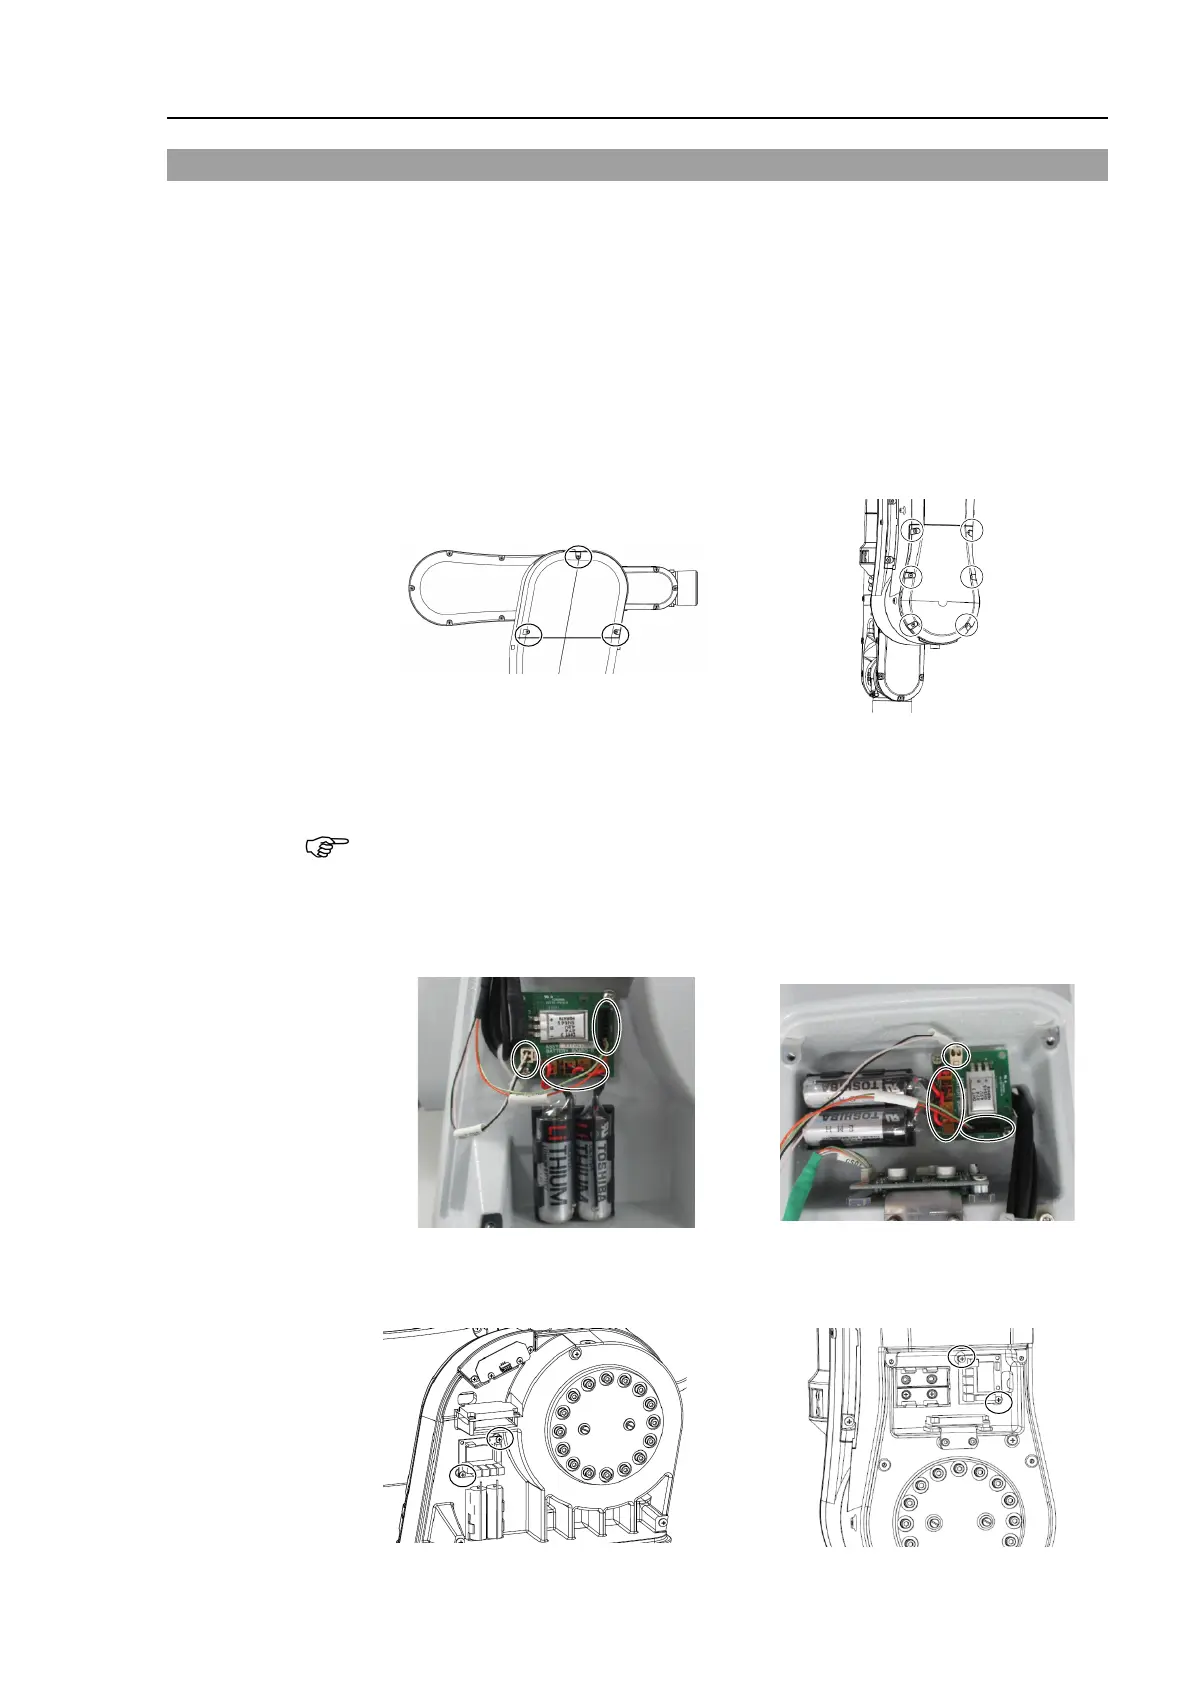
6.2 Replacing the Battery Board
After parts (actuator units, timing belts, etc.) or the battery board have been replaced, the
Manipulator cannot perform positioning properly because a gap exists between the origin
stored in each actuator unit and its corresponding origin stored in the Controller.
After replacing the parts, it is necessary to match these origins.
The process of aligning the two origins is called “Calibration”.
Refer to Maintenance 8. Calibration and follow the steps to perform calibration.
OFF the Controller.
Remove the Joint #2 outside cover.
Cross recessed binding head
machine screws: 3-M4×8
Cross recessed binding head
machine screws: 6-M4×8
Remove the battery connectors.
Hold the board by hand and pull the battery cable upward to remove the connector.
Remove the connectors from the battery board.
Connector: BAT_CN3,
Remove the battery board.
Cross recessed binding head machine screws: 2-M3×6

 Loading...


