Setup & Operation 3. Environment and Installation
N6 Rev.2 41
3.4 Installation
The installation shall be made by qualified installation personnel and should conform to all
national and local codes.
WARNING
■
To ensure safety, a safeguard must be installed for the robot system. For details
on the safeguard, refer to the
Installation and Design Precautions in the Safety
chapter of the EPSON RC+ User’s Guide.
■
Anchor the Manipulator before turning ON the power to or operating the
Manipulator. Turning ON the power to or operating the Manipulator that is not
anchored is extremely hazardous and may result in serious bodily injury and/or
severe equipment damage to the robot system as the Manipulator may fall down.
■
Before installing and operating the Manipulator, make sure that all parts of the
Manipulator are in place and have no external defects. Missing or defective
parts may cause improper operation of the
Manipulator. Improper operation of
the Manipulator is extremely hazardous and may result in serious bodily injury
and/or severe equipment damage to the robot system.
CAUTION
The Manipulator must be installed to avoid interference with buildings,
structures,
utilities, other machines and equipment that may create a trapping hazard or
pinch points.
■
Oscillation (resonance) may occur during operation depending on rigidity of the
If the oscillation occurs, improve rigidity of the table or change
acceleration and deceleration settings.
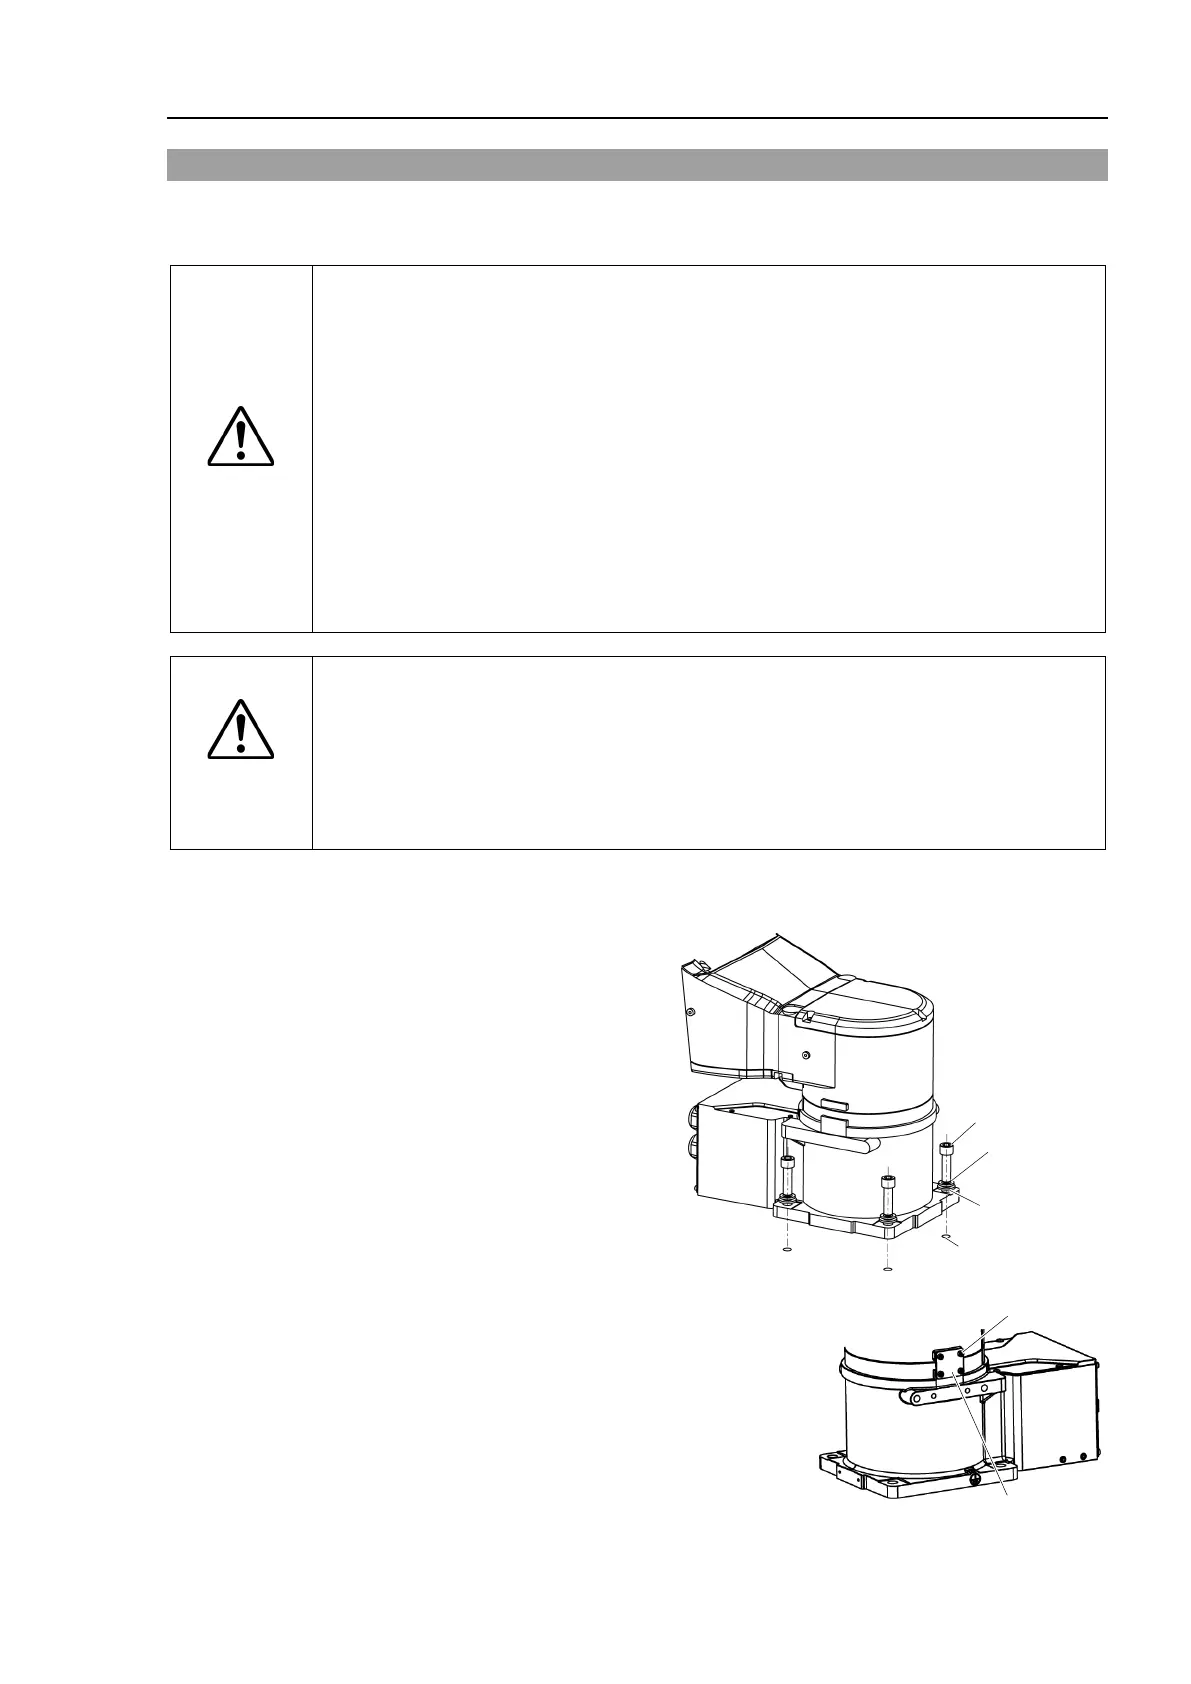
Mounting bolt
For the dimensions, refer to Setup & Operation 3.3 Mounting Dimensions.
There are four threaded holes for the
Manipulator base.
Use M12 mounting bolts
conforming to the strength of
ISO898-1 property class 10.9 or
12.9.
Tightening torque:
100 N·m (1020 kgf·cm)
Screw Hole
(depth 25 mm or more)
After installing the robot, make sure to remove the
fixing jig that fix the base and the Arm #1.
Hexagon socket head screws: 4-M4×8
Fixing jig for transportation

 Loading...


