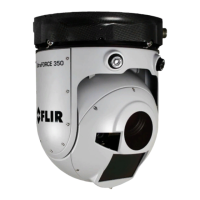
Ranger HRC™ operator´s manual – Hardware installation
Publ. No. TM 614 006 699 Rev B – ENGLISH (EN) – Oct 30. 2008 117
9.3.2 Alignment with camera as reference
If the TV camera has been replaced, the IR camera is used as reference
and vice versa. If both cameras have been replaced and the system is not
equipped with an LRF unit, either the IR camera or the TV camera is used
as reference.
A distant and well dened alignment object is required.
NOTE: Ensure that the crosshair reticle is visible in both cameras. If not, see
section 7.6.1.2.
Alignment with camera as reference
Step Action
1 Press the TV/IR button to select the reference camera.
2 Use the joystick to direct the system towards the alignment object.
3 Use the optical zoom and zoom in maximally, see section 11.2. (Do not use the digital
zoom.)
4 Use the joystick and move the system until the center of the crosshair reticle is at a well
dened point on the alignment object.
NOTE: Once the reference camera is aiming at the alignment object, do not move the
system.
5 Press the TV/IR button to select the other camera.
6 Verify the alignment; if the crosshair reticle is at the same well dened point on the align-
ment object, do not change anything.
7 If the alignment is not correct, adjust the position of the camera according to the camera
adjustment procedures in section 9.3.4. Start with the azimuth adjustment. When the ele-
vation adjustment is completed, the azimuth alignment must be veried again and adjusted
if needed.
NOTE: Do not adjust the position of the reference camera.
 Loading...