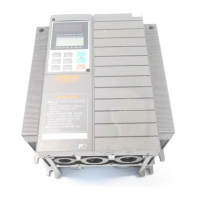
11.9 Power Regenerative PWM Converters, RHC Series
11-41
SELECTING PERIPHERAL EQUIPMENT
Chap 11
■ Basic connection diagrams
RHC7.5-2C to RHC90-2C (Applicable inverters: Three-phase 200 V
class series, 7.5 to 90 kW)
RHC7.5-4C to RHC220-4C (Applicable inverters: Three-
V class series, 7.5 to 220 kW)
*When a charging box is used
For the 400 V class power supply, connect a stepdown
voltage of the sequence circuit to 220 V or below.
Be sure to connect the auxiliary power input terminals R0 and T0 of the PWM
converter to the main power input lines via B (NC) contacts of magnetic
contactors of the charging circuit (73 or MC).
If 73 uses SC-05, SC-4-0, or SC-5-1, connect an auxiliary contact unit to the
MC’s B contact or 73.
Be sure to connect the auxiliary power input terminals R0 and T0 of the
inverter to the main power input lines via B (NC) contacts of magnetic
contactors of the charging circuit (73 or MC). For 200 V class series of
inverters with a capacity of 37 kW or above and 400 V class series with a
capacity of 75 kW or above, connect the fan pow
er input terminals R1 and T1
of the inverter to the main power input lines without going through the MC’
Construct a sequence in which a run command is given to the inverter after
the PWM converter becomes ready to run.
Assign the external alarm THR to any of terminals [X1] to [X5
RHC7.5-2C to RHC90-2C (Applicable inverters: Three-phase 200 V
class series, 7.5 to 90 kW)
RHC7.5-4C to RHC220-4C (Applicable inverters: Three-
V class series, 7.5 to 220 kW)
For the 400 V class power supply, connect a
stepdown transformer to limit the
voltage of the sequence circuit to 220 V or below.
Be sure to connect the auxiliary power input terminals R0 and T0 of the PWM
converter to the main power input lines via B (NC) contacts of magnetic
contactors of the charging circuit (73 or MC).
If 73 uses SC-05, SC-4-0, or SC-5-1, connect an auxiliary contact unit to the
MC’s B contact or 73.
Be sure to connect the auxiliary power input terminals R0 and T0 of the
inverter to the main power input lines via B (NC) contacts of magnetic
contactors of the charging circuit (73 or MC). For 200 V class series of
inverters with a capacity of 37 kW or above and 400 V class series with a
capacity of
75 kW or above, connect the fan power input terminals R1 and T1
of the inverter to the main power input lines without going through the MC’
Construct a sequence in which a run command is given to the inverter after
the PWM converter becomes ready to run.
Assign the external alarm THR to any of terminals [X1] to [X5
RHC280-4C to RHC400-4C (Applicable inverters: Three-phase 400
Connect a stepdown transformer to limit the voltage of the sequence circuit to
Be sure to connect the auxiliary power input terminals R0 and T0 of the PWM
converter and the inverter to the main power input lines via B (NC)
magnetic contactors of the power supply circuit (52).
Connect the fan power input terminals R1 and T1 of the inverter to the main
power input lines without going through the B (NC) contacts of 52, since the
inverter’s AC fans are supplied with power from these terminals.
Construct a sequence in which a run command is given to the inverter after
the PWM converter becomes ready to run.
Assign the external alarm THR to any of terminals [X1] to [X5
RHC400-4C in VT mode (Applicable inverters: Three-phase 400 V,
RHC500-4C and RHC630-4C (Applicable inverters: Three-
Connect a stepdown transformer to limit the voltage of the sequence circuit to
Be sure to connect the auxiliary power input terminals R0 and T0 of the PWM
converter and the inverter to the main power input lines via B (NC)
magnetic contactors of the power supply circuit (52).
Connect the fan power input terminals R1 and T1 of the inverter to the main
power input lines without going through the B (NC)
contacts of 73 or 52, since
the inverter’s AC fans are supplied with power from these terminals.
Construct a sequence in which a run command is given to the inverter after
the PWM converter becomes ready to run.
Assign the external alarm THR to any of terminals [X1] to [X5
Wiring for terminals L1/R, L2/S, L3/T, R2, T2, R1, S1, and T1 should match
Magnetic contactor for
charging circuit
Magnetic contactor for
charging circuit
Magnetic contactor for
charging circuit
Magnetic contactor for
power supply
Magnetic contactor for
filtering circuit
Magnetic contactor for
charging circuit
Magnetic contactor for
power supply
Magnetic contactor for
filtering circuit

 Loading...