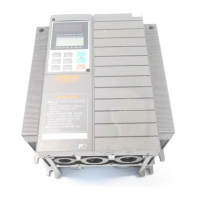
2.1 Installation
2-1
INSTALLATION AND WIRING
Chap 2
2.1 Installation
(1) Installation Environment
Please install FRENIC-Ace in locations which meet the conditions specified in Chapter 1 “1.3.1 Usage
environment”.
(2) Installation Surface
Please install the inverter on non-combustible matter such as metals. Also, do not mount it upside down or
horizontally.
Install on non-combustible matter such as metals.
Risk of fire exists
(3) Surrounding Space
Secure the space shown in
Figure 2.1-1 and Table 2.1-1.
in cabinets, be sure to provide adequate
v
entilation to the cabinet, as the surrounding temperature may rise.
it in small enclosures with low heat dissipation capacity.
Installation of Multiple Inverters
When installing 2 or more units in the same equipment or cabinet,
generally mount
to the side of each other, not above each other.
When the inverters are mounted above each other, attach partitioning
boards to prevent that the heat dissipated from the
lower inverter affects
the upper inverter.
types FRN0072E2-4, FRN0115E2-2, FRN0011E2-7
and for ambient temperature below 40°C
only, the units can be
installed
side by side without any spacing between them. (30°
C or lower
for ND and HD)
Table 2.1-1 Surrounding Space mm (inch)
200 V class: FRN0001 to 0115E2
200 V class: FRN0001 to 0011E2-7
400 V class: FRN0002 to 0072E2-4
10
(0.39)
100
(3.9)
0
*1
400 V class: FRN0085 to 0590E2-4
50
1 A clearance of 50 mm is required to use RJ45 connector.
C: Space in front of the inverter unit
Installation with External Cooling
The external cooling installation reduces the generated heat inside the
panel by dissipating approximately 70% of the total heat generated (total
heat loss) by mounting the cooling fins protruding outside the equipment
or cabinet.
Installation with external cooling is possible for
115E2■-2 and FRN0022 to 0072E2■-4 by adding
attachments
(optional) for external cooling,
and for types FRN0085E2■-4
mounting bases.
Figure 2.1-2 Installation with External
Cooling
(Please refer to Chapter 11 Item 11.15 for the external dimensions
drawing of the external cooling attachment (option
Prevent lint, wastepaper, wood shavings, dust, metal scrap, and
other foreign material from entering the inverter or from attaching to
the cooling fins.
Risk of fire and risk of accidents exist
Figure 2.1-1 Installation Direction

 Loading...