FC2250-UM-251-9370 8-28
8. ELECTRICAL ADJUSTMENTS
8.17 Testing the Control Panel Keys and Home Sensors
Run this test if a control panel key or home sensor has malfunctioned.
(1) Set the SW1 DIP switch as shown below and then turn on the plotter.
Set bits 1, 2, and 8 to OFF
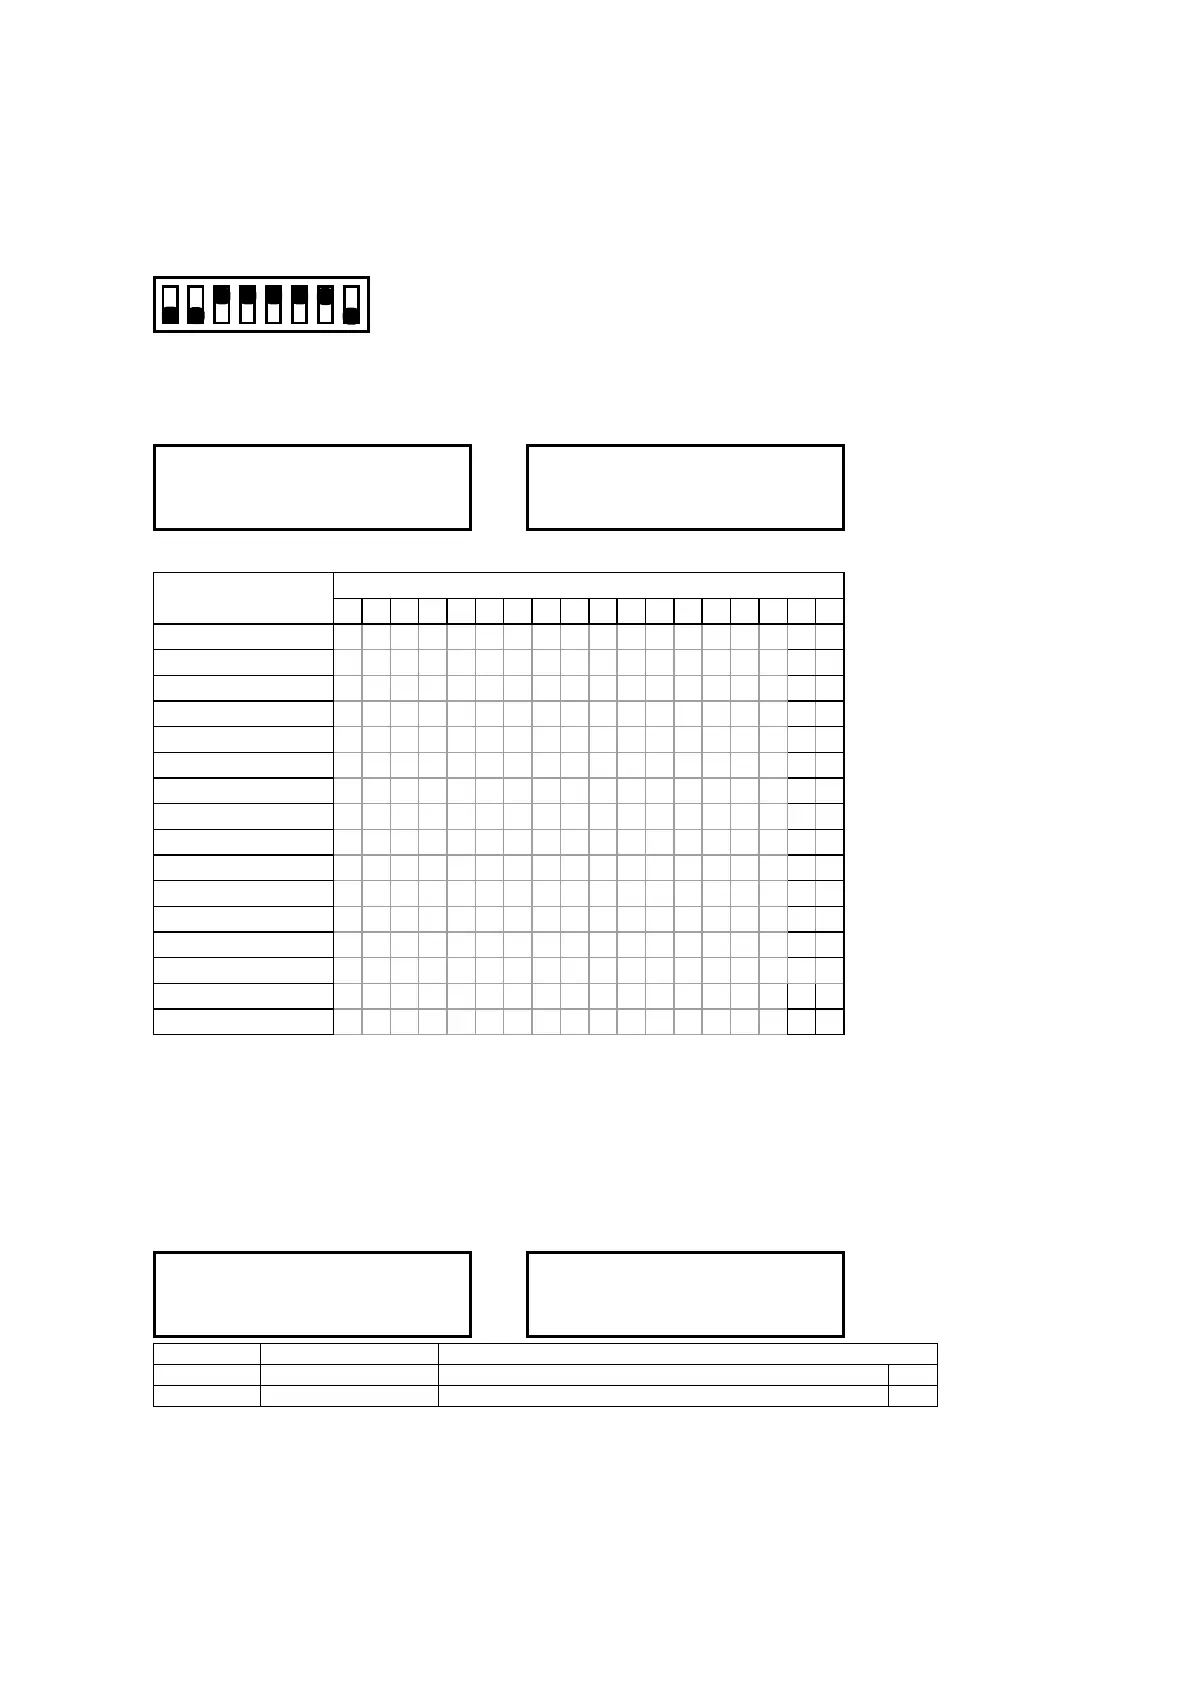
12345678
ON
OFF
(2) The menu below appears, so press the panel key corresponding to each character and check that its
character properly display to the upper section.
OPCERLUD00TN4321XY
--->
P
O CERLUD00TN4321XY
Press each key on the control panel; the below characters will move to upper section.
Key
Status of LCD
18 17 16 15 14 13 12 11 10 9 8 7 6 5 4 3 2 1
RIGHT ARROW R
DOWN ARROW D
UP ARROW U
LEFT ARROW L
F1 1
F2 2
F3 3
F4 4
NEXT N
TEST T
ENTER E
CONDITIONS C
COPY P
ORIGIN O
X home sensor X
Y home sensor Y
Normal status : All characters are shown in the lower section.
Key Test
While the key is pressed : corresponding character is moved to upper section.
The PAUSE key can be checked by observing its lamp.
Sensor Test
The status of each sensor is displayed on the LCD panel.
OPCERLUD00TN4321XY
--->
X
OPCERLUD00TN4321 Y
Display Sensor name Operation when the High/Low level changes
2nd bit X home sensor When the dog blocks the sensor X
1st bit Y home sensor Same as the above Y
If a sensor is not operating properly, check its wiring, its connector contact, and the position of the sensor
dog. If everything checks out all right, either the sensor or main board may be defective.
In this case, initialize the NOV-RAM and then run the sensor test again.
As a temporary measure for dealing with a defective sensor, turn off the plotter, set Bit 6 of the DIP
switch to OFF, and then turn the plotter back on.