connecting housing (4WD)
connecting housing
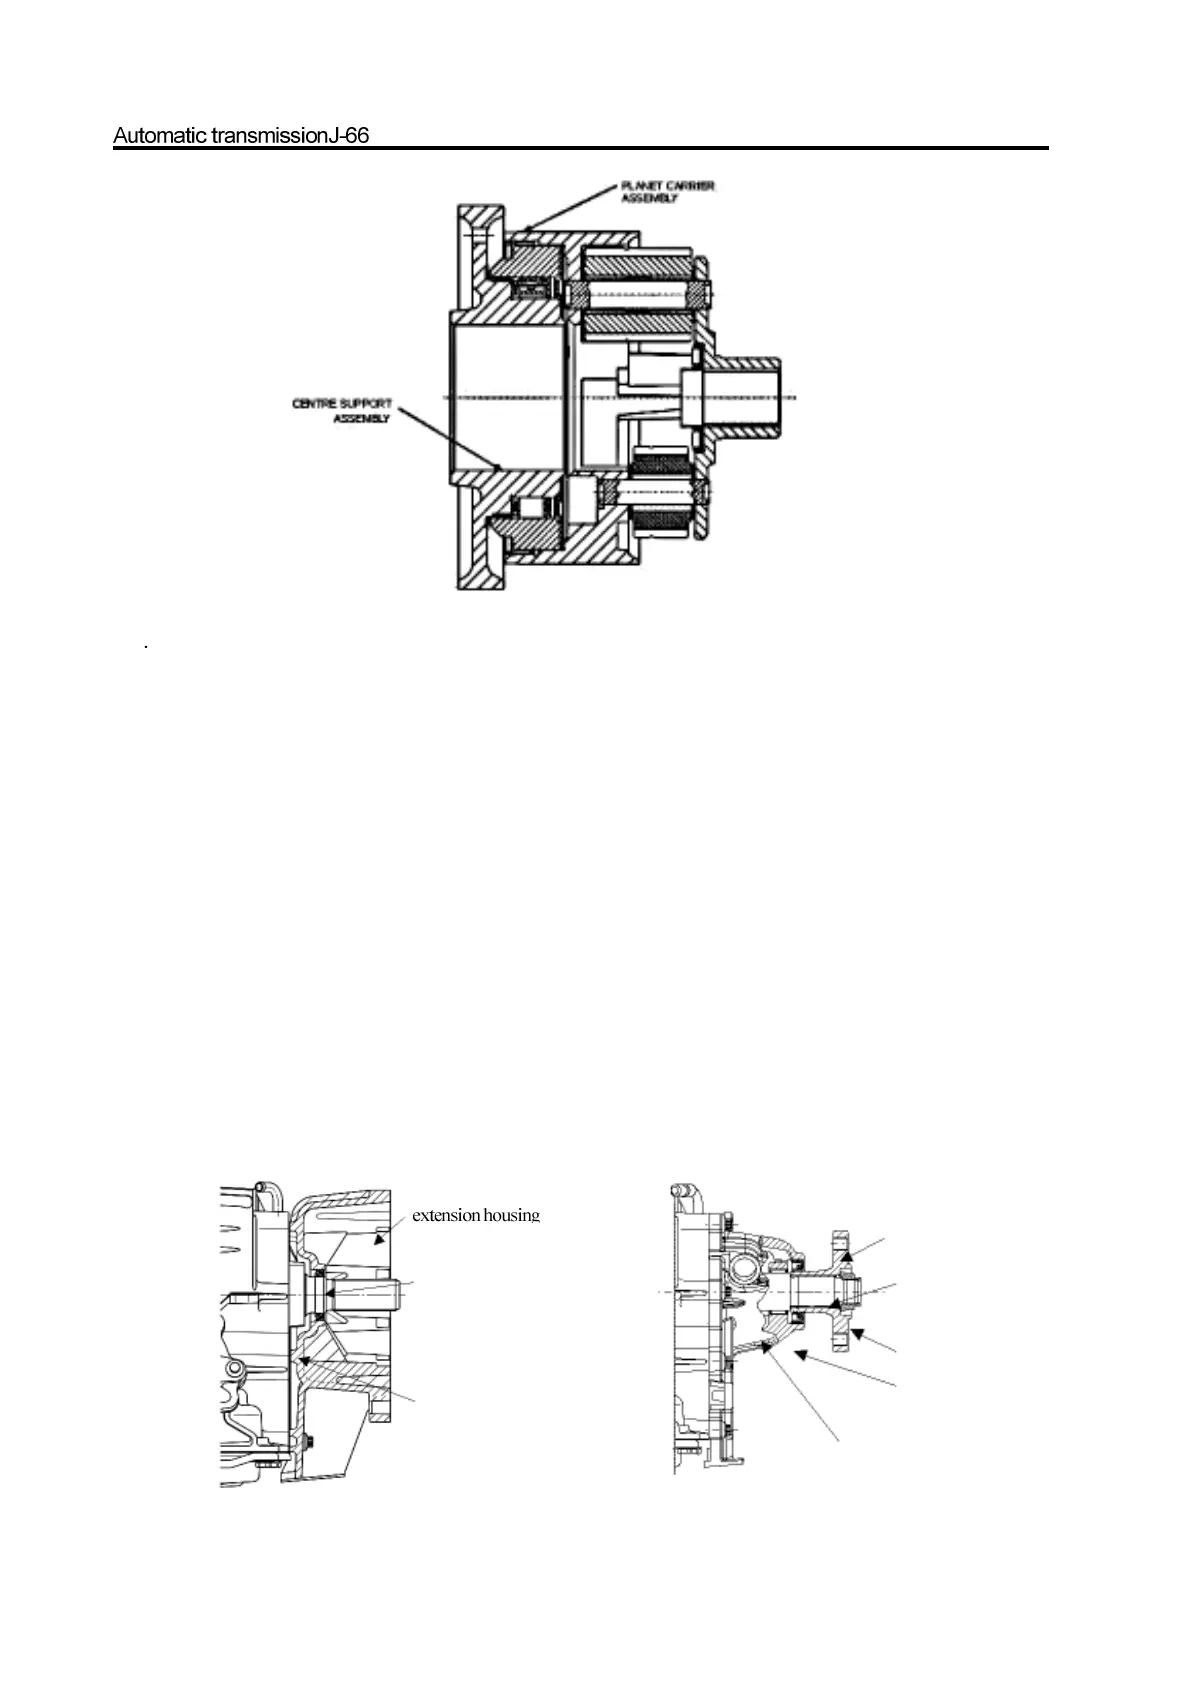
Figure 8.20 planet carrier assembly and central support
e Check whether the socket has the proper central support, then install the central support on the one-way clutch, ensure the
support can rotate in anticlockwise. Refer to Figure 8.20
f. Use the Vaseline to lubricate the NO.9 needle thrust bearing and thrust washer, and install it on the rear of planet carrier. Refer
to Figure 8.19
g. Install the planet assembly and central support on the box and align the central support installation bolt hole.
h. Install and tighten the central support bolt.
i. Install the ring spring fixing plate; ensure the ring spring is installed in the box correctly.
j. Remove the central support bolt and provide the Loctite243 or similar material for screw; install and tighten the bolt to
specified standard.
6.Ttransmission rear housing assembly
The installation procedure of transmission rear housing assembly is shown as follows:
a. Check the condition of transmission rear housing roller bearing (2WD and Chairman mode), replace it if necessary (rear drive
mode). Install the new bearing form the end of transmission rear housing; only can press the bearing side with mark.
b. Install the new sealing material on the transmission rear housing or adaptor rear housing. Refer to Figure 8.21.
Figure 8.21 Connecting and extension housing
output shaft
o-ring
locking nut
oil seal
needle bearing
oil seal
gasket