Disassembly of reducer
Remarks: If the noise of differential is loud, process the follow-
ing inspection before disassembles the differential to determine
its reason. When the differential has serious problems, it can be
disassembled for repair if necessary.
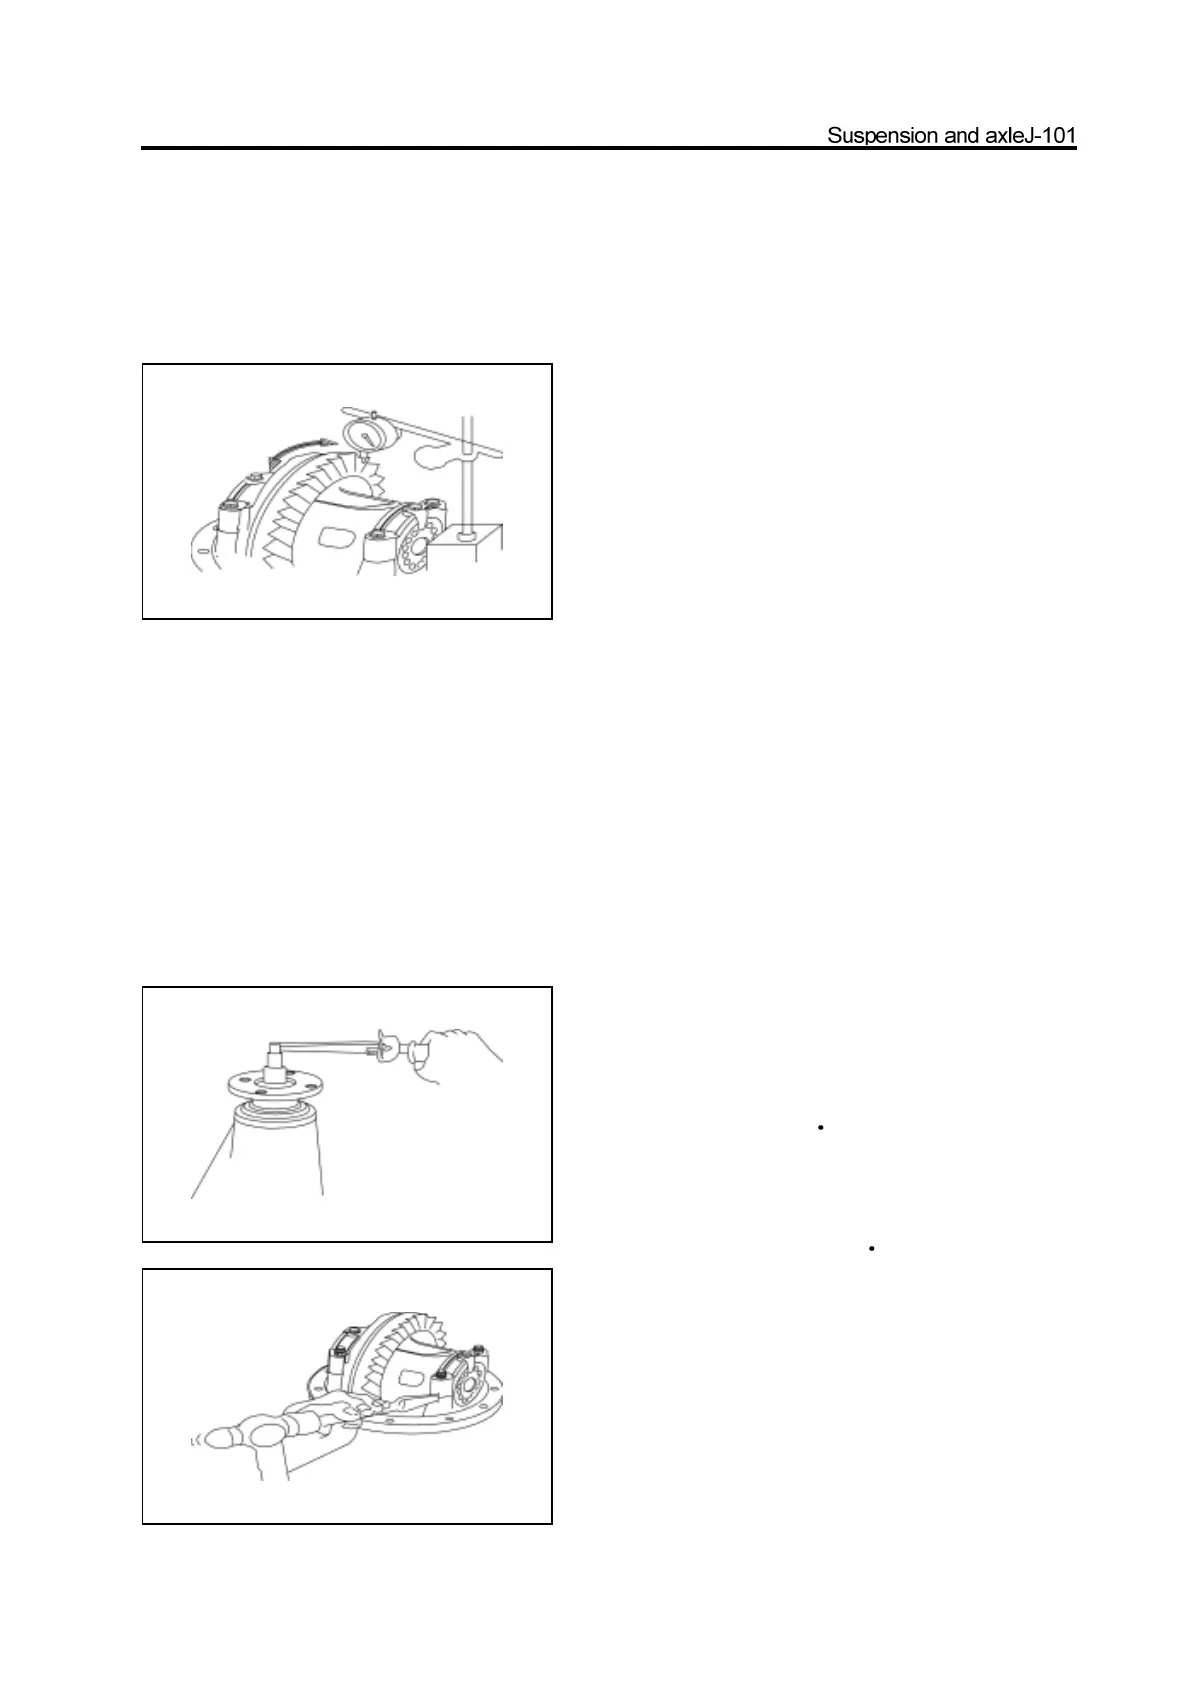
1. Check the internal clearance of driven bevel gear.
If the clearance is beyond the specified range; adjust the preapplied
load of bearing or repair if necessary.
(Refer to step 13 “Assembly of Reducer”)
Standard internal clearance: 0.15-0.25mm
2. Check the intertooth contact of drive bevel gear
and driven bevel gear.
(Refer to Step 14 in “Assembly of Reducer”)
Record the contact position of tooth.
3. Check the clearance between the thrust plate of
axle shaft gear and differential housing.
Use the feeler to measure the clearance between the thrust plate
of axle shaft gear and differential housing.
Standard clearance: 0.45-0.75mm
It should be replaced by the proper thrust washer if the clearance
is beyond the specified range.
(Refer to Step 2 in “Replacement of Differential Components”)
4. Measure the pre-applied load of drive bevel gear
Use the torsion meter to measure the pre-applied load on the
internal clearance between the drive small gear and driven bevel
gear.
Pre-applied load: 0.4-0.6N m
5. Total pre-applied load
Use the torsion meter to measure the total pre-applied load.
Pre-applied load : 0.9-1.3N
m
6. Remove the differential and driven bevel gear
a. Make the assembly mark on the differential bearing gland and
reducer housing.
b.Remove two stop plates.
c.Remove two bearing glands and two adjusting rings.
d.Remove the bearing outer race.
e.Remove the differential form the reducer housing.