Figure 8.56 The tighten sequence of valve bolt from upper to lower
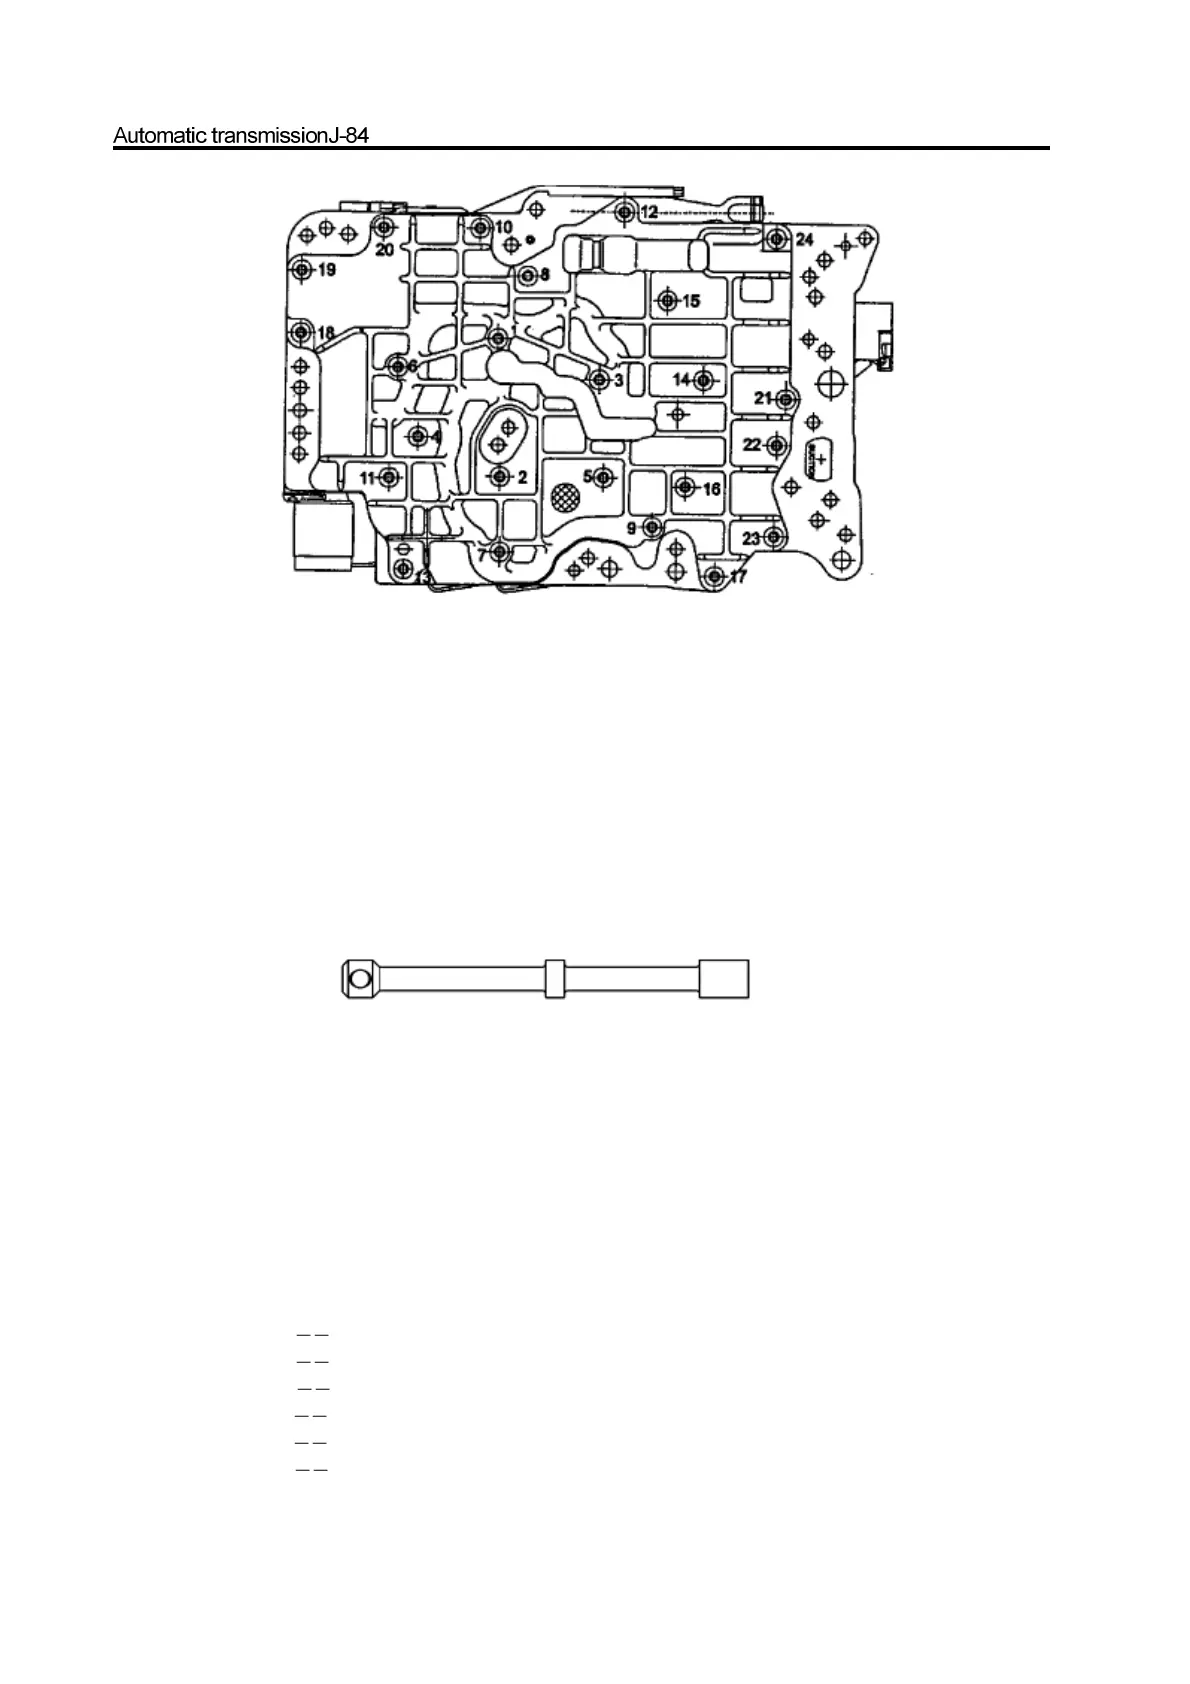
q. Install the solenoid valve 1, 2, 3, 4 and 6. Ensure the solenoid valve is clamped by the clip tightly and the bolt is tightened to
the specified torque.
Caution:
The wire harness ground wire port is protected by the solenoid valve fixing plate
r. Install the solenoid valve 5. Ensure the solenoid valve close to valve through the clip.
s. When install the valve with line pressure relief valve, it should install the tapering port of line pressure relief valve, then install
and fix the spring and disc.
t. Install the pin spring; ensure the screw is tightened to the specified torque. Check the damaged spring.
u. Install the manual gear shift valve .Refer to Figure 8.57.
Figure 8.57 Manual gear shift valve
v. It should ensure the position lever is in the position of manual 1
st
-Gear before install the valve on the transmission.
w. Adjust the valve on the transfer case and install the connection of manual-operated valve steering column and manual-operated
valve. Make the long end of connecting object is proper for the 1
st
manual-operated valve. Install the protecting spring and
tighten it according to the specification. Refer to Figure 8.58.
x. Check the positioning drum and manual-operated valve .
Caution:
All hardware must be installed and meet the specification.
y. Connect the wire of connecting solenoid according to the following details:
Solenoid valve 1
red
Solenoid valve 2
blue
Solenoid valve 3
yellow
Solenoid valve 4
orange
Solenoid valve 5
green
Solenoid valve 6
purple
Refer to Figure 8.58.