125
_____________________________________________________________________________________________
7.14 START Protection Function
______________________________________________________________________________________________
0:
Not set
1:
Set (Initial setting)
NOTE
If the START protection function is used for tests that are to be performed
successively, such as tests in auto-test mode or program tests, the unit does not
proceed to the next test until completion of discharge, as the discharging function
is enabled upon termination of each test (in the meantime, no key operation is
accepted).
Note that if "
0
: No set" is selected, even when the unit is in READY state upon
completion of the test, residual electricity may remain between the output
terminals.
7.14 START Protection Function
This is a function for preventing the unit from starting the next test during
discharge time upon completion of each withstand-voltage or insulation-
resistance test.
Discharge function
This is a function for discharging electricity from the test object upon
completion of each withstand-voltage or insulation-resistance test (discharge
resistance: 726 kΩ). During the discharge time, the
DANGER
lamp is lit,
even when the test has been terminated. The
DANGER
lamp goes off when
the measured voltage drops below approximately 0.03 kV in the case of AC
withstand-voltage tests, and below approximately 60 V in the case of DC
withstand-voltage and insulation-resistance tests. The larger the capacity
component of the test object, the more time is required to discharge the test
object.
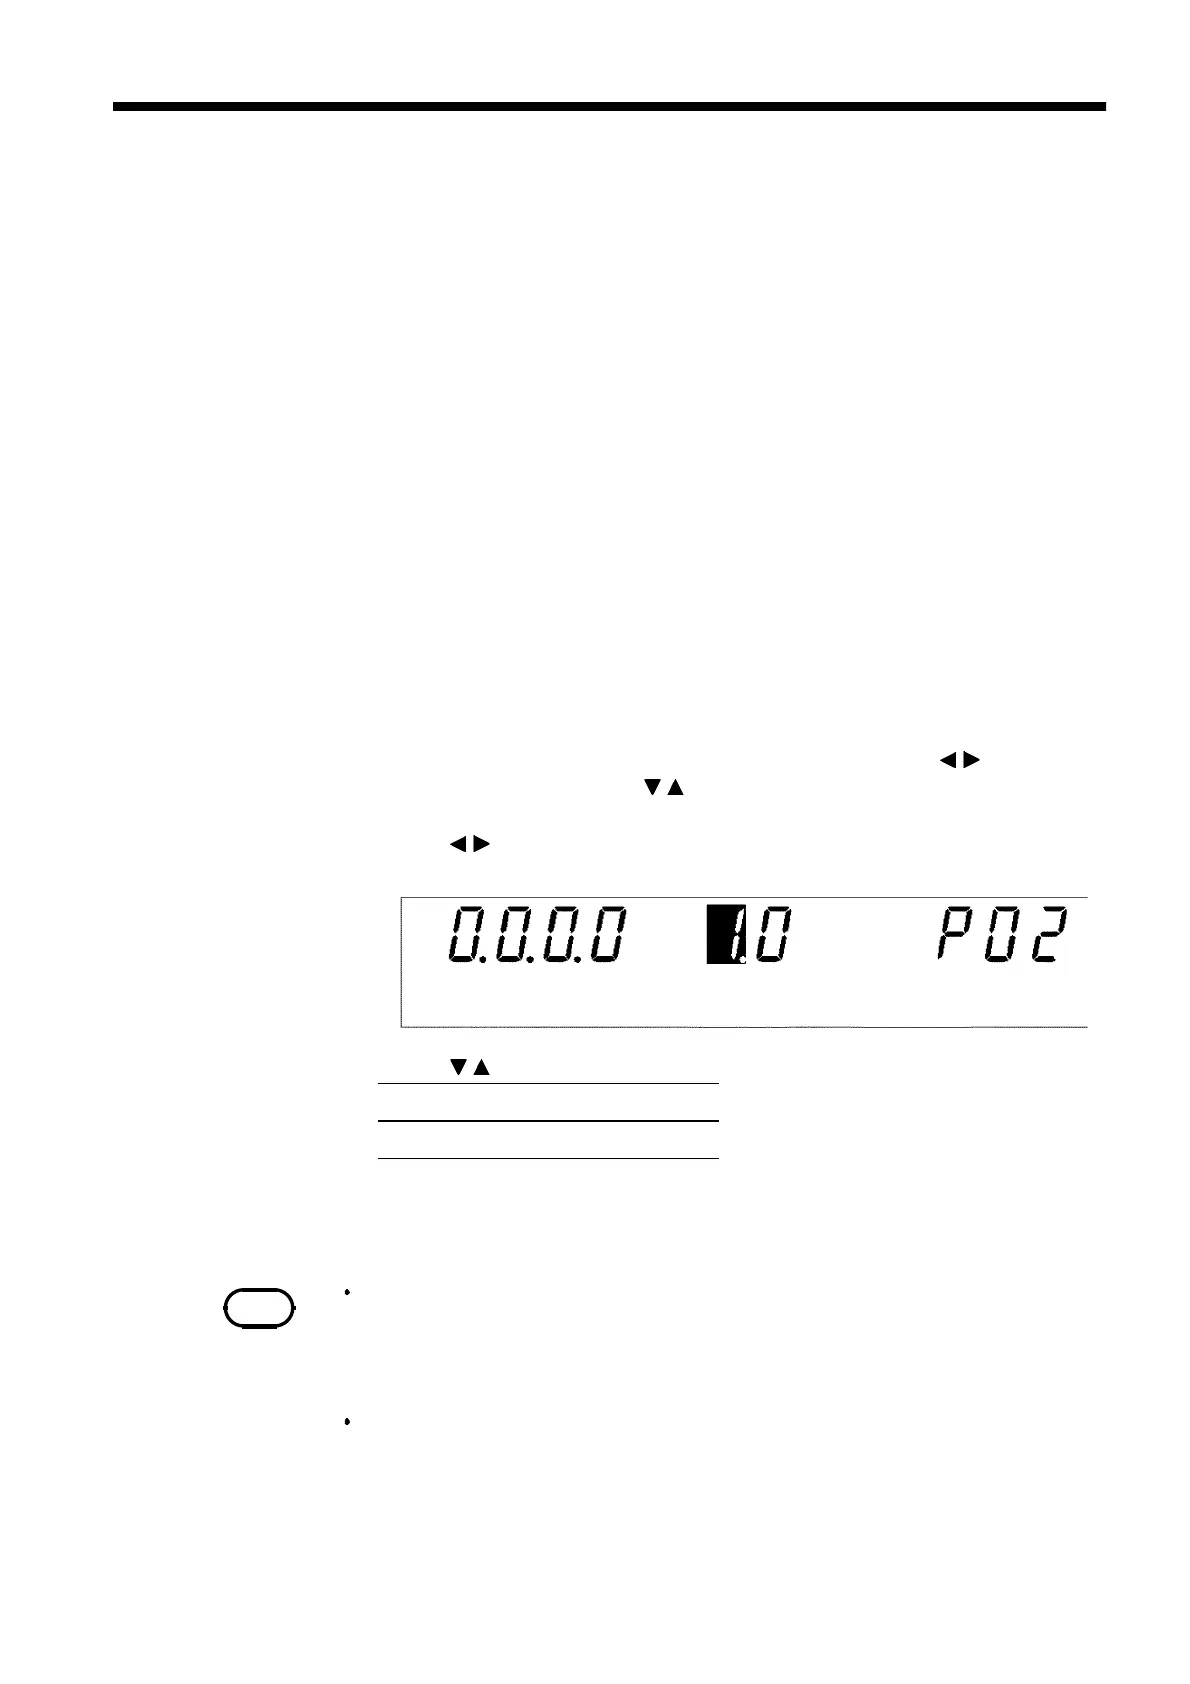
1. Press
SHIFT
+
STOP
keys while in READY state to display the Optional
function setting screen.
2. Move the flashing cursor to the position of
P01
using the
/
keys, and
display
P02
(p. 2) using the
/
keys.
3. Use the
/
keys to move the flashing cursor to the position shown in the
figure.
4. Use the
/
keys to set a value at the flashing cursor location.
5. To complete the optional settings, press
SHIFT
+
STOP
keys. The unit
reverts to the READY state.