Reuse the mounting bracket screws to fasten the 21-inch mounting bracket to the
module.
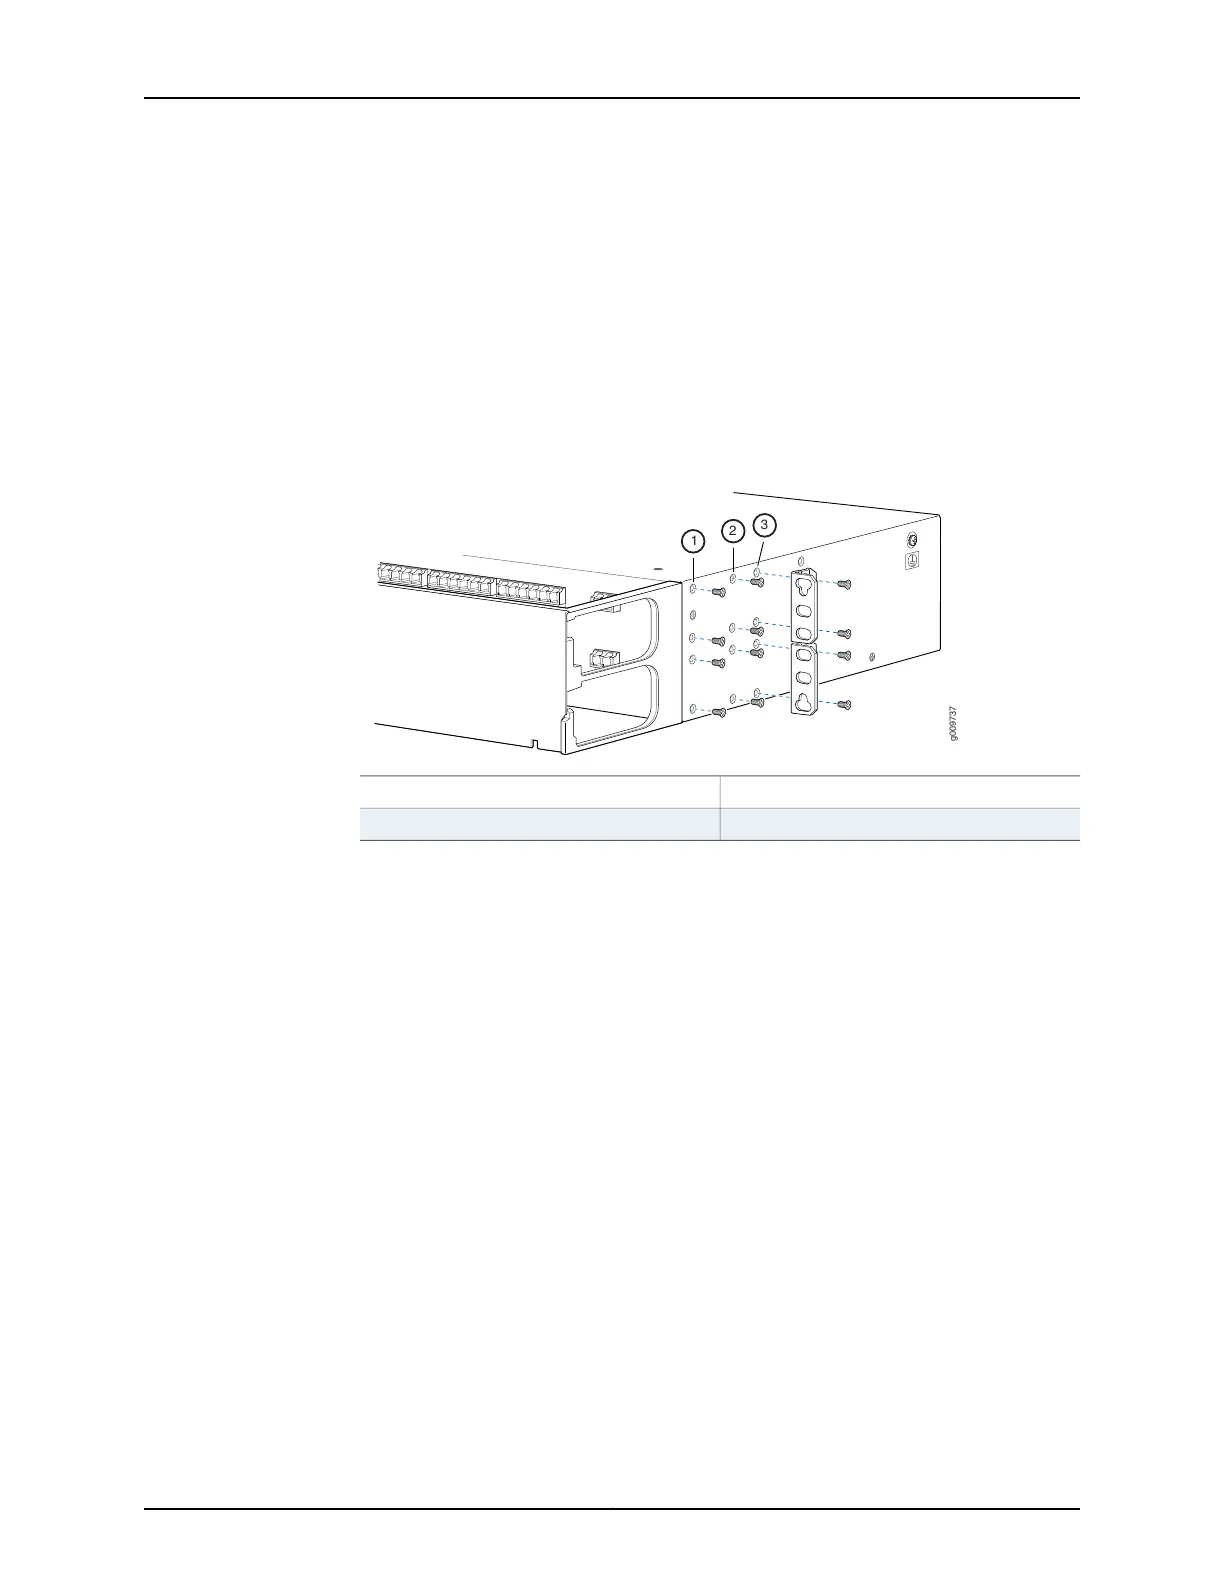
c. To install the 19-inch brackets (Figure 49 on page 148):
Remove the 23-inch mounting brackets if installed. Choose the mounting position
that enables the module to be installed flush with adjacent equipment.
Reuse the mounting bracket screws to fasten the 19-inch mounting bracket to the
module.
Figure 49: 19-inch Bracket Mounting Positions
3—1— Mounting positionMounting position
2—Mounting position
2. Mount the module on the frame or the rack.
a. With one person at each side of the module, lift the module into position in the
equipment frame.
b. Align the mounting holes in the mounting bracket with the mounting holes in the
equipment frame.
c. Choose the set of mounting screws from the installation kit to mount the shelf into
the equipment frame. Use one mounting screw and washer for each mounting
bracket attachment. No locking nuts are required as the mounting screws fasten
into the threaded screw inserts on the frame.
3. Ground the module.
Copyright © 2019, Juniper Networks, Inc.148
BTI7800 Series Hardware Overview and Installation Guide

 Loading...


