V Series Operating Instructions 4 - 17
Mechanical Functions V Hub
4.5 V Hub
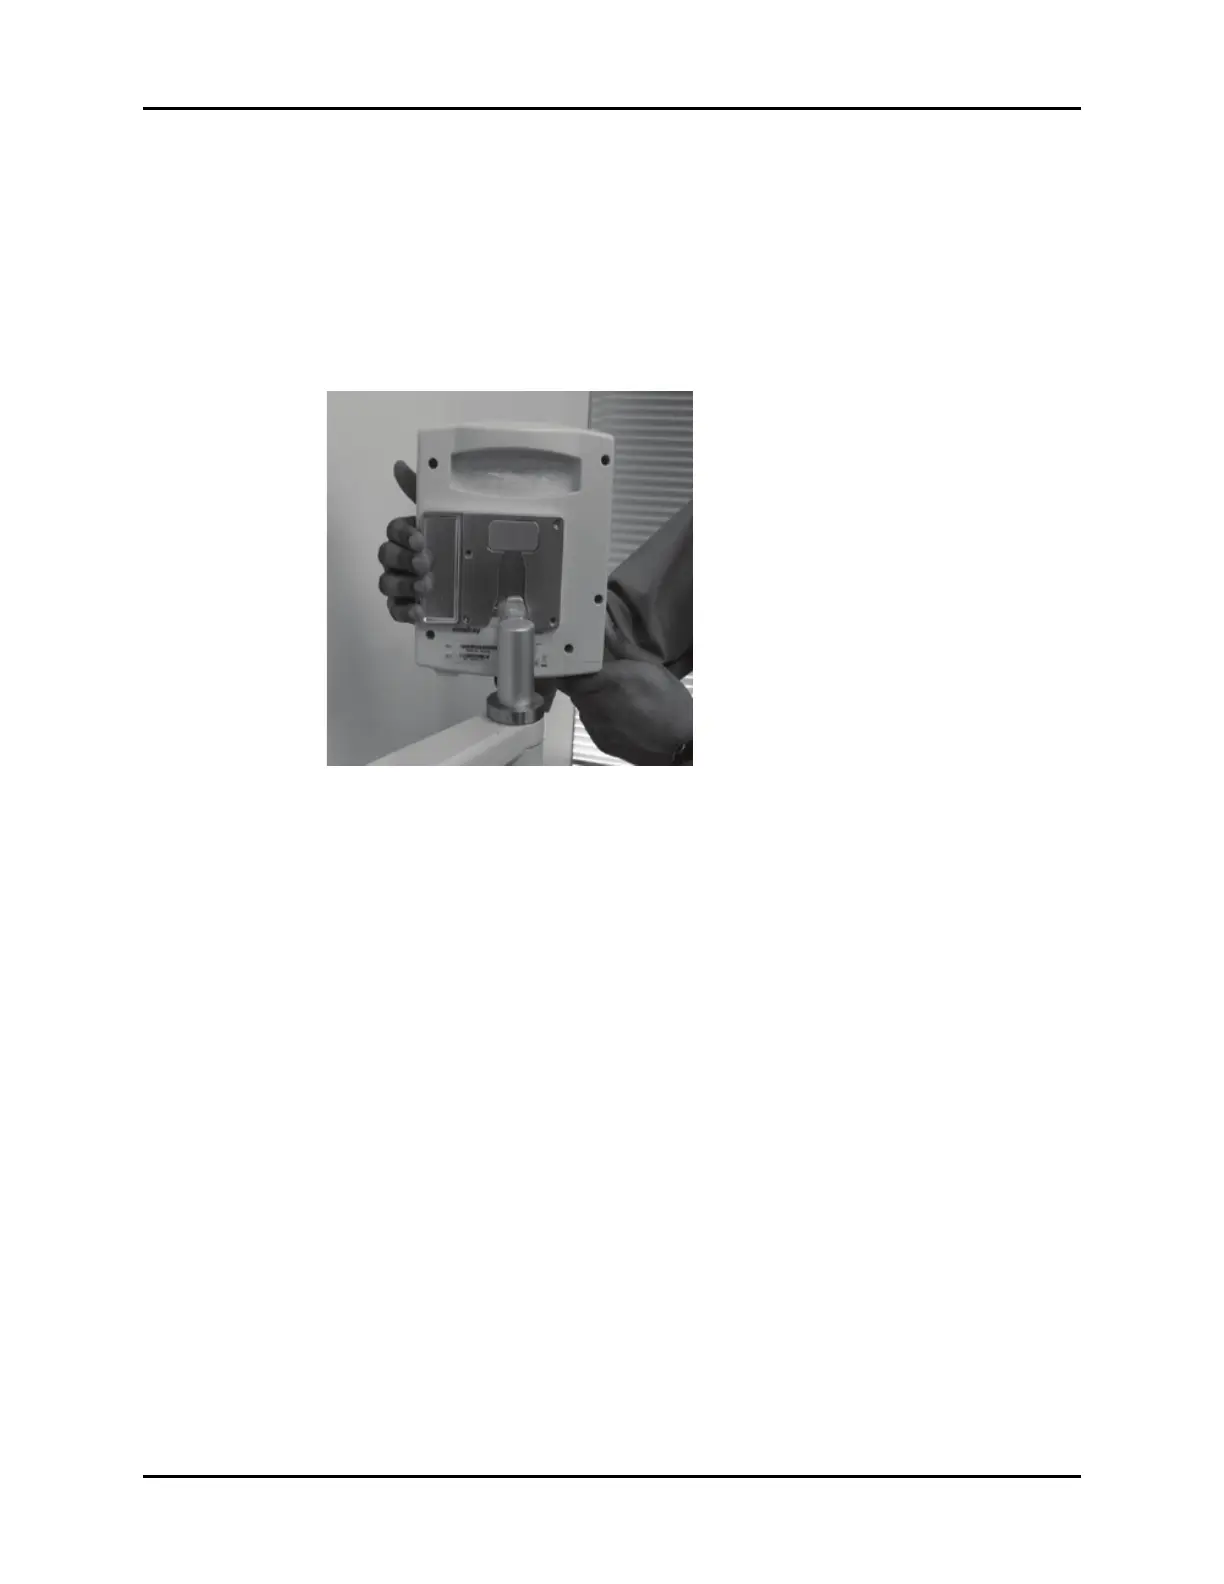
4.5.1 V Hub Mounting
1. Pick up and hold the V Hub by gripping it around one or both sides, and align the channel in the
mounting plate on the back of the V Hub with the cleat on a wall mount post, or on the front of
a rolling stand, with both the left and the right flanges of the channel beginning to slide
vertically over the flanges of the mounting cleat.
FIGURE 4-28 V Hub on a Wall Mount Post
2. Continue to slide the V Hub downward, ensuring that the flanges remain engaged, until the
spring-loaded latch engages, with a corresponding audible click.
4.5.2 V Hub Dismounting
1. Grab the V Hub around both sides and, with the right hand, forcefully squeeze against the lever
of the mounting plate on the back of the V Hub.
2. Carefully slide the V Hub upward until the mounting plate is free of the mounting cleat on the
wall mount or rolling stand.
4.5.3 Module Installation
1. Look at the locked/unlocked indicator near the top left corner of the V Hub, and confirm that it is
in the unlocked position (with green background). If not, then follow the instructions for Module
Unlocking.
2. Pick up a module and align it with a group of module bays on the V Hub sufficient to
accommodate the module. (For example, a VPS requires a set of three adjacent module bays.)
Modules may be installed in either of two orientations (rotated 180º apart). Push the module
inward until the module latch engages the latching pins on the V Hub, with a corresponding
audible click. (Avoid pressing against any circular buttons on the end of the module, to avoid
inadvertent actuation of the button function.)