Chapter Eleven: Troubleshooting The Dia
nostics Feature
291
Chapter Eleven: Troubleshooting
The Diagnostics Feature
The 146 unit comes with a basic diagnostics feature. This feature is used to command the 146
unit to perform specific self-tests and display the test results in the front panel window.
Starting the Diagnostics Feature
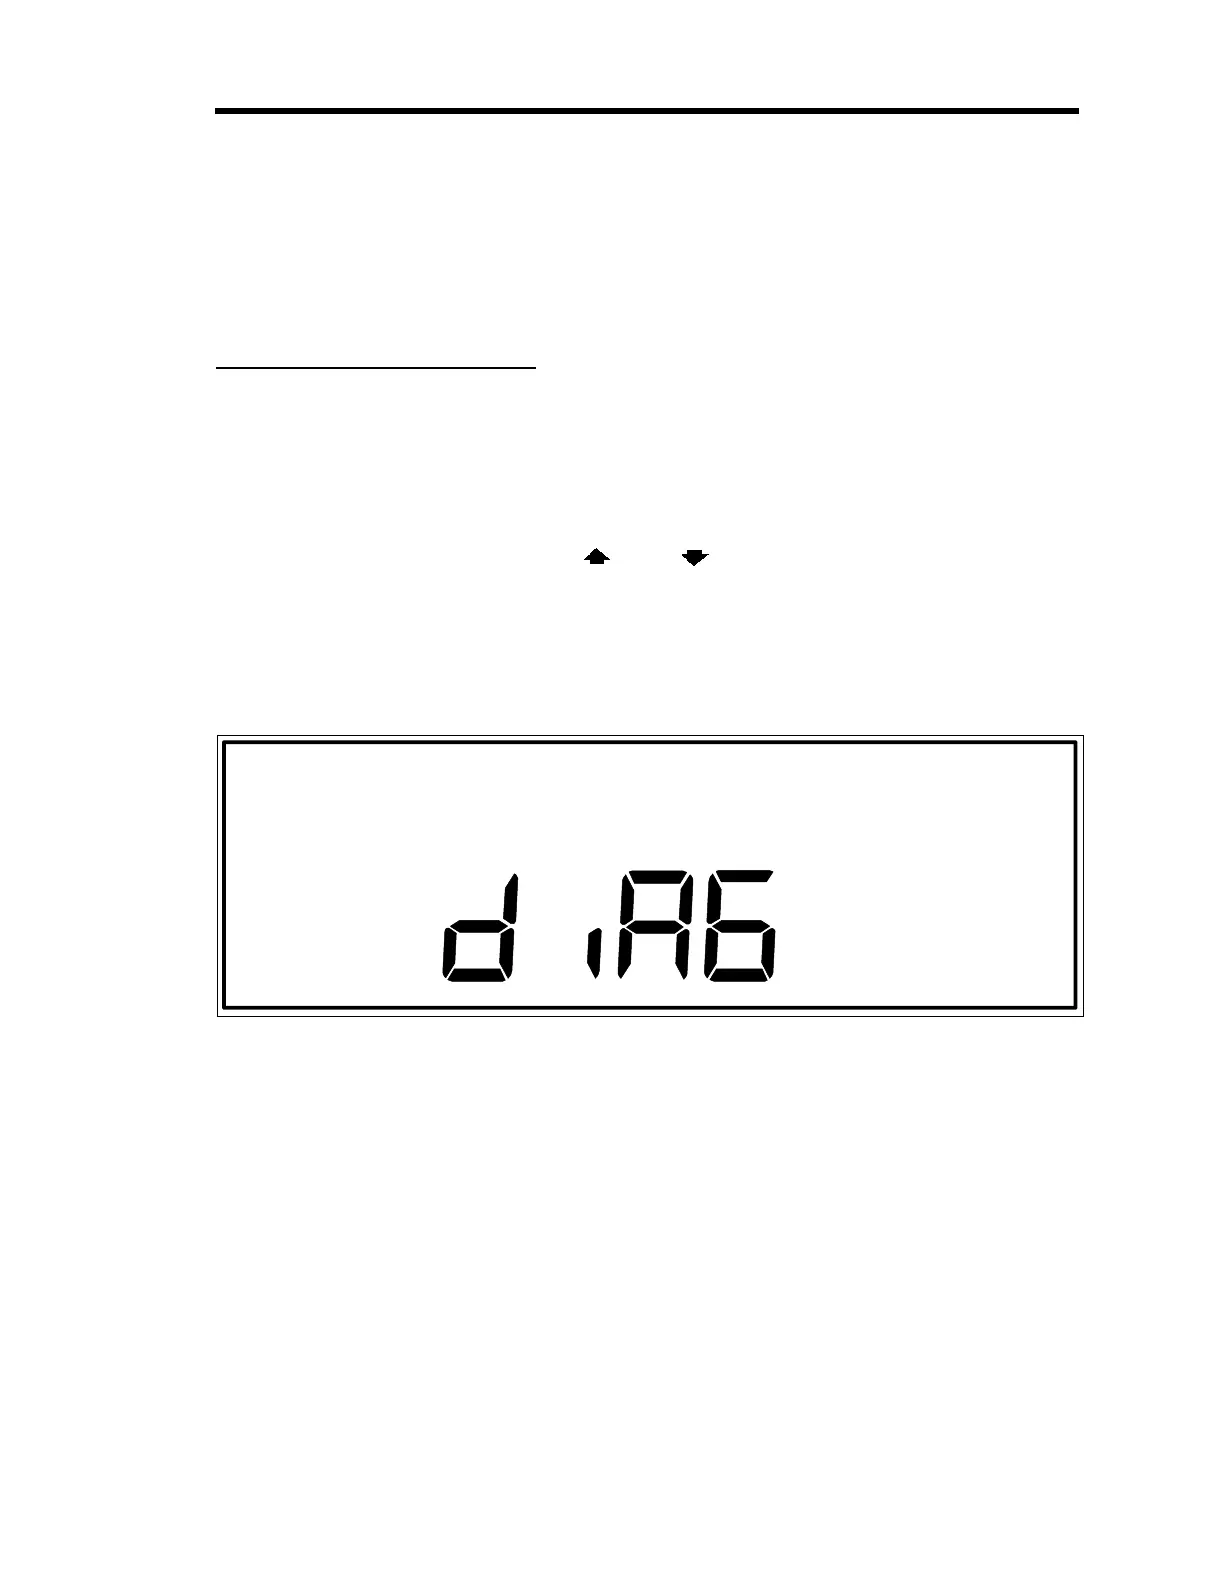
1. Press and hold both arrow keys [
] and [ ] together, for about 3 seconds when
powering up the 146 unit. When the arrow keys are released, the display changes to the
initial diagnostics screen display.
The system responds by performing its normal initialization procedure and providing a
full LCD test display in the front panel window.
Figure 85: Initial Diagnostics Screen Display
Performing 146 Instrument Self Tests
All tests
except
Codes 5x, 6x, and 7x, are initiated by entering a code number and pressing the
[
ENTER
] key. The 146 unit responds by performing the selected self-test.
If the self-test for any code
except
Codes 1 and 2 fails, the display remains as it was before the
self-test was initiated. For example, if the display currently is showing the word
PASS
(as in
Figure 86, page 292), and a Code 6 test is done, the display continues to show the word
PASS
if the Code 6 self-test failed. Codes 1 and 2 test the 146 unit RAM and PROM respectively.
These tests should always come up with a PASS test result because if either the RAM or PROM
is bad, the 146 unit displays error codes upon power up, and will not initiate the diagnostics
feature at all.
Artisan Technology Group - Quality Instrumentation ... Guaranteed | (888) 88-SOURCE | www.artisantg.com