Print Job Manager The ‘Job’ Menu
A29247-X3-X-6-7670 263
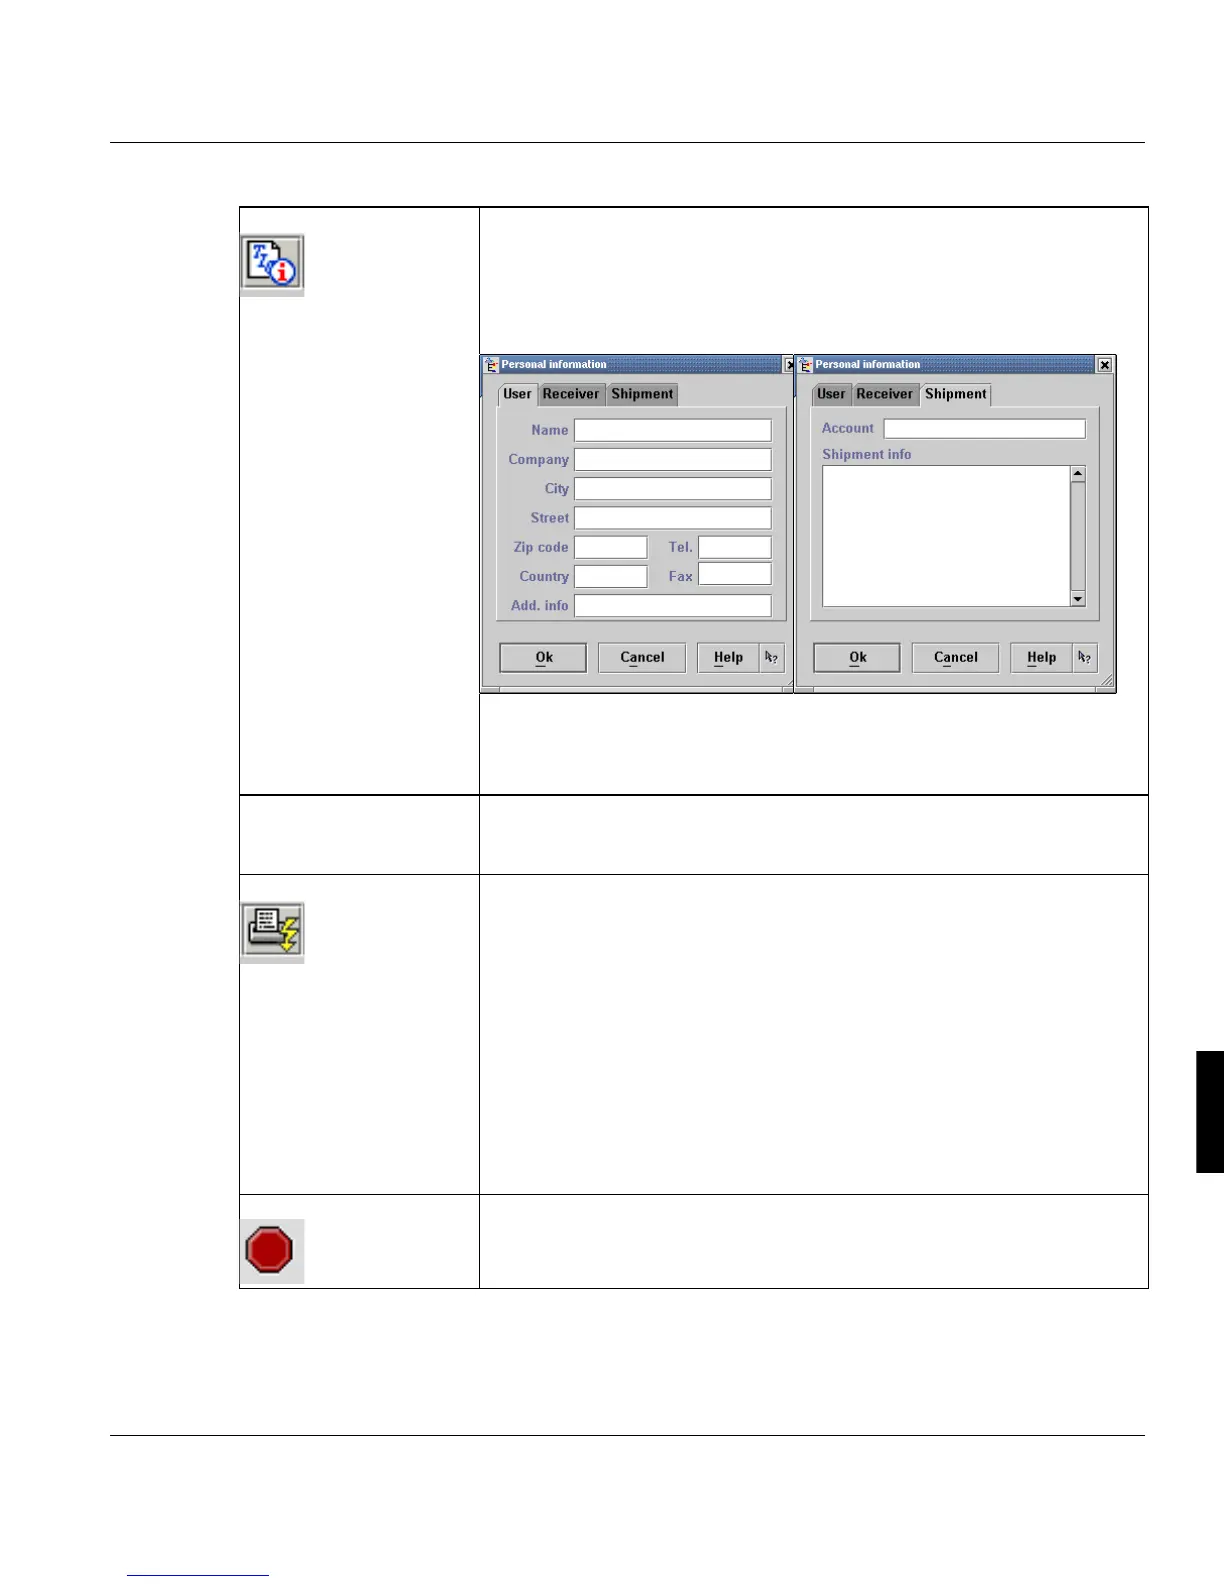
‘Information...’ Use this dialog box to enter details relating to the user (‘User’ tab) and re-
cipient (‘Receiver’ tab). You can also enter unformatted data of any type
on the 'Shipment' tab. On this tab you can insert in the field 'Account' an
information which makes it easier to identify the print job (i.e. the customer
account id).
In the current version of PJM, the input field permits entries to a maximum
length of 1024 bytes. There is no length restriction for the data you enter
on the 'Shipment' tab.
’Attributes’ This menu item relates to the window area ‘Job attributes’. Here you de-
fine, where the converted and/or composed data should be stored or how
they should be printed. For details see page 248
‘Execute’ The 'Execute' command starts a print job for the job ticket currently dis-
played in the main PJM window, using the job name you have specified.
When printing begins, the server assigns a unique eight-digit number to
the print job. This job ID is displayed in the status bar on your workstation,
together with a message to indicate how the task is progressing. An error
message is displayed if an error occurs. The job ID is also displayed in the
Joblist window.
You can check the status of a job in the job lists.
If the option ‘Operator invention’ is activated in the general setting in the
‘ODS Manager’ or if you select ‘Hold job until operator confirmation’ on the
‘Message’ tab in the ‘Job properties’ dialogue, the printjob will only be ex-
ecuted after you click ‘Continue’ in the ODS part of the PJM.
’Cancel Submission’ You can cancel the submission of a job. This is possible as lon as the PJM
starts the job.