Oki Data CONFIDENTIAL
43967002TH Rev. 1
340 /
7. Troubleshooting
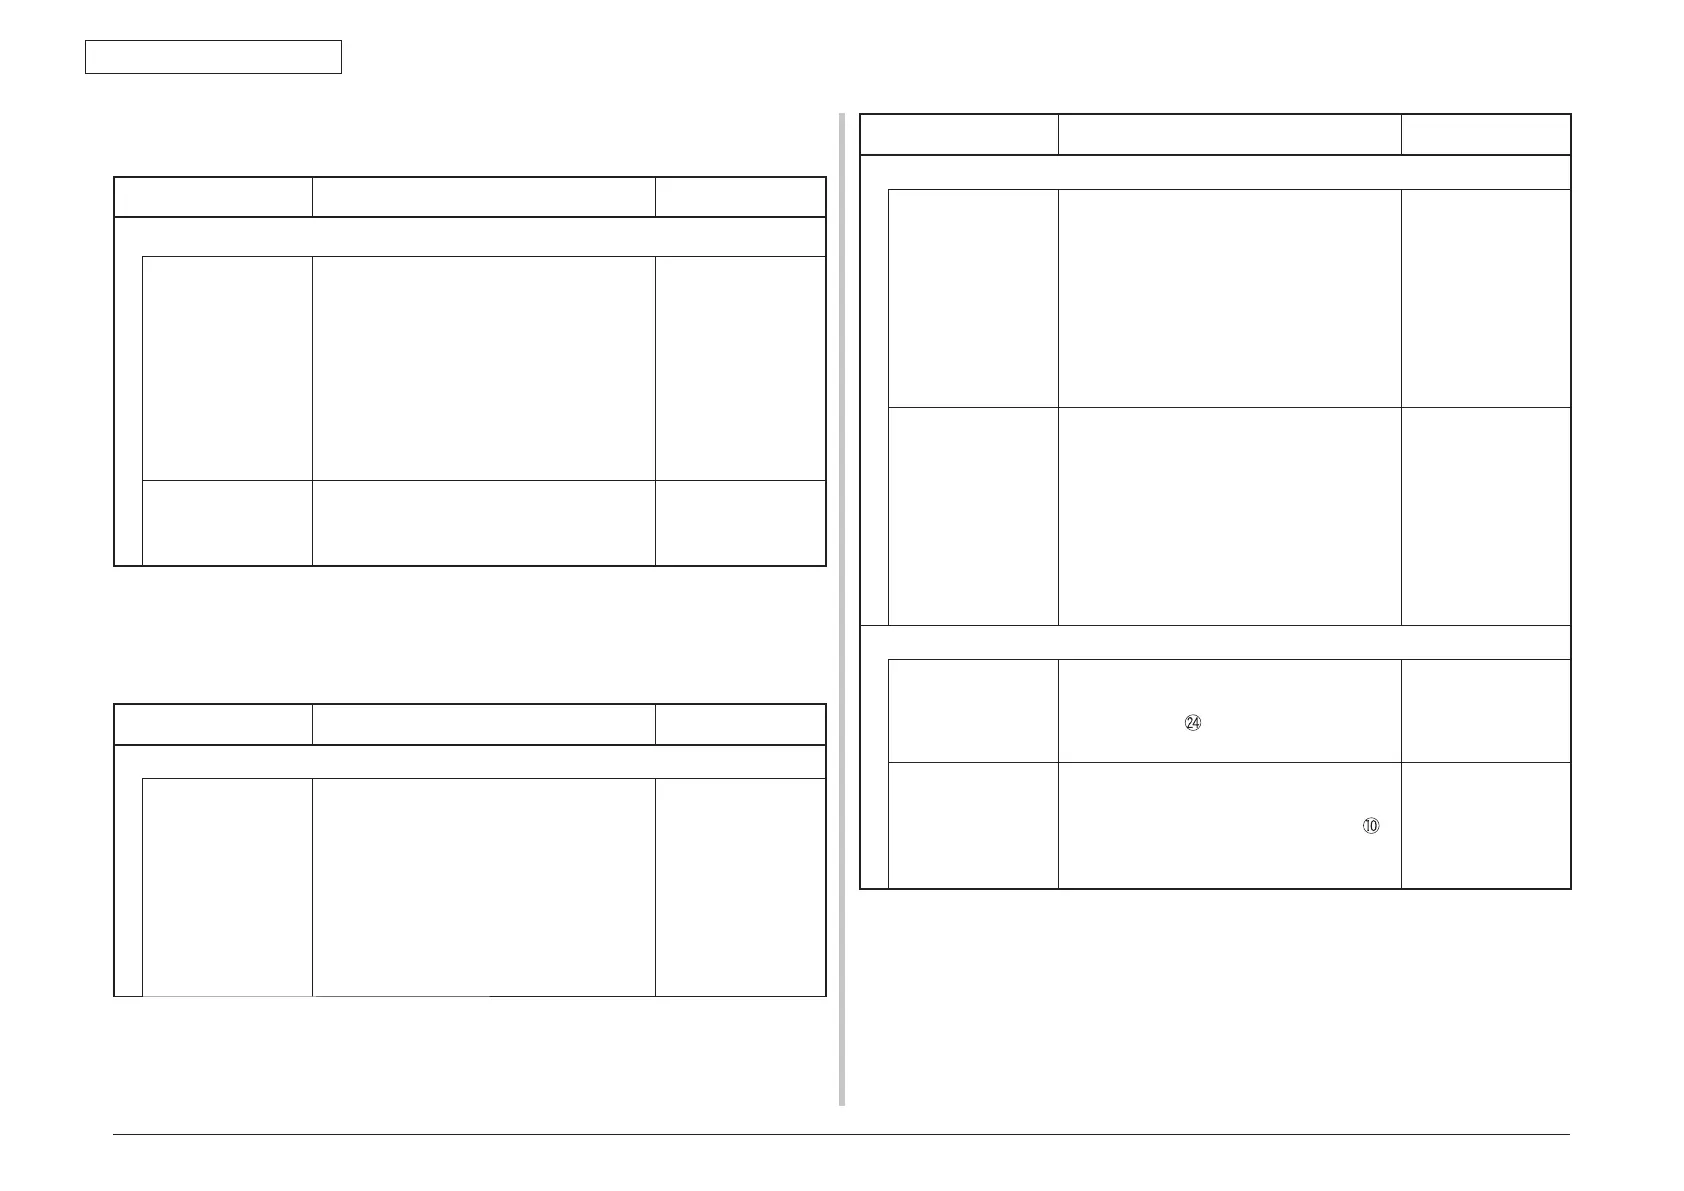
7.5.2.(11) Fuser unit error (error 170 to 177)
(11-1) Jam occurs immediately after the power is turned on.
Check item Check work
Action to be taken at NG
(11-1-1) Thermistor is defective note)
Upper thermistor,
lower thermistor,
frame thermistor
Check the respective thermistors if they are
shorted or opened internally.
Check the resistance value at the
connector pins in the bottom of the fuser
unit. (Refer to item 8.1 Resistance check
(fuser unit).)
Replace the
fuser unit. If any
attempt of using
new fuser unit as
a trial is going to
be made, be sure
to use the System
Maintenance Menu
FUSE KEEP MODE.
Installed condition
of fuser unit.
Check if the fuser nit is pressed in until the
connector in the bottom of the fuser unit is
surely connected.
Re-set the fuser
unit.
Note) Service calls 171 error and 171 error can occur when the printer temperature
is below 0 degree C. Turn on the power again after the printer temperature has
increased.
(11-2)
Error occurs approx.
1 minutes after the power is turned on.
Check item Check work
Action to be taken at NG
(11-2-1) Temperature increase of fuser unit
Thermostat,
halogen lamp
If the fuser unit temperature does not
increase and remains cold, check that the
resistance between pin-1 and pin-2, and
that in between pin-3 and pin-4 of the two
connectors is in the range of several ohms
to several ten ohms respectively. (Refer to
item 8.1 Resistance value (fuser unit).)
Replace the
fuser unit. If any
attempt of using
new fuser unit as
a trial is going to
be made, be sure
to use the System
Maintenance Menu
FUSE KEEP MODE.
Check item Check work
Action to be taken at NG
(11-2-2) Temperature increase of fuser unit
Installation position
of the upper
thermistor
Check if the upper thermistor is installed in
the far position from the specified position
or not causing detection of the lower
temperature than the actual temperature
of fuser unit. Remove the heater cover,
and check warpage of sensor by visual
inspection.
Replace the
fuser unit. If any
attempt of using
new fuser unit as
a trial is going to
be made, be sure
to use the System
Maintenance Menu
FUSE KEEP MODE.
Installation position
of the lower
thermistor
The lower thermistor must be installed
while contacting with the fuser unit. Check
if the lower thermistor is installed in the far
position from the specified position or not
causing detection of the lower temperature
than the actual temperature of fuser unit.
Replace the
fuser unit. If any
attempt of using
new fuser unit as
a trial is going to
be made, be sure
to use the System
Maintenance Menu
FUSE KEEP MODE.
(11-2-3) AC po
wer input to the halogen lamp
AC power voltage
from the low voltage
power supply
Check if the AC voltage for heater is
normally supplied or not. Power supply
CN2 connector
, between pin-1 and
pin-2, and between pin-3 and pin-4.
Replace the low
voltage power
supply unit.
Heater ON signal
that is output
from PU to the
low voltage power
supply
Check that the heater ON signal goes
active at the warming up timing, or not.
“L” active while ON. POWER connector
pins-11 and -12 of the PU PCB.
Replace the PU
PCB.