113
F3SG-R
User’s Manual
Chapter3 Setting by Teach-in
Setting with DIP Switch
E
(4) Teach-In and Check Processes
When it is ensured that the F3SG-RA is in the Teach-in Mode, press the Push Switch (for within 1 s) to
activate the scanning of the blocked area and automatically configure the setting related to the Fixed
Blanking.
*1
The F3SG-RA judges if the setting is valid or not.
If the setting is valid, "BLANK" indicator changes to solid ON state.
If the setting is invalid
*2
, "SEQ" indicator blinks. In this case, try the steps again from (3).
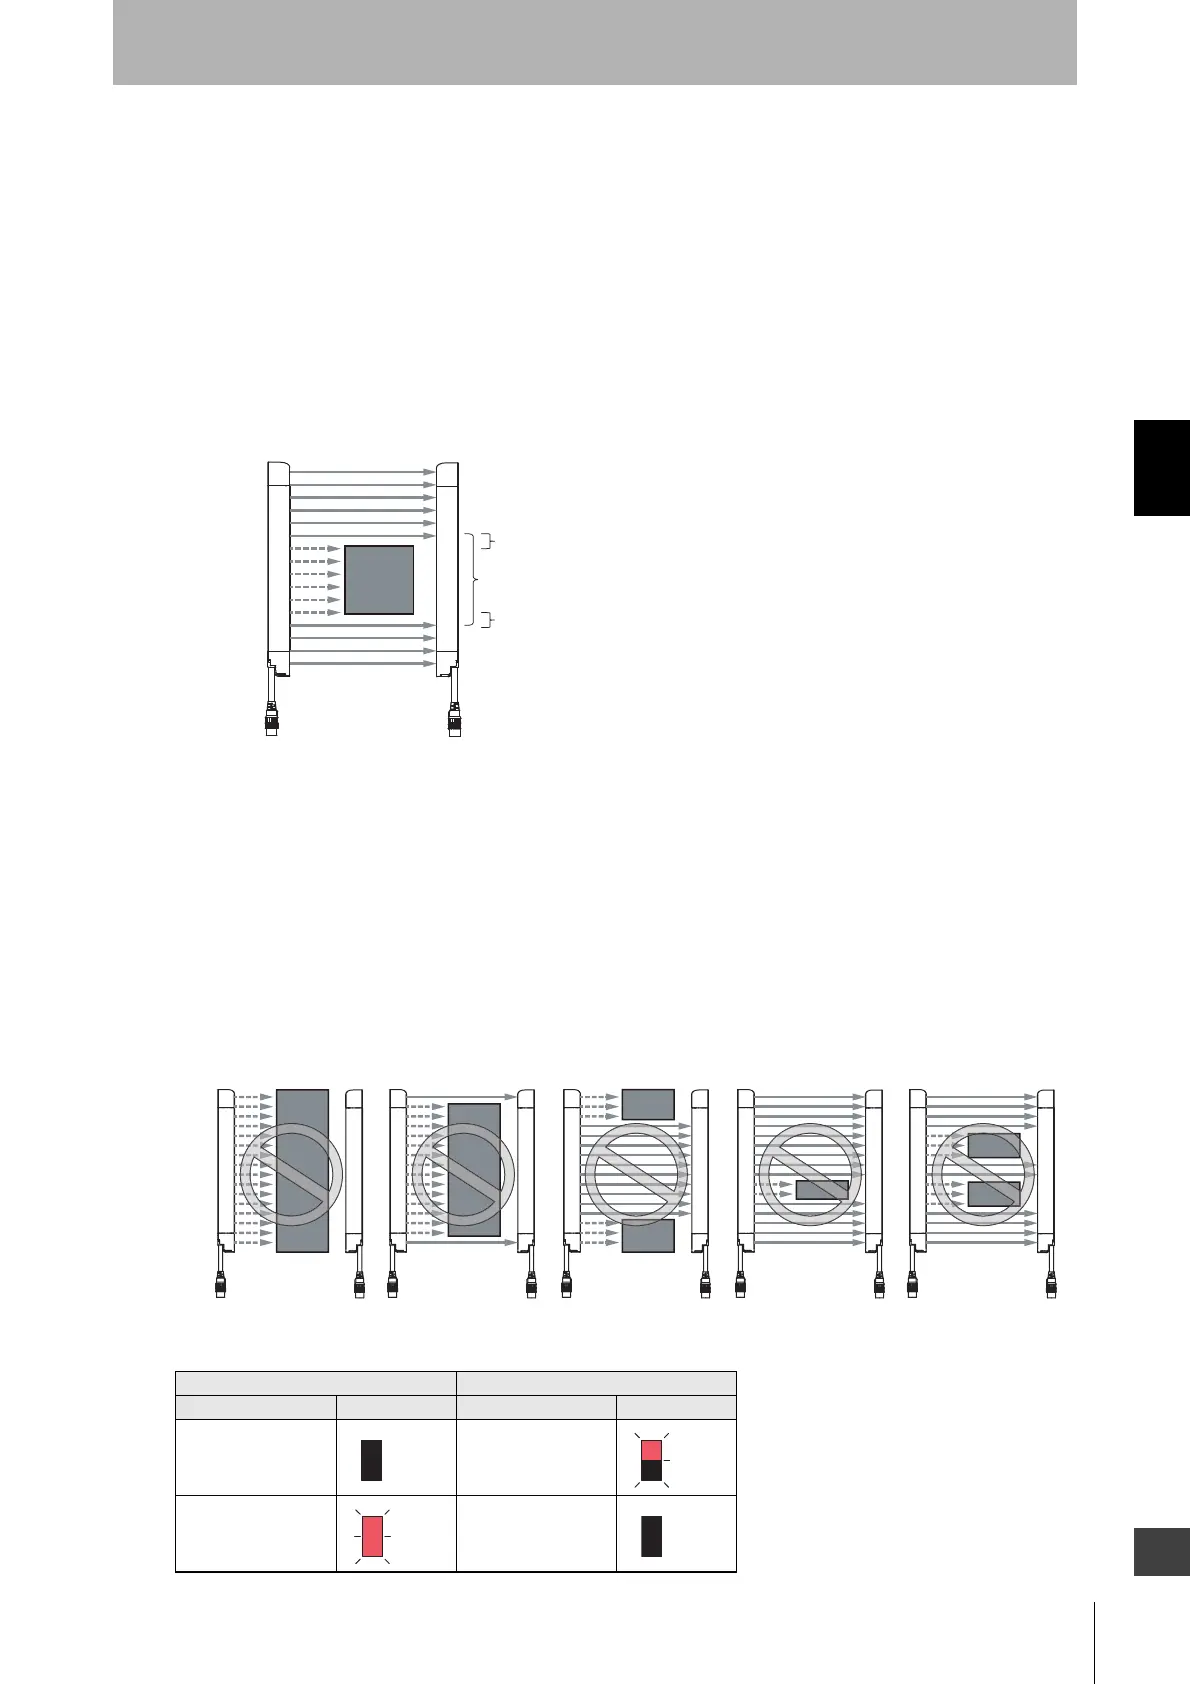
*1 The Fixed Blanking zone is configured to include one additional beam outside the actually blocked
beams. Two beams on both ends are configured as allowable beams.
*2 If the setting value is not an allowable one, the setting is invalid. The following cases are judged as
invalid.
• All beams have been configured as a fixed blanking zone (including allowable beams).(Fig. 1)
• All beams except the beams at both ends have been configured as a fixed blanking zone. (Fig. 2)
• Both beams of the ends have been configured as a fixed blanking zone at the same time.
(Primary sensor only) (Fig. 3)
• The teach-in must be performed with at least 3 beams being blocked.(Fig. 4)
• When the teach-in is performed for more than one Fixed Blanking zones, there must be at least 3
beams between the blocking objects.(Fig. 5)
• Four or more areas have been configured as fixed blanking zones for one channel.
Teach-in setting is valid Teach-in setting is invalid
LED Indicator Status LED Indicator Status
SEQ SEQ
BLANK BLANK
Upper Upper
Lower
11th beam
10th beam
Fixed Blanking zone (4th to 11th beams)
Allowable beam (10th and 11th beams)
5th beam
4th beam
Lower
Allowable beam (4th and 5the beams)
Upper Upper
Lower Lower
Fig. 1
Upper Upper
Lower Lower
Fig. 2
Upper Upper
Lower Lower
Fig. 3
Fig. 4
Upper Upper
Lower Lower
Upper Upper
Lower Lower
Fig. 5

 Loading...