114
Chapter3 Setting by Teach-in
F3SG-R
User’s Manual
Setting with DIP Switch
(5) Restart
Press and hold the reset switch (for 1 s or longer) or power cycle the F3SG-RA to enable and activate
the setting. Check if the Fixed Blanking zone is properly configured.
Others
• When the teach-in is performed with the all Fixed Blanking zone being unblocked, the Fixed Blanking
is configured as Disabled. Teach-in is available under cascade connection as well. In such a case,
use the primary sensor's Push Switch to perform teach-in with the similar steps.
• When the F3SG-RA is in the cascade connection, the teach-in setting is performed for each channel
independently. This allows different F3SG-RA's to have different teach-in settings depending on the
position or size of the blocking object. For example, when the F3SG-RA at Channel 1 is blocked, that
F3SG-RA only has the Fixed Blanking setting.
• The teach-in result for Fixed Blanking and Floating Blanking cannot be saved together. When the
Teach-in is ferformed for Floating Blanking, the result of the teach-in for Fixed Blanking is cleared.
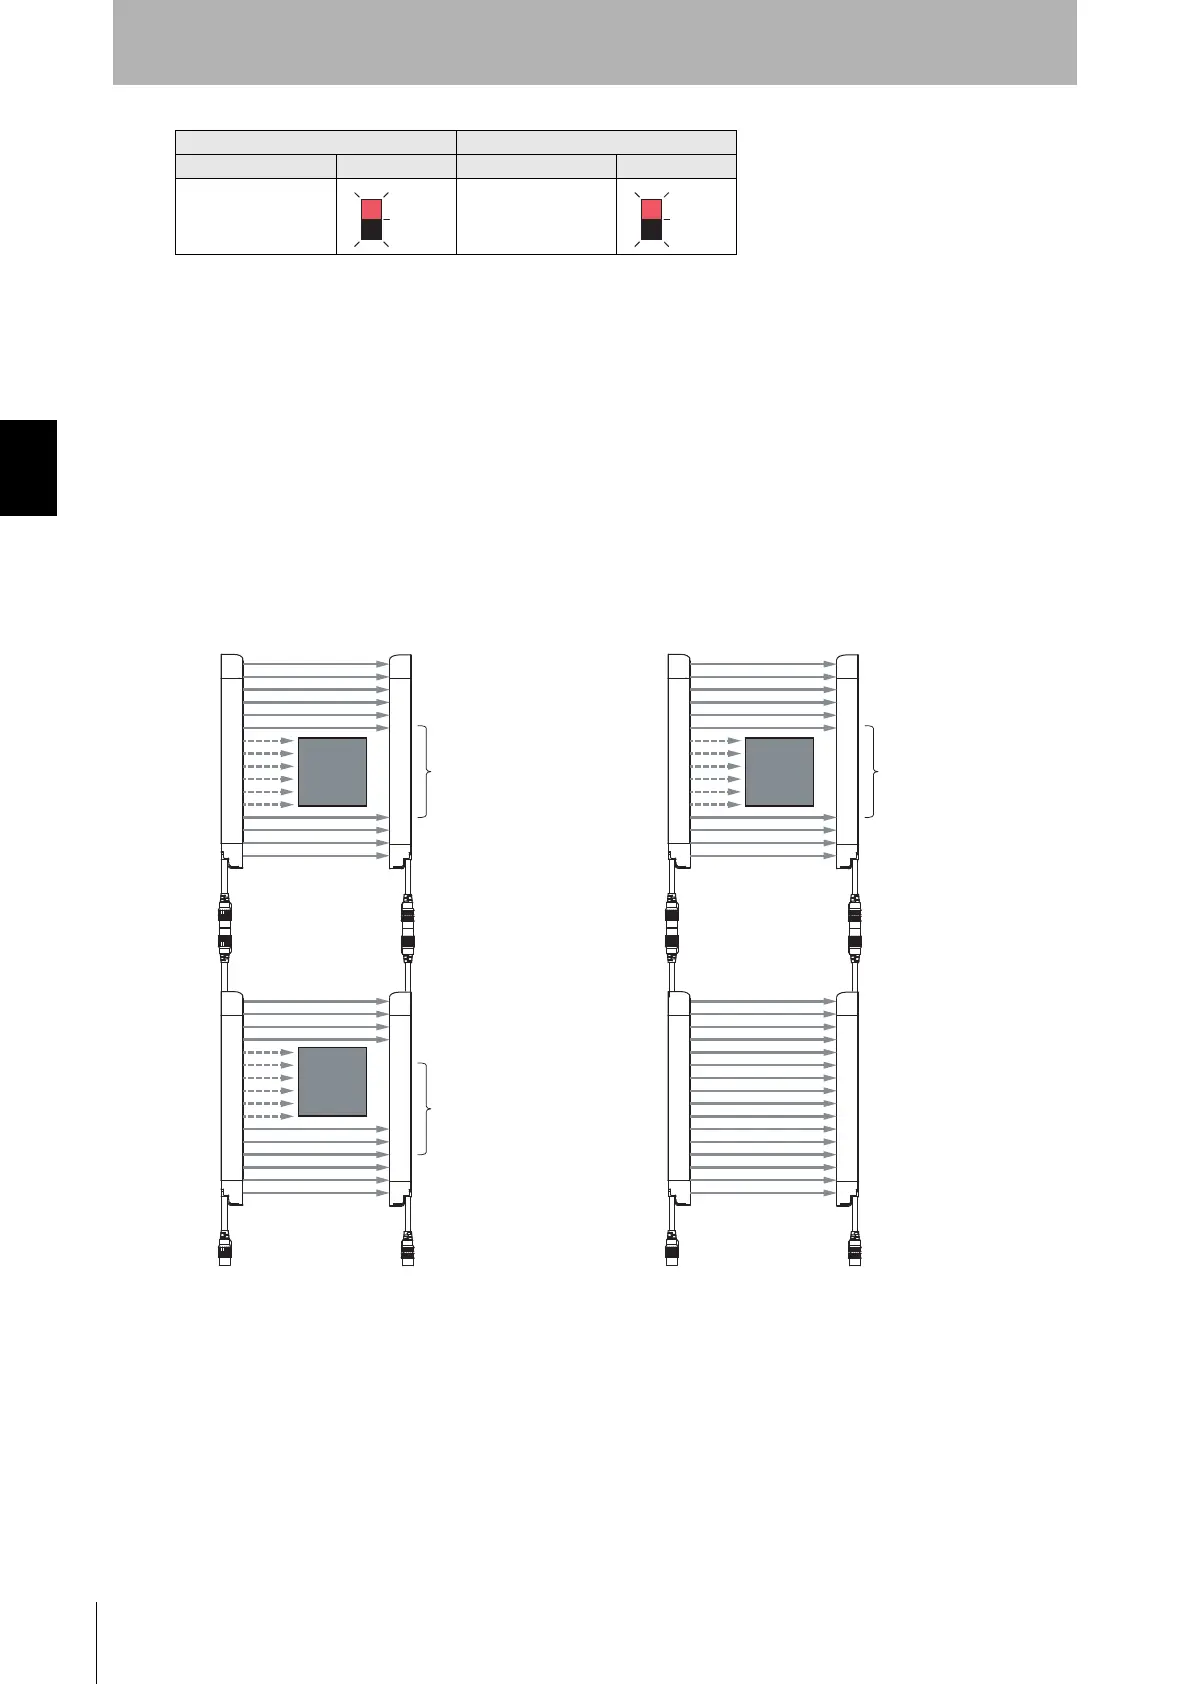
CFG CFG
Teach-in setting is valid Teach-in setting is invalid
LED Indicator Status LED Indicator Status
Upper Upper
Lower
11th beam
10th beam
Fixed Blanking zone
5th beam
4th beam
Lower
Upper Upper
Lower
13th beam
12th beam
Fixed Blanking zone
Fixed Blanking zone:
6th to 13th beams
Allowable beam:
2 lower beams/2 upper beams
6th & 7th beams
12th & 13th beams
Fixed Blanking zone:
4th to 11th beams
Allowable beam:
2 lower beams/2 upper beams
4th & 5th beams
10th & 11th beams
7th beam
6th beam
Lower
Upper Upper
Lower
11th beam
10th beam
Fixed Blanking zone
5th beam
4th beam
Lower
Upper Upper
Lower
Fixed Blanking: Disabled
Fixed Blanking zone:
4th to 11th beams
Allowable beam:
2 lower beams/2 upper beams
4th & 5th beams
10th & 11th beams
Lower

 Loading...