2-12
2.4.3 Clock/Calendar
The clock/calendar function is available for the FP0R-T32.
Note) As the value is unstable in the initial state, write the value using a programming tool.
Area of clock/calendar
With the clock/calendar function, data indicating the hour, minute, second, day, year and other
information stored in the special data registers DT90053 to DT90057 can be read using the transmission
instruction and used in sequence programs.
Special data
Higher bytes Lower bytes Reading Writing
DT90053
Hour data
H00 to H23
Minute data
H00 to H59
Available Not available
DT90054
Minute data
H00 to H59
Second data
H00 to H59
Available Available
DT90055
Day data
Hour data
Available Available
DT90056
Year data
Month data
Available Available
DT90057 -
Day-of-the-week data
H00 to H06
Available Available
Setting of Clock/Calendar Function
Setting using a programming tool
Using FPWIN GR
1.Select [Online Edit Mode] under the [Online] on the menu bar, or press the [CTRL] and [F2] keys at the
same time, to switch to the [Online] screen.
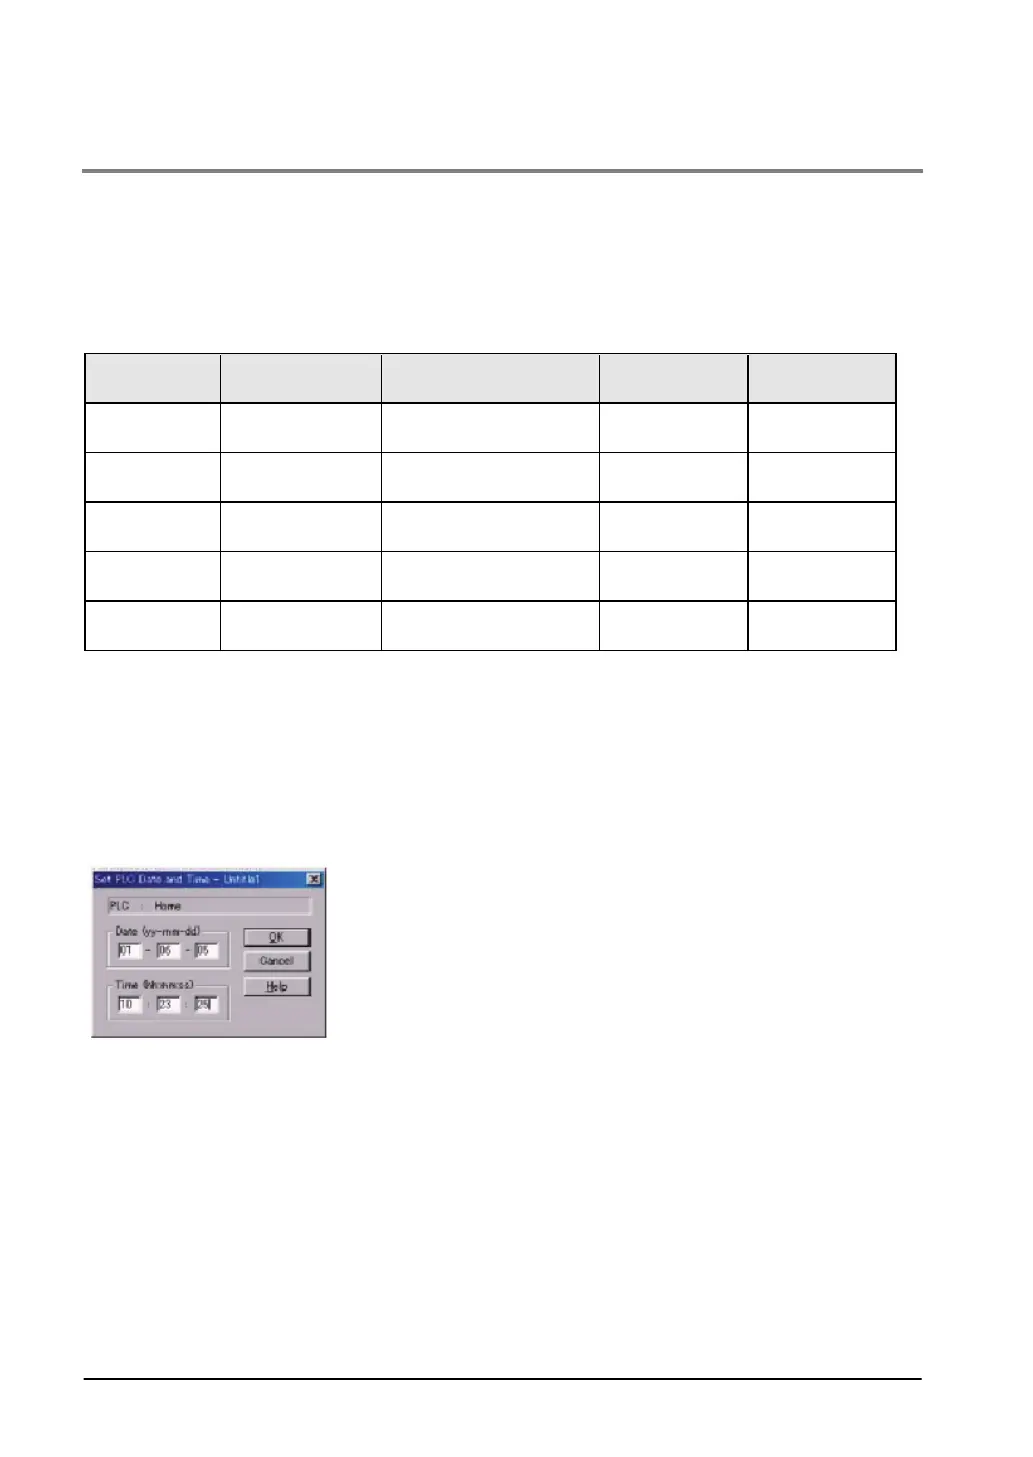
2.Select "Set PLC Data and Time" under "Tool" on the menu bar.
Set PLC Date and Time dialog box
The above steps display the "Set PLC Date and Time dialog
box" shown at the left. Input the date and time, and click on the
"OK" button.
Using FPWIN Pro
1. Select [Online Mode] under the [Online] on the menu bar, or press the [Shift] and [Esc] keys at the
same time, to switch to the [Online Mode] screen.
2. Select "Special Relay/Special Data Register" under "Monitor" on the menu bar.
3. The screen will appear to set various parameters.