5.4
9929419 R02 - 2018-2019 RZR XP / XP 4 Turbo S Service Manual
© Copyright Polaris Industries Inc.
DRIVE BELT
BELT REMOVAL
NOTE
Removal of left rear wheel or left rear shock is NOT
necessary for belt replacement.
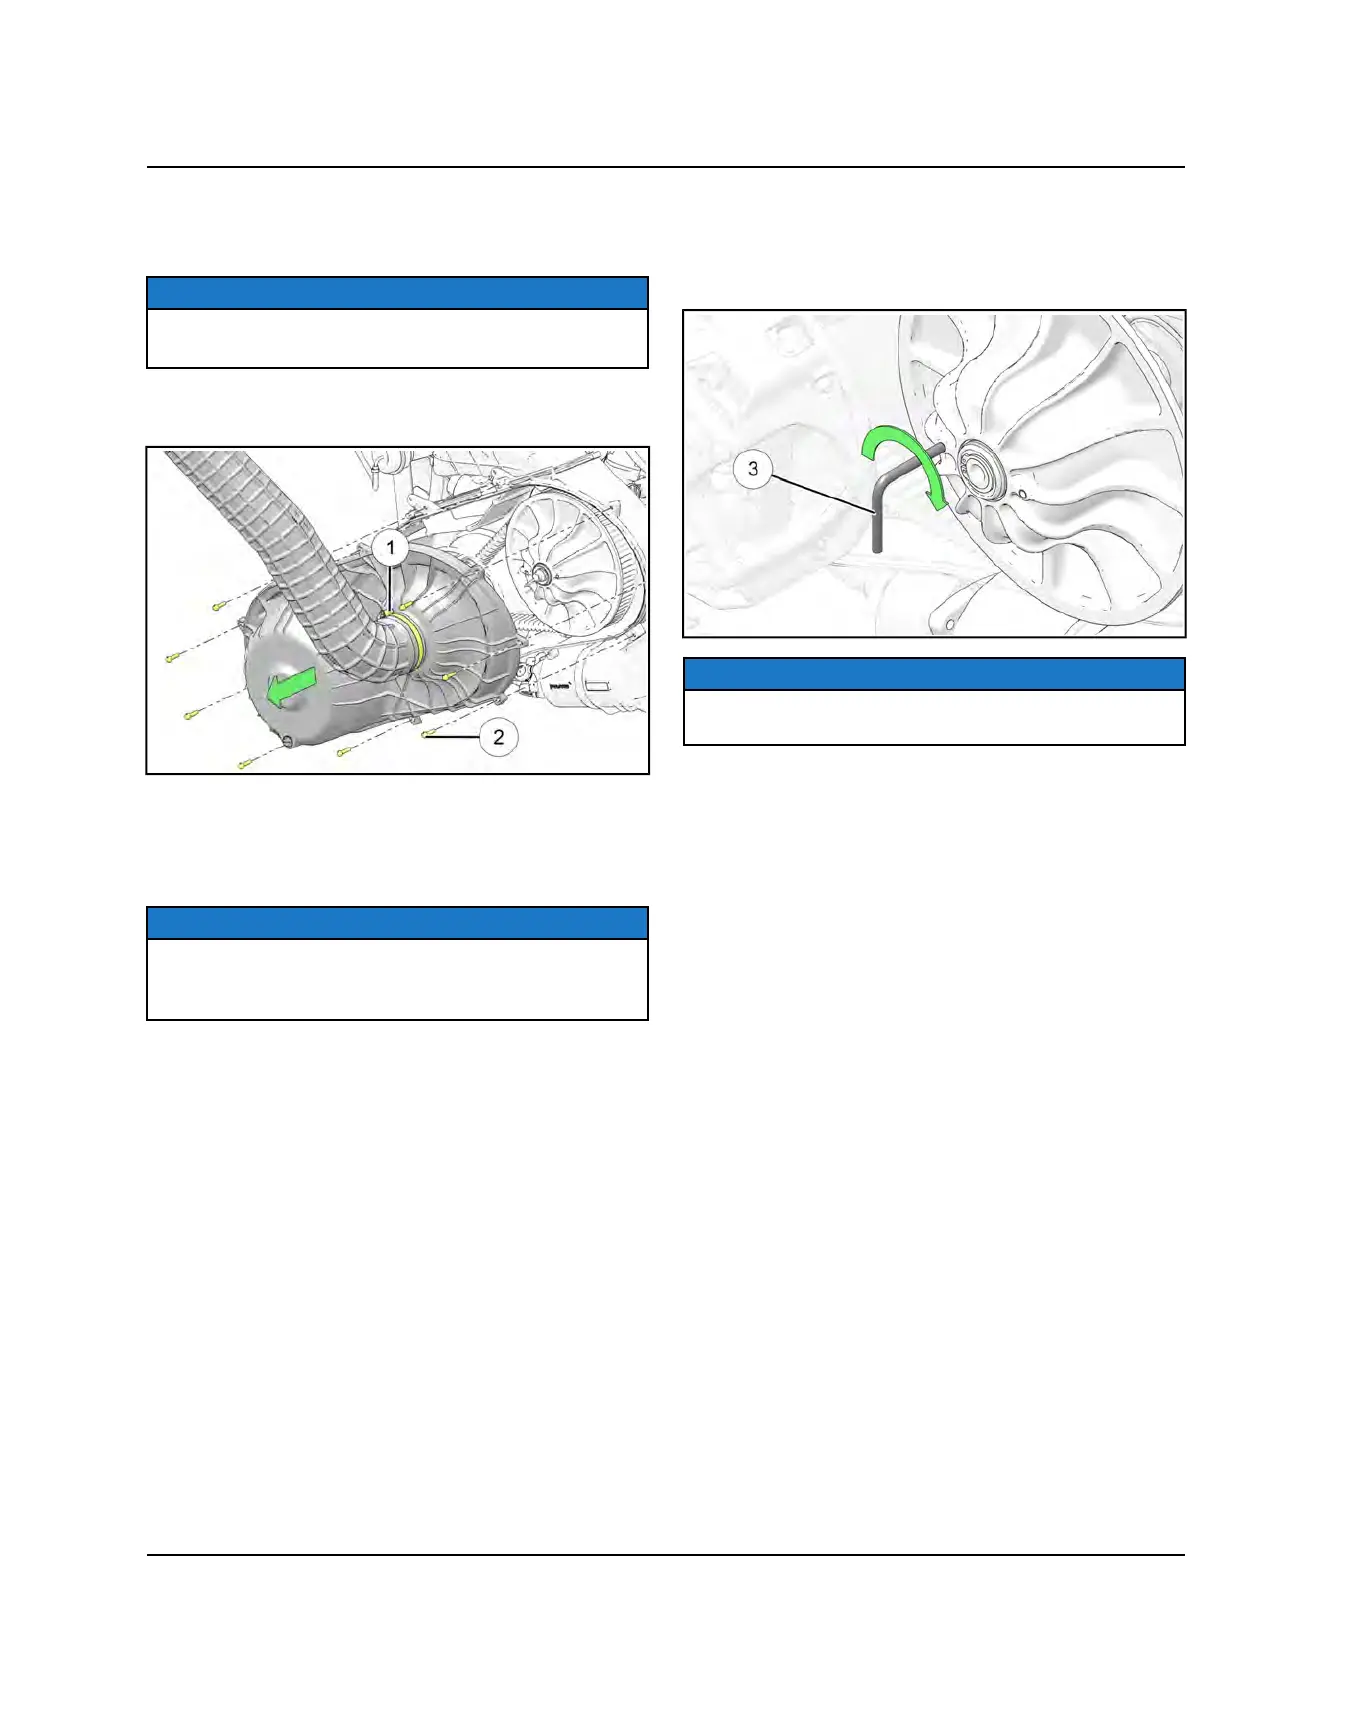
1. Loosen the clamp
q
retaining the PVT inlet duct to
the outer clutch cover.
2. Remove the nine screws
w
that retain the outer
clutch cover.
3. Maneuver the outer clutch cover outward as shown
below to access the drive belt.
NOTE
Angle the rear of the clutch cover up and use a slight
rocking motion to work the clutch free when removing
the cover. There will be very little clearance.
4. Mark the drive belt direction of rotation so that it can
be installed in the same direction.
5. Insert clutch spreader tool
e
into the driven clutch
and turn the tool clockwise to open the sheaves on
the driven clutch.
NOTE
The driven clutch spreader tool is included with the
vehicle’s tool kit
6. Walk the belt out of the driven clutch and drive clutch.
Remove the belt from the vehicle.
BELT INSPECTION
1. Inspect belt for hour glassing (extreme circular wear
in at least one spot and on both sides of the belt).
Hour glassing occurs when the drive train does not
move and the drive clutch engages the belt.
2. Inspect belt for loose cords, missing cogs, cracks,
abrasions, thin spots, or excessive wear. Compare
belt measurements with a new drive belt. Replace if
necessary.
3. Belts with thin spots, burn marks, etc., should be
replaced to eliminate noise, vibration, or erratic PVT
operation. See the Troubleshooting Chart at the end
of this chapter for possible causes.
PVT SYSTEM

 Loading...