5
9929419 R02 - 2018-2019 RZR XP / XP 4 Turbo S Service Manual
© Copyright Polaris Industries Inc.
5.15
DRIVEN CLUTCH REMOVAL (2019
MODELS)
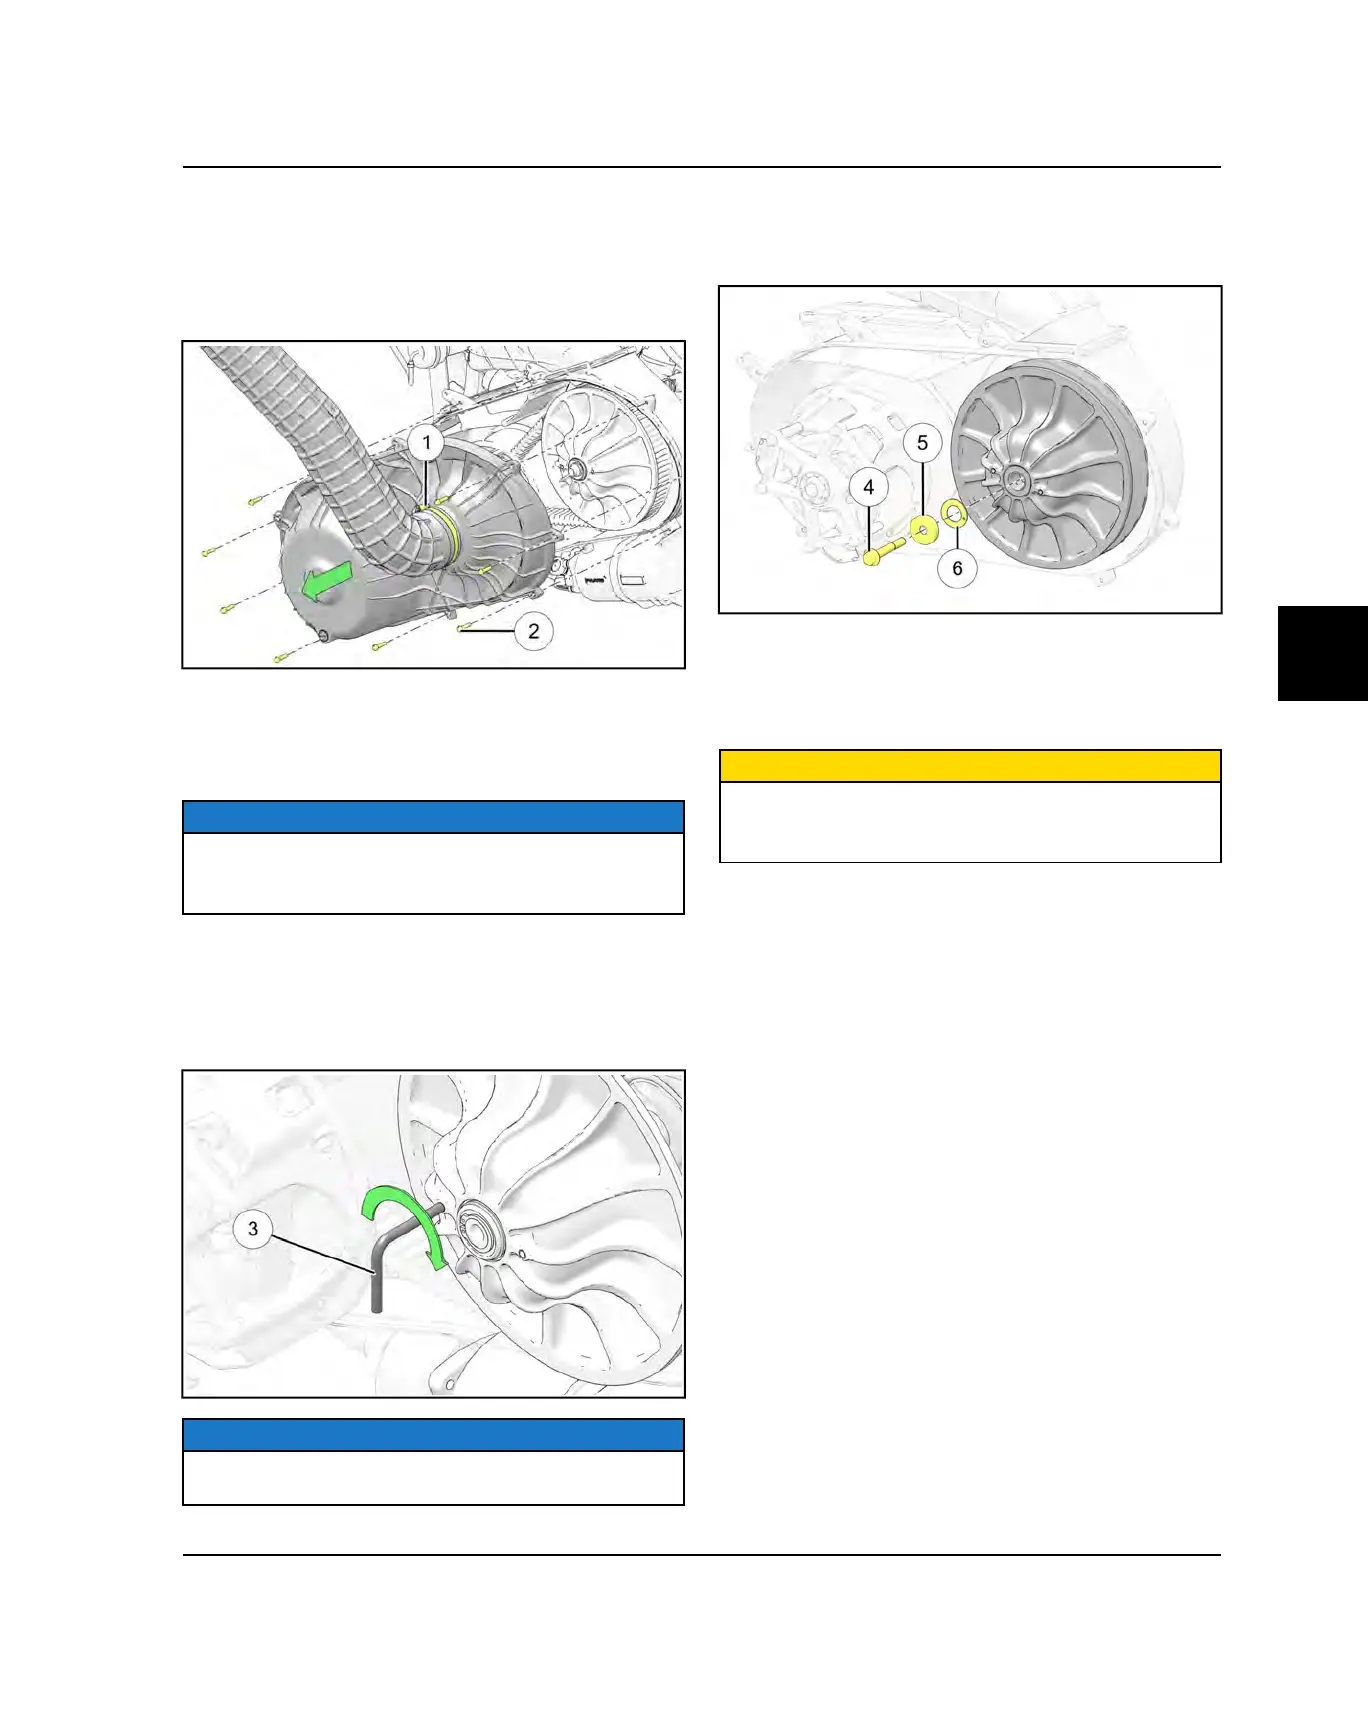
1. Loosen the clamp
q
retaining the PVT inlet duct to
the outer clutch cover. Remove duct from clutch
cover.
2. Remove the nine screws
w
that retain the outer
clutch cover.
3. Maneuver the outer clutch cover outward as shown
below to access the drive belt.
NOTE
Angle the rear of the clutch cover up and use a slight
rocking motion to work the clutch free when removing
the cover. There will be very little clearance.
4. Mark the drive belt direction of rotation so that it can
be installed in the same direction.
5. Insert clutch spreader tool
e
into the driven clutch
and turn the tool clockwise to open the sheaves on
the driven clutch.
NOTE
The driven clutch spreader tool is included with the
vehicle’s tool kit
6. Walk the belt out of the driven clutch and drive clutch.
Remove the belt from the vehicle.
7. Remove the driven clutch retaining bolt
r
.
8. Remove the cup washer
t
and thrust bearing
y
.
9. Remove the driven clutch from the transmission input
shaft by holding both sheaves together and pulling
straight off.
CAUTION
The driven clutch is held together by the snap ring that
was removed in the previous step. The driven clutch will
become damaged if it is dropped.
PVT SYSTEM

 Loading...