11.20
9929419 R02 - 2018-2019 RZR XP / XP 4 Turbo S Service Manual
© Copyright Polaris Industries Inc.
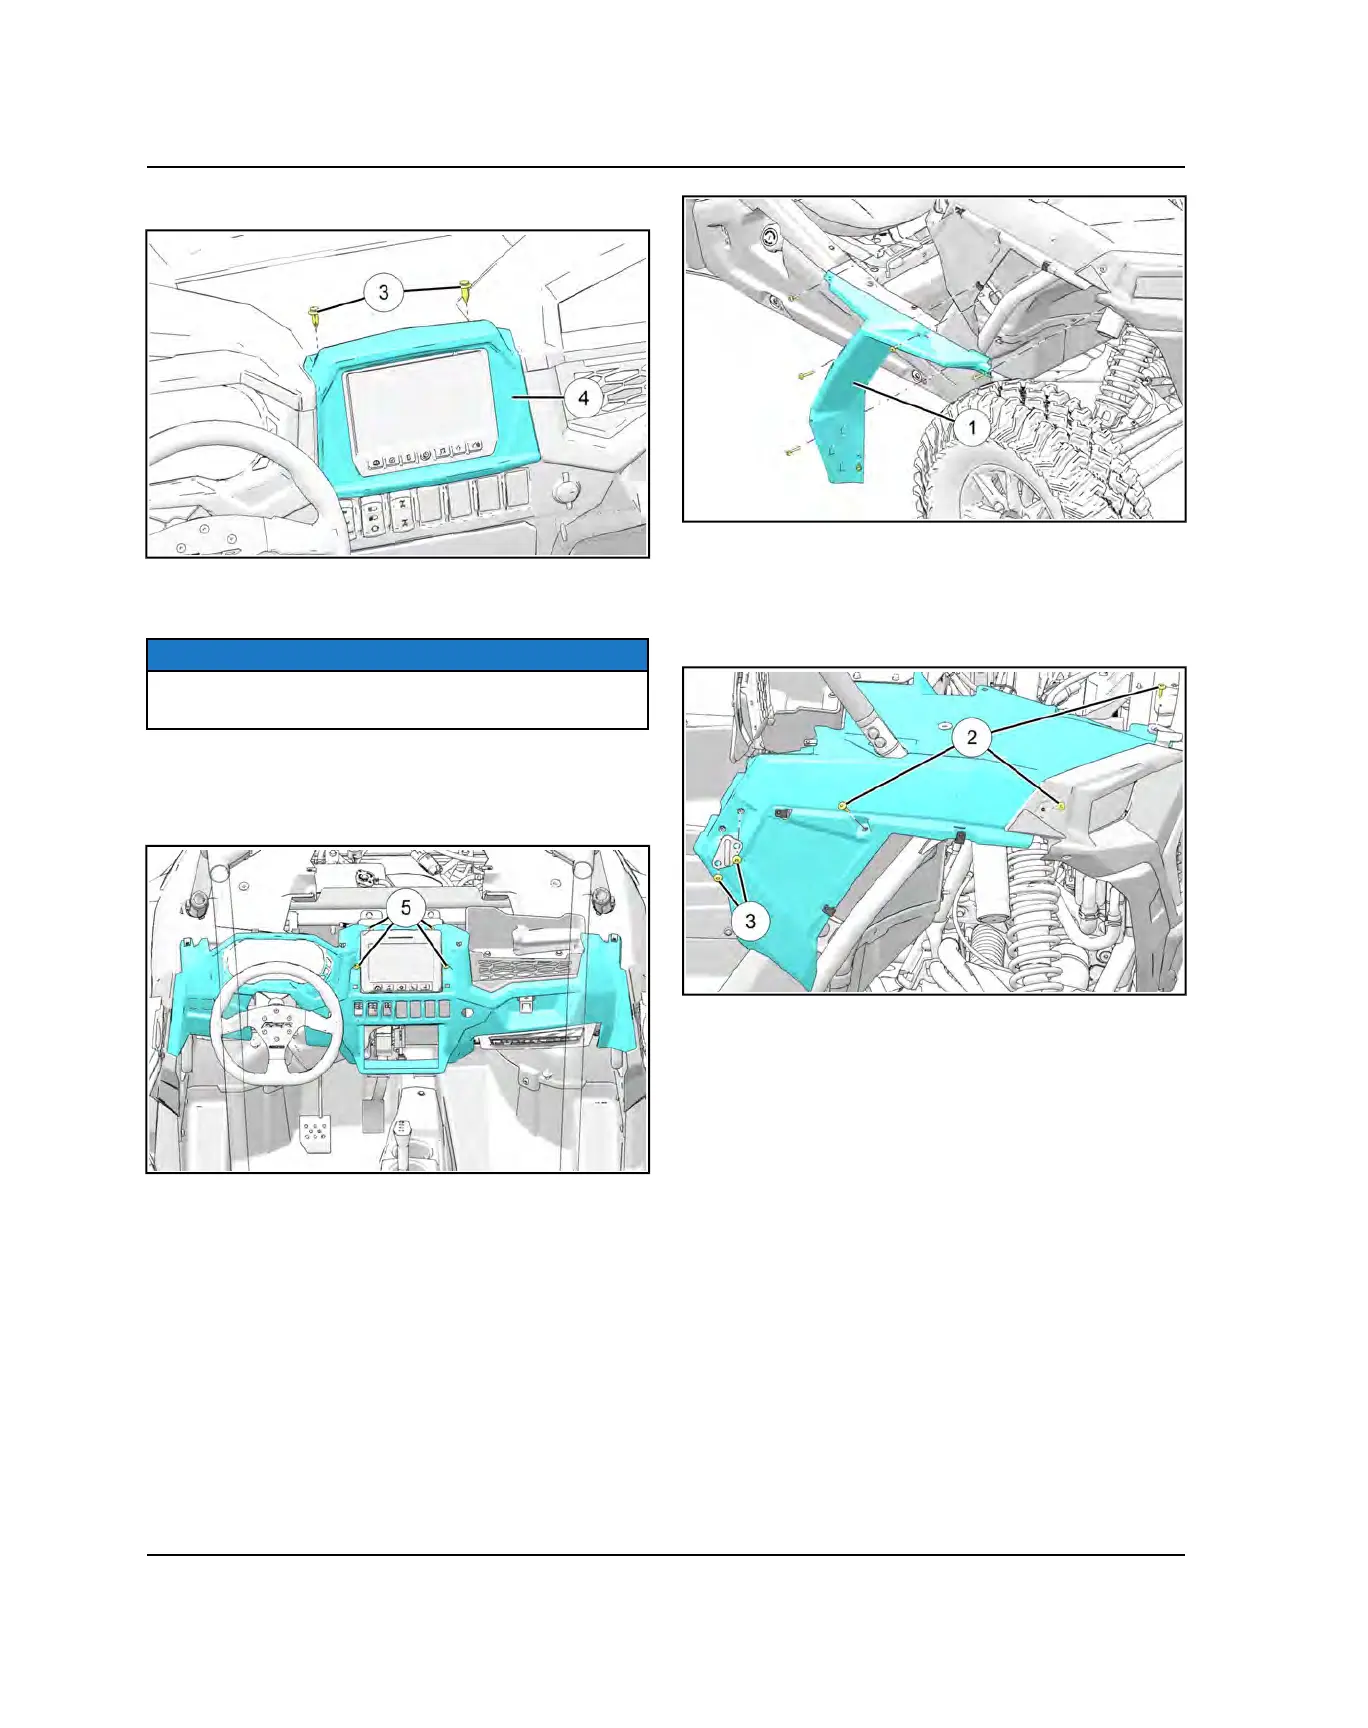
3. Remove two push pins
e
retaining display bezel
r
.
4. Disconnect the AWD switch, headlight switch, mode
switch and ignition switch.
NOTE
Pay attention to switch locations and electrical harness
routing.
5. Remove glove box and passenger grab handle.
6. Remove four lower dash fasteners
t
and remove
lower dash by pulling rearward to disengage clips.
FRONT FENDER FLAIR REMOVAL
Remove the Five T-40 torx screws and one push pin.
Remove fender flairs
q
from the dash assembly.
FRONT BODY REMOVAL
1. Remove the hood, upper dash, lower dash, and
fender flairs.
2. Remove the three fasteners
w
retaining the fender.
3. Remove two fasteners
e
securing door striker to
fender.
4. Remove the right side ROPS by removing its
fasteners . Refer to Cab Frame Assembly page 11.4
for reinstallation and torque info.
5. Remove the front fender.
BODY / FRAME

 Loading...