5.12
9929419 R02 - 2018-2019 RZR XP / XP 4 Turbo S Service Manual
© Copyright Polaris Industries Inc.
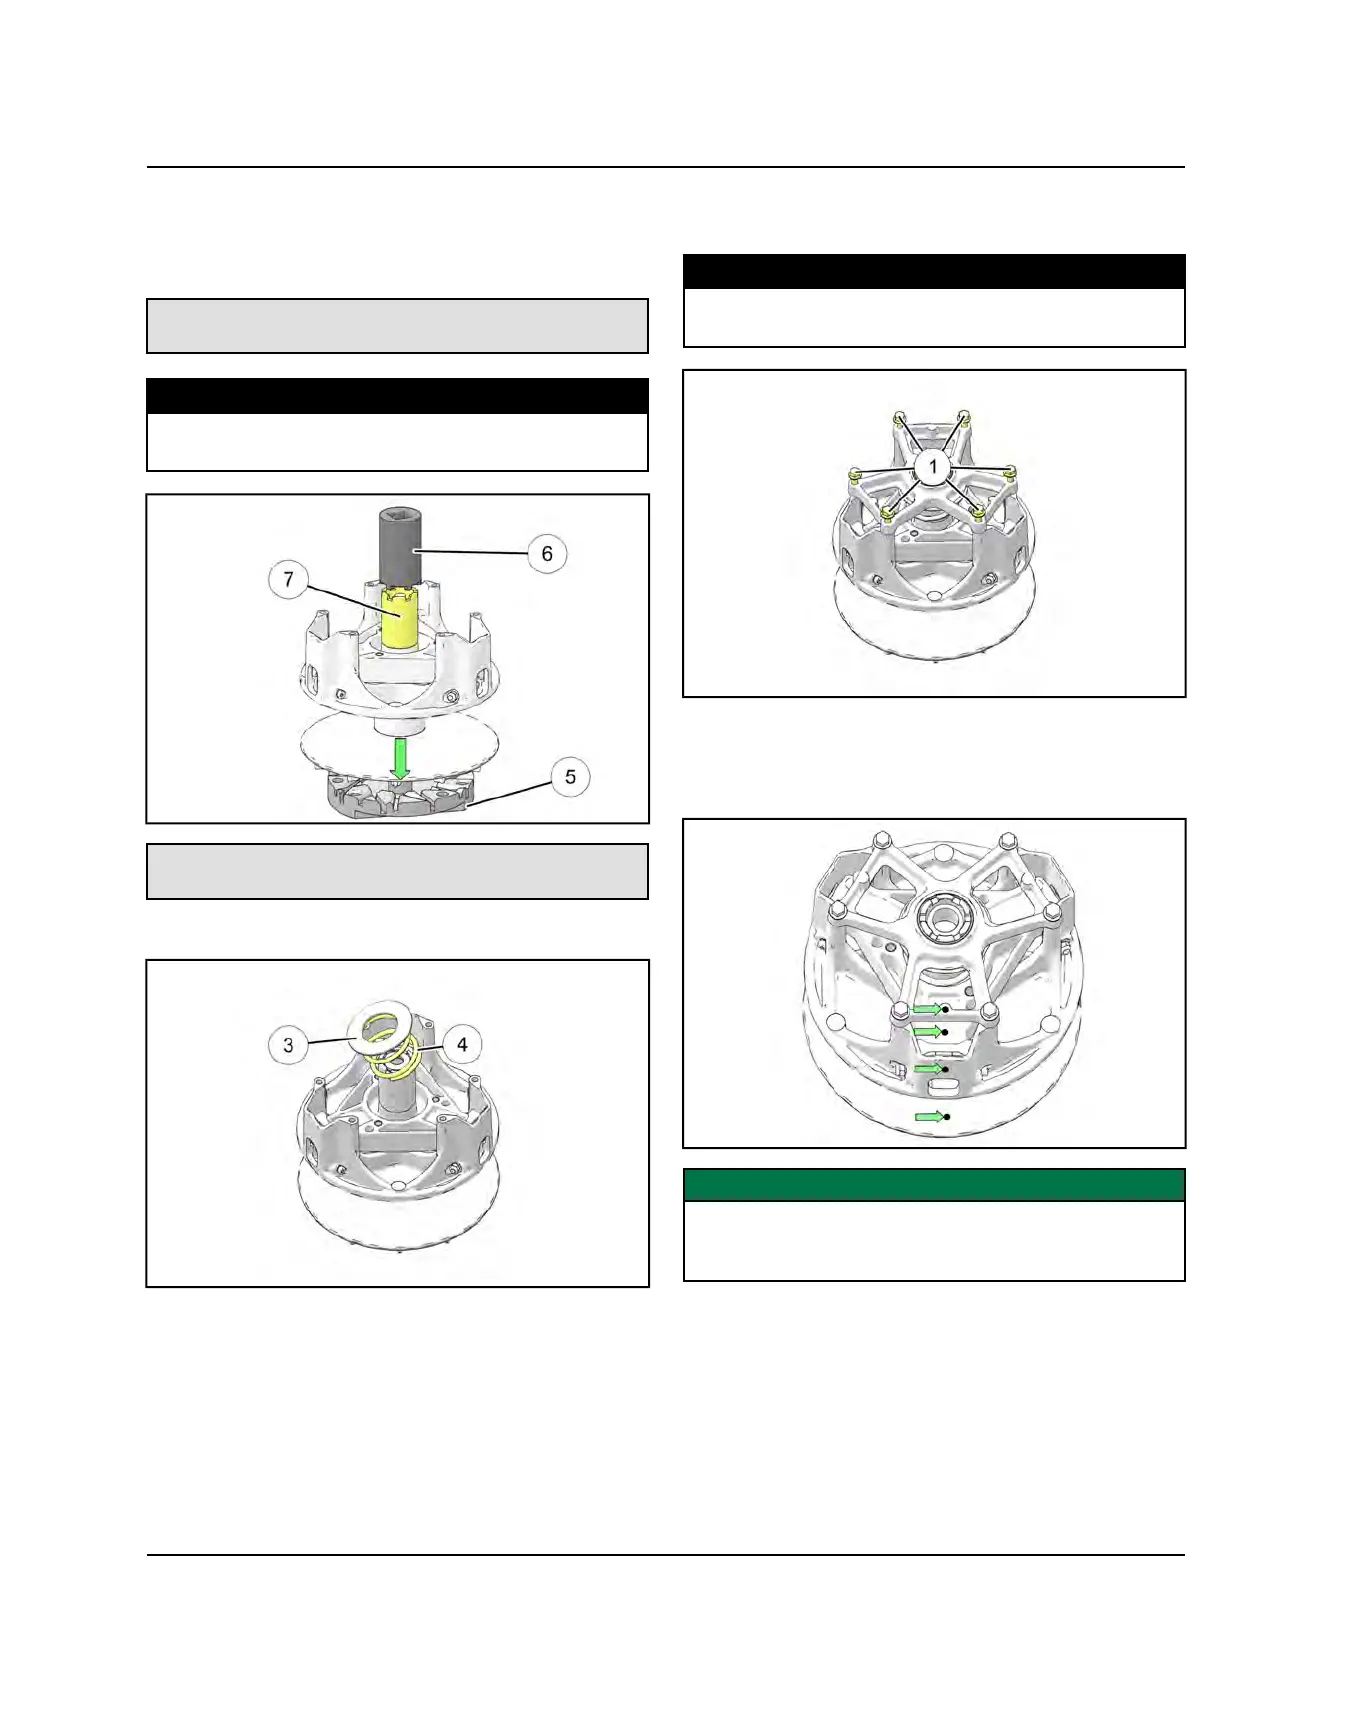
4. Place the drive clutch holding tool
t
in a vise and
install the drive clutch on the tool. Install the clutch
spider nut tool
y
on the spider nut sleeve
u
and
torque the nut to specification.
Spider Nut Removal tool:
PU-50578
TORQUE
Spider Nut:
300 ft-lb (407 Nm)
Drive Clutch Holding Fixture:
2871358-B
5. Install the spring
r
and the spring spacer
e
.
6. Place the drive clutch in a clutch compression tool.
7. Install the six fasteners
q
retaining the drive clutch
cover. Torque fasteners to specification.
TORQUE
Drive Clutch Cover Fasteners:
9 ft-lb (12 Nm)
8. Once the clutch is fully assembled, ensure the
reference marks you made on the stationary sheave,
moveable sheave, spider and cover are properly
aligned.
IMPORTANT
Failure to assemble the clutch exactly how it was taken
apart will cause the clutch to be out of balance and
require clutch replacement.
PVT SYSTEM

 Loading...