Home
Ricoh
All in One Printer
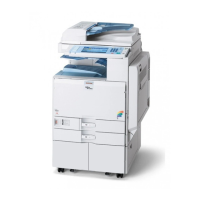
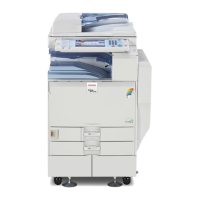
Aficio MP C5000
Ricoh Aficio MP C5000 Function Guide
4
of 1
of 1 rating
1044 pages
Give review
Manual
Specs
To Next Page
To Next Page
To Previous Page
To Previous Page
Loading...
1.
Press the [User Tools/Counter] key.
2.
Press [System Settings].
3.
Press [Administrator Tools].
4.
Press [
Next]twice.
5.
Press [Program / Change / Delete LDAP Server].
6.
Press [Delete].
7.
Select the LDAP server you want to delete.
8.
Press [Yes].
9.
Press [Exit].
10.
Press the [User Tools/Counter] key.
Programming the LDAP server
63
1
280
282
Table of Contents
Table of Contents
3
Default Chapter
1
Operating Instructions
1
Manuals for this Machine
9
Notice
11
Important
11
How to Read this Manual
12
Symbols
12
Note
12
Laws and Regulations
14
Legal Prohibition
14
About the Scanner Functions
15
Display Panel
17
Simplified Display
17
Confirmation Displays
18
1 Sending Scan Files by E-Mail
23
Before Sending Scan Files by E-Mail
23
Overview of Sending Scan Files by E-Mail
23
Preparation for Sending by E-Mail
24
Registering E-Mail Addresses in the Address Book
26
E-Mail Screen
27
Basic Procedure for Sending Scan Files by E-Mail
29
Switching to the E-Mail Screen
32
Specifying E-Mail Destinations
33
Selecting the Destination from the Machine's Address Book
33
Entering an E-Mail Address Manually
36
Selecting Destinations by Searching an LDAP Server
37
Registering a Directly-Entered Destination in the Address Book
40
Specifying the E-Mail Sender
42
Selecting a Sender from the List
42
Using a Registration Number to Specify a Sender Name
43
Selecting the Sender by Searching the Machine's Address Book
43
Entering the E-Mail Subject
46
Entering the E-Mail Message
47
Selecting a Message from the List
47
Manual Entry of a Message
48
Simultaneous Storage and Sending by E-Mail
49
Security Settings to E-Mails
50
Sending Encrypted E-Mail
50
Sending E-Mail with a Signature
51
Sending the URL by E-Mail
53
2 Sending Scan Files to Folders
55
Before Sending Files by Scan to Folder
55
Overview of Sending Scan Files by Scan to Folder
55
Preparation for Sending by Scan to Folder
57
Registering Destination Folders in the Address Book
59
Scan to Folder Screen
60
Basic Procedure When Using Scan to Folder
62
Switching to the Scan to Folder Screen
64
Specifying Scan to Folder Destinations
65
Selecting the Destination from the Machine's Address Book
65
Sending Files to a Shared Network Folder
69
Sending Files to an FTP Server
72
Sending Files to Netware Server
73
Registering the Path to the Selected Destination in the Address Book
77
Simultaneous Storage and Sending by Scan to Folder
78
3 Sending Scan Files Using WSD
79
Before Sending Scan Files Using WSD
79
Overview of Sending Scan Files Using WSD
79
Preparation for Sending Files Using WSD
80
WSD Scanner Screen
82
Basic Procedure for Sending Scan Files Using WSD
84
• P.85 "Switching to the WSD Scanner Screen
85
Specifying the Destination Client Computer
88
Selecting a Destination Client Computer from the Destination List
88
Searching for a Destination Client Computer
89
Changing a Scan Profile
92
Creating a New Scan Profile
93
4 Storing Files Using the Scanner Function
95
Before Storing Files
95
Overview of File Storage under the Scanner Function
95
Basic Procedure for Storing Scan Files
97
Specifying File Information for a Stored File
99
Specifying a User Name
99
Specifying a File Name
99
Specifying a Password
100
Displaying the List of Stored Files
102
List of Stored Files
102
Searching the List of Stored Files
103
Checking Stored Files
105
Checking a Stored File Selected from the List
105
Checking Stored Files from a Client Computer
106
Sending a Stored File
108
Sending Stored Files
108
Managing Stored Files
110
Deleting a Stored File
110
Changing Information for a Stored File
111
5 Saving Scan Files on a Removable Memory Device
115
Before Saving Files on a Removable Memory Device
115
Overview of Saving Files on a Removable Memory Device
115
Basic Procedure for Saving Scan Files on a Removable Memory Device
117
6 Delivering Scan Files
119
Before Delivering Files
119
Overview of Scan File Delivery
119
Preparing to Deliver Files
120
Installing Desktopbinder Lite from the Supplied CD-ROM
122
Network Delivery Scanner Screen
123
Basic Procedure for Delivering Files
125
Switching to the Network Delivery Scanner Screen
128
Specifying Delivery Destinations
129
Selecting Destinations Registered in the Delivery Server's Address Book
129
Specifying the Sender
133
Selecting a Sender from the Sender List
133
Selecting the Sender by Entering the Registration Number
133
Selecting a Sender by Searching the Delivery Server's Destination List
134
Entering the Subject of the E-Mail to be Transmitted Via the Delivery Server
137
Simultaneous Storage and Delivery
138
7 Scanning Originals with the Network TWAIN Scanner
139
Before Using the Network TWAIN Scanner
139
Overview of the Network TWAIN Scanner
139
Preparing to Use the Network TWAIN Scanner
140
Installing the TWAIN Driver from the Supplied CD-ROM
142
Basic Network TWAIN Scanner Procedure
144
Scan Settings When Using TWAIN Scanner
146
Setting Original Orientation on the TWAIN Scanner
146
When Scanning Originals of Mixed Sizes Using TWAIN Scanner
148
8 Various Scan Settings
149
Specifying Scan Settings
149
Scan Settings
150
Scan Type
150
Resolution
151
Scan Size
151
Edit
157
Adjusting Image Density
158
Setting of Original Feed Type
159
Original Orientation
159
Original Settings
160
Stamp
162
Batch, SADF
163
Divide
164
• P.164 "Scanning Multiple Pages of Originals as One File
164
Specifying the File Type and File Name
168
Specifying the File Type
168
Notes about and Limitations of File Types
169
Specifying the File Name
170
Security Settings for PDF Files
172
Programs
177
Registering Frequently Used Setting
177
Recalling a Registered Content
178
Changing a Registered Program
178
Deleting a Program
179
Changing the Registered Program Name
179
Registering the Default Values of the Scanner's Initial Display
181
9 Scanner Features
183
Accessing User Tools
183
Changing User Tools
183
Closing User Tools
184
General Settings
185
Scan Settings
187
Send Settings
189
Administrator Tools
191
Menu Protect
191
10 Appendix
193
Relationship between Resolution and Scan Size
193
When Using as a TWAIN Scanner
194
Software Supplied on CD-ROM
196
Auto-Run Program
196
TWAIN Driver
196
Desktopbinder Lite
197
Values of Various Set Items for Transmission/Storage/Delivery Function
199
Transmission Function
199
Storage Function
201
Network Delivery Function
202
Specifications
204
Trademarks
207
Table of Contents
219
Manuals for this Machine
228
Notice
230
Important
230
How to Read this Manual
231
Symbols
231
Names of Major Options
231
Note
231
About IP Address
232
Laws and Regulations
233
Legal Prohibition
233
Display Panel
234
Accessing User Tools
235
Changing Default Settings
235
Quitting User Tools
236
General Features
237
Output Tray Settings (Type 1 and 2)
239
Output Tray Settings (Type 3 and 4)
240
1 System Settings
237
Tray Paper Settings
242
Timer Settings
249
Interface Settings
251
Network
251
Parallel Interface
254
Wireless LAN
255
Print List
257
File Transfer
259
Administrator Tools
266
Programming the LDAP Server
276
Changing the LDAP Server
280
Deleting the LDAP Server
280
Programming the Realm
282
Changing the Realm
283
Deleting the Realm
284
Connecting to the Interfaces
285
Connecting to the Ethernet Interface
286
Connecting to the Gigabit Ethernet Interface
287
Connecting to the USB Interface
289
Connecting to the IEEE 1284 Interface
290
Connecting to the Wireless LAN Interface
290
Setup Procedure
291
2 Connecting the Machine
285
Network Settings Required to Use the Printer/Lan-Fax
293
Ethernet
293
Wireless LAN
294
Network Settings Required to Use Internet Fax
296
Ethernet
296
Wireless LAN
298
Network Settings Required to Use E-Mail Function
300
Ethernet
300
Wireless LAN
301
Network Settings Required to Use Scan to Folder Function
304
Ethernet
304
Wireless LAN
305
Network Settings Required to Use the Network Delivery Scanner
307
Ethernet
307
Wireless LAN
308
Network Settings Required to Use WSD Scanner
310
Ethernet
310
Wireless LAN
311
Network Settings Required to Use Network TWAIN Scanner
313
Ethernet
313
Wireless LAN
314
Network Settings Required to Use Document Server
316
Ethernet
316
Wireless LAN
317
Using Utilities to Make Network Settings
319
Interface Settings
319
File Transfer
325
Connecting the Machine to a Telephone Line and Telephone
328
Connecting the Telephone Line (Type 1 and 2)
328
Connecting the Telephone Line (Type 3 and 4)
328
Selecting the Line Type
329
Connecting the Optional Handset or an External Telephone
329
Preparing Printer Server
331
3 Using a Printer Server
331
Using Netware
332
Setting up as a Print Server (Netware 3.X)
333
Setting up as a Print Server (Netware 4.X, 5/5.1, 6/6.5)
334
Using Pure IP in the Netware 5/5.1 or 6/6.5 Environment
335
Setting up as a Remote Printer (Netware 3.X)
337
Setting up as a Remote Printer (Netware 4.X, 5/5.1, 6/6.5)
339
Using Web Image Monitor
343
Displaying Top Page
344
When User Authentication Is Set
345
About Menu and Mode
346
Administrator Mode
347
Access in the Administrator Mode
348
List of Setting Items
348
Displaying Web Image Monitor Help
355
4 Monitoring and Configuring the Printer
343
Using Smartdevicemonitor for Admin
357
Installing Smartdevicemonitor for Admin
358
Changing the Network Interface Board Configuration
359
Locking the Menus on the Machine's Control Panel
360
Changing the Paper Type
361
Managing User Information
361
Configuring the Energy Saver Mode
367
Setting a Password
367
Checking the Machine Status
368
Changing Names and Comments
369
Load Fax Journal
370
Viewing and Deleting Spool Print Jobs
371
Managing Address Information
371
Using Smartdevicemonitor for Client
373
Monitoring Printers
373
Checking the Machine Status
374
When Using IPP with Smartdevicemonitor for Client
374
Printer Status Notification by E-Mail
376
Setting the Account for E-Mail Notification
378
Mail Authentication
378
Auto E-Mail Notification
379
On-Demand E-Mail Notification
380
Format of On-Demand E-Mail Messages
381
Remote Maintenance by Telnet
382
Using Telnet
382
Access
383
Appletalk
384
Authfree
384
Autonet
385
Bonjour
386
Btconfig
387
Devicename
387
Dhcp
388
Dhcp6
389
Diprint
389
Dns
390
Domainname
392
Etherauth
393
Help
393
Hostname
393
Ifconfig
394
Info
395
Ipp
395
Ipsec
396
Ipv6
396
Logout
396
Lpr
397
Netware
397
Passwd
399
Pathmtu
399
Prnlog
400
Route
400
Rhpp
401
Set
402
Show
405
Slp
405
Smb
405
Snmp
406
Sntp
409
Spoolsw
410
Ssdp
411
Ssh
411
Status
412
Syslog
412
Upnp
412
Web
412
Wiconfig
413
Wins
417
Wsmfp
418
8021X
419
Snmp
423
Getting Printer Information over the Network
424
Current Printer Status
424
Printer Configuration
433
Understanding the Displayed Information
435
Print Job Information
435
Print Log Information
435
Configuring the Network Interface Board
436
Message List
447
System Log Information
447
Address Book
457
Managing Names in the Address Book
460
Sending Fax by Quick Dial
460
Sending E-Mail by Quick Dial
461
Sending Received Fax Documents or Scanned Files to a Shared Folder Directly
461
Preventing Unauthorized User Access to Shared Folders from the Machine
461
Managing Users and Machine Usage
461
5 Registering Addresses and Users for Facsimile/Scanner Functions
457
Registering Names
463
Changing a Registered Name
464
Deleting a Registered Name
465
Authentication Information
467
Registering a User Code
467
Changing a User Code
469
Deleting a User Code
470
Displaying the Counter for each User
472
Printing the Counter for each User
472
Printing the Counter for All Users
473
Clearing the Number of Prints
474
Fax Destination
476
Registering a Fax Destination
477
Changing a Fax Destination
479
Deleting a Fax Destination
482
Registering an IP-Fax Destination
483
Changing a Registered IP-Fax Destination
484
Deleting a Registered IP-Fax Destination
487
E-Mail Destination
489
Registering an E-Mail Destination
489
Changing an E-Mail Destination
491
Deleting an E-Mail Destination
492
Registering Folders
494
Registering an SMB Folder
494
Changing an SMB Folder
497
Deleting an SMB Registered Folder
499
Registering an FTP Folder
500
Changing an FTP Folder
502
Deleting an FTP Folder
504
Registering an NCP Folder
505
Changing an NCP Registered Folder
508
Deleting an NCP Folder
510
Registering Names to a Group
511
Registering a Group
511
Registering Names to a Group
512
Adding a Group to Another Group
514
Displaying Names Registered in a Group
515
Removing a Name from a Group
516
Deleting a Group Within Another Group
517
Changing a Group Name
518
Deleting a Group
520
Registering a Protection Code
521
Registering a Protection Code to a Single User
521
Registering a Protection Code to a Group User
522
Registering SMTP and LDAP Authentication
524
SMTP Authentication
524
LDAP Authentication
525
Printing Files Directly from Windows
529
Setup
529
Using a Host Name Instead of an Ipv4 Address
529
Printing Commands
530
6 Special Operations under Windows
529
Printing with Bluetooth Connection
534
Supported Profiles
534
Adding a Bluetooth Printer
534
7 Appendix
537
Operating Environment
537
Supported Printer Drivers
537
Limitations
537
Using DHCP
539
Using Autonet
539
Configuring the WINS Server
540
• P.125 "Using Web Image Monitor
540
Using Telnet
540
Using the Dynamic DNS Function
542
Updating
542
DNS Servers Targeted for Operation
543
DHCP Servers Targeted for Operation
543
Setting the Dynamic DNS Function
543
Precautions
545
Connecting a Dial-Up Router to a Network
545
Netware Printing
546
When the IEEE 802.11 Interface Unit Is Installed
548
Configuring IEEE 802.1X
549
Installing a Site Certificate
549
Installing Device Certificate
550
Setting Items of IEEE 802.1X for Ethernet
551
Setting Items of IEEE 802.1X for Wireless LAN
552
Specifications
554
Copyrights
557
Expat
557
Netbsd
557
Sablotron
559
Jpeg Library
560
Sasl
560
Md4
561
Md5
561
Samba(Ver 3.0.4)
561
Rsa Bsafe
562
Open SSL
562
Open SSH
564
Open LDAP
568
Heimdal
569
IPS TM Print Language Emulations
569
Trademarks
570
Index
573
Table of Contents
587
Default Chapter
594
Manuals for this Machine
594
Notice
596
Important
596
How to Read this Manual
597
Symbols
597
IP Address
597
Note
597
Laws and Regulations
598
Legal Prohibition
598
1 Getting Started
599
Before Using the Security Functions
599
Setting up the Machine
600
Enhanced Security
602
Glossary
603
Administrator Authentication
603
User Authentication
603
Security Measures Provided by this Machine
604
Using Authentication and Managing Users
604
Ensuring Information Security
604
Limiting and Controlling Access
606
Enhanced Network Security
607
2 Administrators/Authentication and Its Application
609
Administrators
609
User Administrator
609
Machine Administrator
610
Network Administrator
610
File Administrator
610
Supervisor
610
About Administrator Authentication
611
Enabling Administrator Authentication
613
Specifying Administrator Privileges
613
Registering the Administrator
616
Logging on Using Administrator Authentication
620
Logging off Using Administrator Authentication
621
Changing the Administrator
621
Using Web Image Monitor
622
3 Users/Authentication and Its Application
623
Users
623
About User Authentication
624
Authentication Setting Procedure
625
Enabling User Authentication
627
User Code Authentication
628
Specifying User Code Authentication
628
Basic Authentication
632
Specifying Basic Authentication
632
Authentication Information Stored in the Address Book
634
Specifying Login User Name and Login Password
635
Specifying Authentication Information to Log on
637
Windows Authentication
639
Specifying Windows Authentication
640
LDAP Authentication
651
Specifying LDAP Authentication
652
Integration Server Authentication
659
Specifying Integration Server Authentication
659
Printer Job Authentication
666
If User Authentication Is Specified
669
User Code Authentication (Using the Control Panel)
669
User Code Authentication (Using a Printer Driver)
670
Login (Using the Control Panel)
670
Log off (Using the Control Panel)
670
Login (Using Web Image Monitor)
671
Log off (Using Web Image Monitor)
671
User Lockout Function
671
Auto Logout
673
Authentication Using an External Device
676
4 Protecting Document Data Information from Leaks
677
Preventing Unauthorized Copying
677
Unauthorized Copy Prevention
677
Data Security for Copying
678
Printing Limitations
680
Notice
680
Printing with Unauthorized Copy Prevention and Data Security for Copying
680
Printing a Confidential Document
683
Specifying a Locked Print File
683
Printing a Locked Print File
684
Deleting Locked Print Files
685
Changing Passwords of Locked Print Files
686
Unlocking Locked Print Files
687
Specifying Access Permission for Stored Files
689
Assigning Users and Access Permission for Stored Files
690
Specifying Access Privileges for Files Stored Using the Scanner and Fax Functions
692
Assigning the User and the Access Permission for the User's Stored Files
696
Specifying Passwords for Stored Files
698
Unlocking Files
699
5 Protecting Information Transmitted through the Network or Stored on the Hard Disk from Leaks
701
Preventing Data Leaks Due to Unauthorized Transmission
701
Restrictions on Destinations
701
Using S/MIME to Protect Email Transmission
703
E-Mail Encryption
703
Attaching an Electronic Signature
705
Protecting the Address Book
711
Address Book Access Permission
711
Encrypting Data in the Address Book
712
Encrypting Data on the Hard Disk
715
Enabling the Encryption Settings
715
Printing the Encryption Key
717
Updating the Encryption Key
718
Canceling Data Encryption
719
Deleting Data on the Hard Disk
721
Auto Erase Memory
721
Erase All Memory
726
6 Managing Access to the Machine
729
Preventing Modification of Machine Settings
729
Menu Protect
731
Set up Menu Protect
731
Limiting Available Functions
736
Specifying Which Functions Are Available
736
Managing Log Files
738
Using the Control Panel to Specify Log File Settings
738
Using Web Smartdevicemonitor Professional Is/Standard to Manage Log Files
740
Using Web Image Monitor to Manage Log Files
740
7 Enhanced Network Security
743
Preventing Unauthorized Access
743
Access Control
743
Enabling/Disabling Protocols
744
Specifying Network Security Level
751
Encrypting Transmitted Passwords
755
Driver Encryption Key
755
Group Password for PDF Files
757
IPP Authentication Password
759
Protection Using Encryption
760
SSL (Secure Sockets Layer) Encryption
760
User Settings for SSL (Secure Sockets Layer)
765
Setting the SSL / TLS Encryption Mode
765
Snmpv3 Encryption
767
Transmission Using Ipsec
769
Encryption and Authentication by Ipsec
769
Encryption Key Auto Exchange Settings and Encryption Key Manual Settings
770
Ipsec Settings
771
Encryption Key Auto Exchange Settings Configuration Flow
778
Encryption Key Manual Settings Configuration Flow
783
Telnet Setting Commands
784
Authentication by Telnet
792
Authfree" Command
792
Authentication by IEEE802.1X
793
8 Specifying the Extended Security Functions
795
Changing the Extended Security Functions
795
Procedure for Changing the Extended Security Functions
795
Settings
796
Update Firmware
799
Other Security Functions
801
Fax Function
801
Scanner Function
801
Limiting Machine Operation to Customers Only
803
Settings
803
Specifying Service Mode Lock Preparation
803
Canceling Service Mode Lock
804
Additional Information Enhanced Security
806
Settings to Configure Using the Control Panel
806
Settings to Configure Using Web Image Monitor
808
Settings When Ipsec Is Available / Unavailable
809
Interface
809
9 Troubleshooting
813
Authentication Does Not Work Properly
815
An Error Code Appears
815
Machine Cannot be Operated
830
10 Appendix
835
Supervisor Operations
835
Logging on as the Supervisor
835
Logging off as the Supervisor
836
Changing the Supervisor
836
Resetting an Administrator's Password
837
Machine Administrator Settings
839
System Settings
839
Network Administrator Settings
850
File Administrator Settings
855
User Administrator Settings
857
Document Server File Permissions
859
User Settings - Control Panel Settings
864
Copier / Document Server Features
865
Printer Functions
871
User Settings - Web Image Monitor Settings
888
Device Settings
889
Network
907
Webpage
911
Functions that Require Options
913
Trademarks
914
Index
917
Table of Contents
927
Manuals for this Machine
931
Notice
933
Important
933
How to Read this Manual
934
Symbols
934
Note
934
About IP Address
934
Laws and Regulations
935
Legal Prohibition
935
Using the Desktop Binder-Smartdevicemonitor for Client Port
937
Installing Desktop Binder-Smartdevicemonitor for Client
937
Installing the Postscript 3 Printer Driver (Windows 2000 - TCP/IP)
938
Installing the Postscript 3 Printer Driver (Windows 2000 - IPP)
939
Installing the Postscript 3 Printer Driver (Windows XP, Windows Server 2003 / 2003 R2 - TCP/IP)
940
Installing the Postscript 3 Printer Driver (Windows Vista - TCP/IP)
942
Installing the Postscript 3 Printer Driver (Windows Vista - IPP)
944
Windows 2000
946
Changing the Port Settings Desktop Binder-Smartdevicemonitor for Client
946
1 Windows Configuration
937
Using the Standard TCP/IP Port
948
Installing the Postscript 3 Printer Driver (Windows 2000)
949
Installing the Postscript 3 Printer Driver (Windows Vista)
950
Using the LPR Port
952
Installing the Postscript 3 Printer Driver (Windows 2000)
952
Installing the Postscript 3 Printer Driver (Windows XP, Windows Server 2003 / 2003 R2)
953
Installing the Postscript 3 Printer Driver (Windows Vista)
954
Using as the Windows Network Printer
956
Installing the Postscript 3 Printer Driver (Windows 2000)
956
Installing the Postscript 3 Printer Driver (Windows XP, Windows Server 2003 / 2003 R2)
957
Installing the Postscript 3 Printer Driver (Windows Vista)
958
Using the WSD Port
959
Using as the Netware Print Server / Remote Printer
961
When Using the Postscript 3 Printer Driver
961
Installing the Printer Driver Using USB
962
Windows 2000 - USB
962
Windows XP, Windows Server 2003 / 2003 R2 - USB
963
Windows Vista - USB
964
Troubleshooting for Using USB
965
Printing with Parallel Connection
966
Installing the Postscript 3 Printer Driver (Windows 2000)
966
Installing the Postscript 3 Printer Driver (Windows XP, Windows Server 2003 / 2003 R2)
967
Installing the Postscript 3 Printer Driver (Windows Vista)
968
Printing with Bluetooth Connection
970
Supported Profiles
970
Adding a Bluetooth Printer
970
If a Message Appears During Installation
973
Making Option Settings for the Printer
975
Setting up the Printer Driver
976
Windows 2000 - Accessing the Printer
976
Windows XP, Windows Server 2003 / 2003 R2 - Accessing the Printer Properties
977
Windows Vista - Accessing the Printer Properties
979
Mac os
983
Installing the Postscript 3 Printer Driver and PPD File
983
Setting up PPD Files
984
Setting up Options
984
Installing Adobe Type Manager
985
Installing Screen Fonts
985
Changing to Ethertalk
986
2 Mac os Configuration
983
Mac os X
987
Installing the PPD Files
987
Setting up the PPD File
987
Setting up Options
988
Using USB Interface
988
Using Bonjour (Rendezvous)
989
Changing to Ethertalk
989
Configuring the Printer
991
Setting up Options
993
3 Using Postscript
993
Printing a Document
995
Job Type
995
Deleting a Sample Print File
1000
Deleting a Locked Print File
1003
Deleting a Stored Print File
1009
User Code
1010
Paper Size
1011
Fit to Paper
1011
Input Slot
1012
Resolution
1012
Rotate by 180 Degrees
1013
Orientation Override
1013
Gradation
1014
Toner Saving
1014
Duplex Printing
1015
Collate
1016
Paper Type
1016
Destination Tray
1017
Staple
1017
Punch
1018
Watermark
1018
Watermark Text
1019
Watermark Font
1019
Watermark Size
1019
Watermark Angle
1020
Watermark Style
1020
Color Mode
1020
Color Setting
1021
Color Profile
1022
Black over Print
1023
Gray Reproduction
1023
Dithering
1024
CMYK Simulation Profile
1025
Image Smoothing
1025
Separate into CMYK
1026
Color Control
1026
Installing Printer Utility for Mac
1029
4 Printer Utility for Mac
1029
Starting Printer Utility for Mac
1030
Mac os
1030
Mac os X
1030
Printer Utility for Mac Functions
1031
Downloading PS Fonts
1032
Displaying Printer's Fonts
1032
Deleting Fonts
1033
Initializing the Printer Disk
1033
Page Setup
1034
Printing Fonts Catalog
1034
Printing Fonts Sample
1034
Renaming the Printer
1034
Restarting the Printer
1035
Downloading Postscript Files
1035
Selecting the Zone
1036
Displaying the Printer Status
1037
Launching the Dialogue Console
1037
5 Appendix
1039
Trademarks
1039
Index
1041
Other manuals for Ricoh Aficio MP C5000
Operating Instructions
260 pages
User Guide
60 pages
Troubleshooting Guide
22 pages
Quick Start Guide
19 pages
4
Based on 1 rating
Ask a question
Give review
Questions and Answers:
Need help?
Do you have a question about the Ricoh Aficio MP C5000 and is the answer not in the manual?
Ask a question
Ricoh Aficio MP C5000 Specifications
General
Brand
Ricoh
Model
Aficio MP C5000
Category
All in One Printer
Language
English
Related product manuals
Ricoh Aficio MP C5502
830 pages
Ricoh Aficio MP C5501
93 pages
Ricoh Aficio MP C300
228 pages
Ricoh Aficio MP C2050
328 pages
Ricoh Aficio MP C6000
124 pages
Ricoh Aficio MP C3500
236 pages
Ricoh Aficio MP C2550
328 pages
Ricoh Aficio MP C2000
236 pages
Ricoh Aficio MP C2800
260 pages
Ricoh Aficio MP C3001
93 pages
Ricoh Aficio MP C2051
172 pages
Ricoh Aficio MP C2551
172 pages