• For details about registering the address of a destination folder in the address book, see "Registering
Addresses and Users for Facsimile/Scanner Functions", Network and System Settings Guide.
• You can register entries in the address book using Web Image Monitor or SmartDeviceMonitor for
Admin. For details about how to display Web Image Monitor or install SmartDeviceMonitor for
Admin, see "Monitoring and Configuring the Printer", Network and System Settings Guide. For details
about registering addresses in the address book, see Web Image Monitor or SmartDeviceMonitor
Help.
• Depending on the machine type, you may not be able to use the machine when it is updating the
address book using CSV files (retrieved using SmartDeviceMonitor for Admin) that contain user codes.
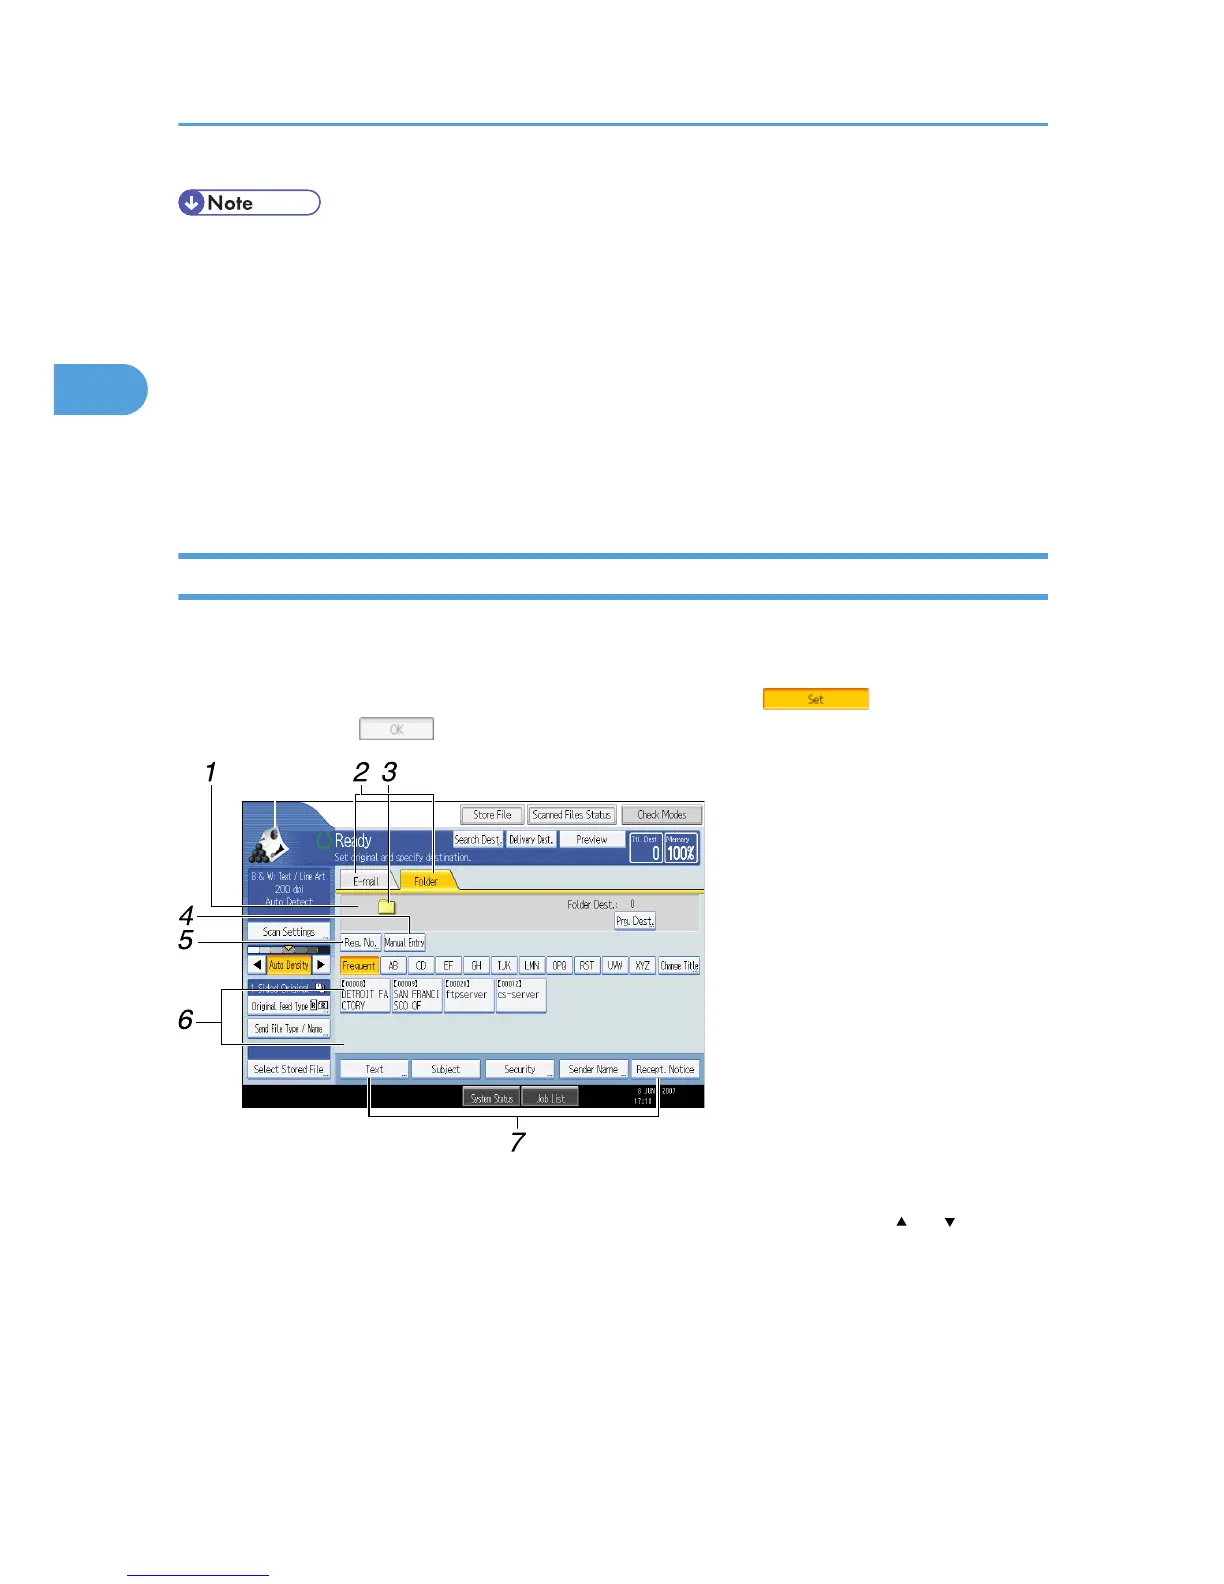
Scan to Folder Screen
This section describes the screen layout when sending scan files by Scan to Folder.
The function items displayed serve as selector keys. You can select or specify an item by pressing it. When
you select or specify an item on the display panel, it is highlighted like [ ]. Keys that cannot be
selected appear like [ ].
1. Destination field
The specified destination appears. If more than one destination has been specified, press [ ] or [ ] to scroll
through the destinations.
2. E-mail/ Folder
Press to switch between the Scan to Folder screen and E-mail screen.
Also switch the screen when sending a file simultaneously by both Scan to Folder and e-mail.
3. Scan to Folder icon
Shows that the Scan to Folder screen is displayed.
2. Sending Scan Files to Folders
58
 Loading...