The group key that you have selected becomes highlighted, and the group is added to it.
9. Press [OK].
10. Press [Exit].
11. Press the [User Tools/Counter] key.
Displaying Names Registered in a Group
This section describes how to display names registered in a group.
You can check the names or groups registered in each group.
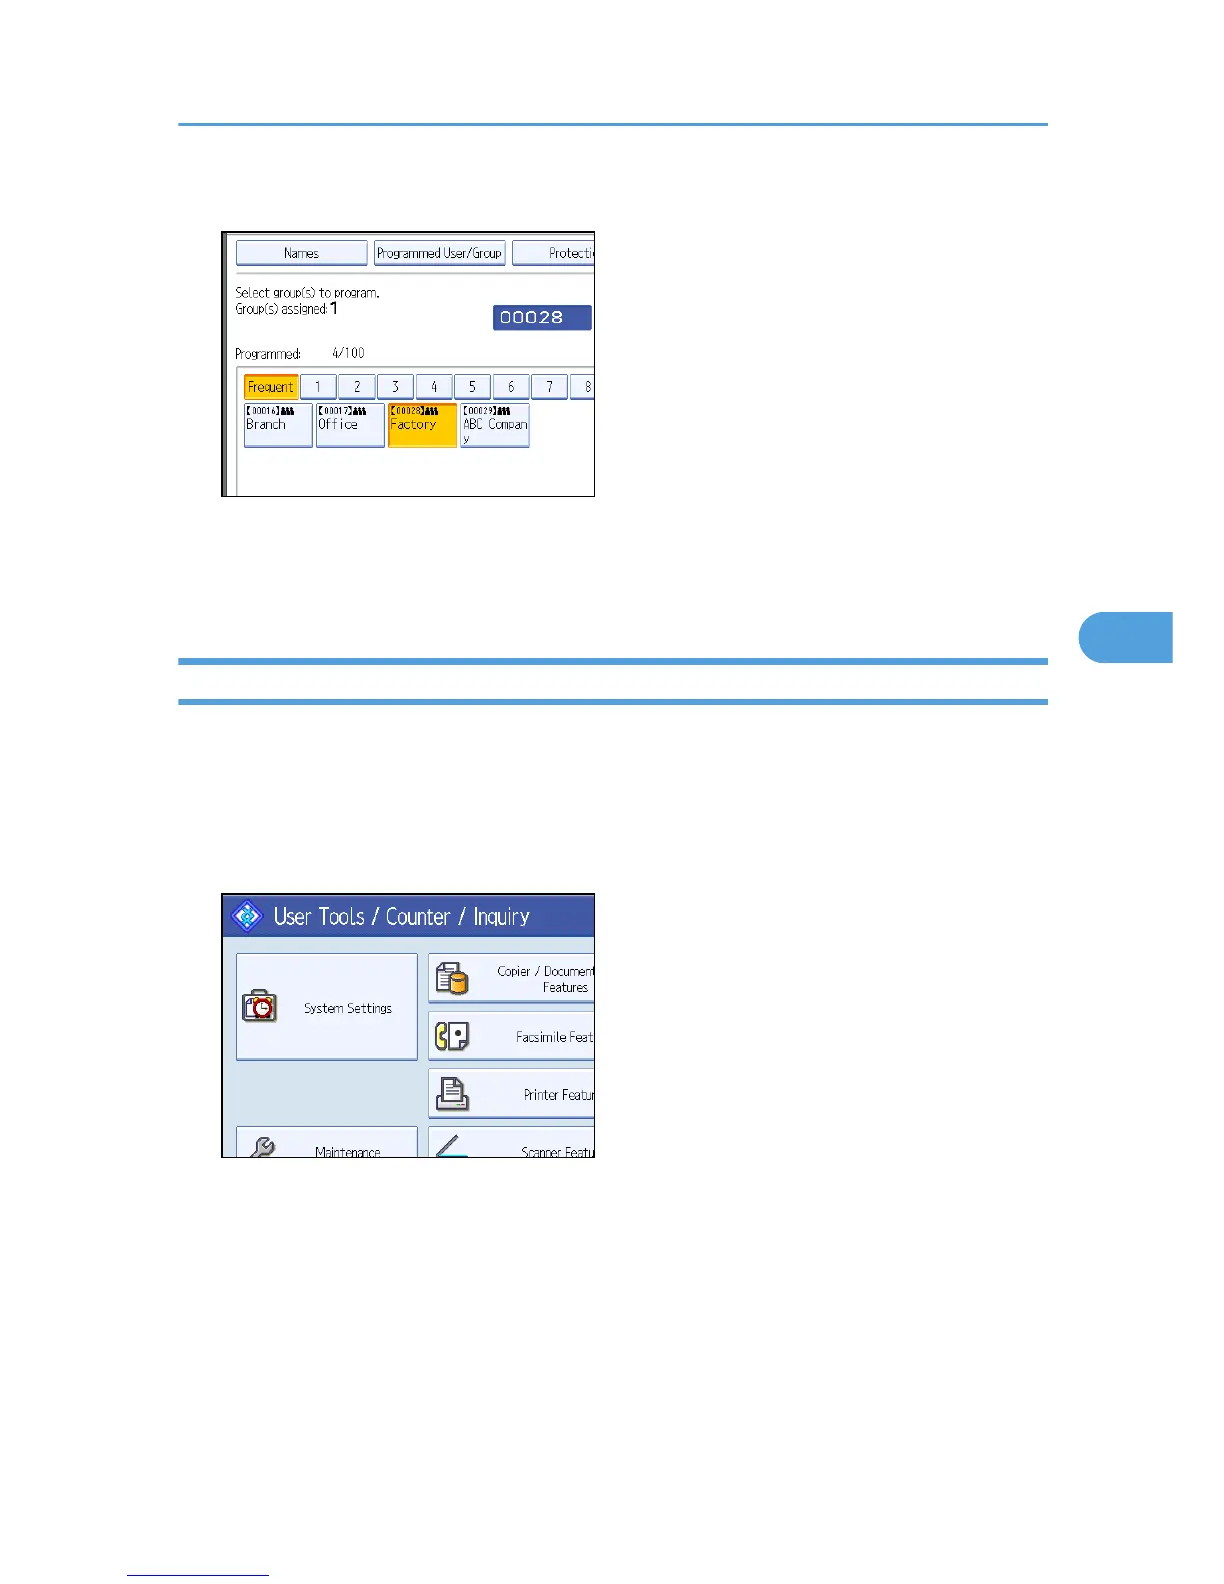
1. Press the [User Tools/Counter] key.
2. Press [System Settings].
3. Press [Administrator Tools].
4. Press [Address Book: Program / Change / Delete Group].
5. Check that [Program / Change] is selected.
6. Select the group where the members you want to check is registered.
You can search by the registered name, fax number, folder name, e-mail address, or IP-Fax
destination.
Registering Names to a Group
297
 Loading...