Scope and Multimeter Operations Triggers
124
9.10.2 Trigger Operation
Trigger Slope Icons
Trigger slope icons are displayed in the control panel.
Turning Triggers on/off
z To turn a trigger on/off:
A trigger can be turned on by:
- selecting the trigger (off) icon from the control panel.
- opening the Trigger Setup Menu see Trigger Setup Menu on page 109,
and selecting the desired Trigger tab from the menu.
A trigger can be turned off by:
- opening the Trigger Setup Menu see Trigger Setup Menu on page 109,
and selecting the desired Trigger tab from the menu. then selecting
None under the Source options.
Setting Trigger Position
z To set trigger position:
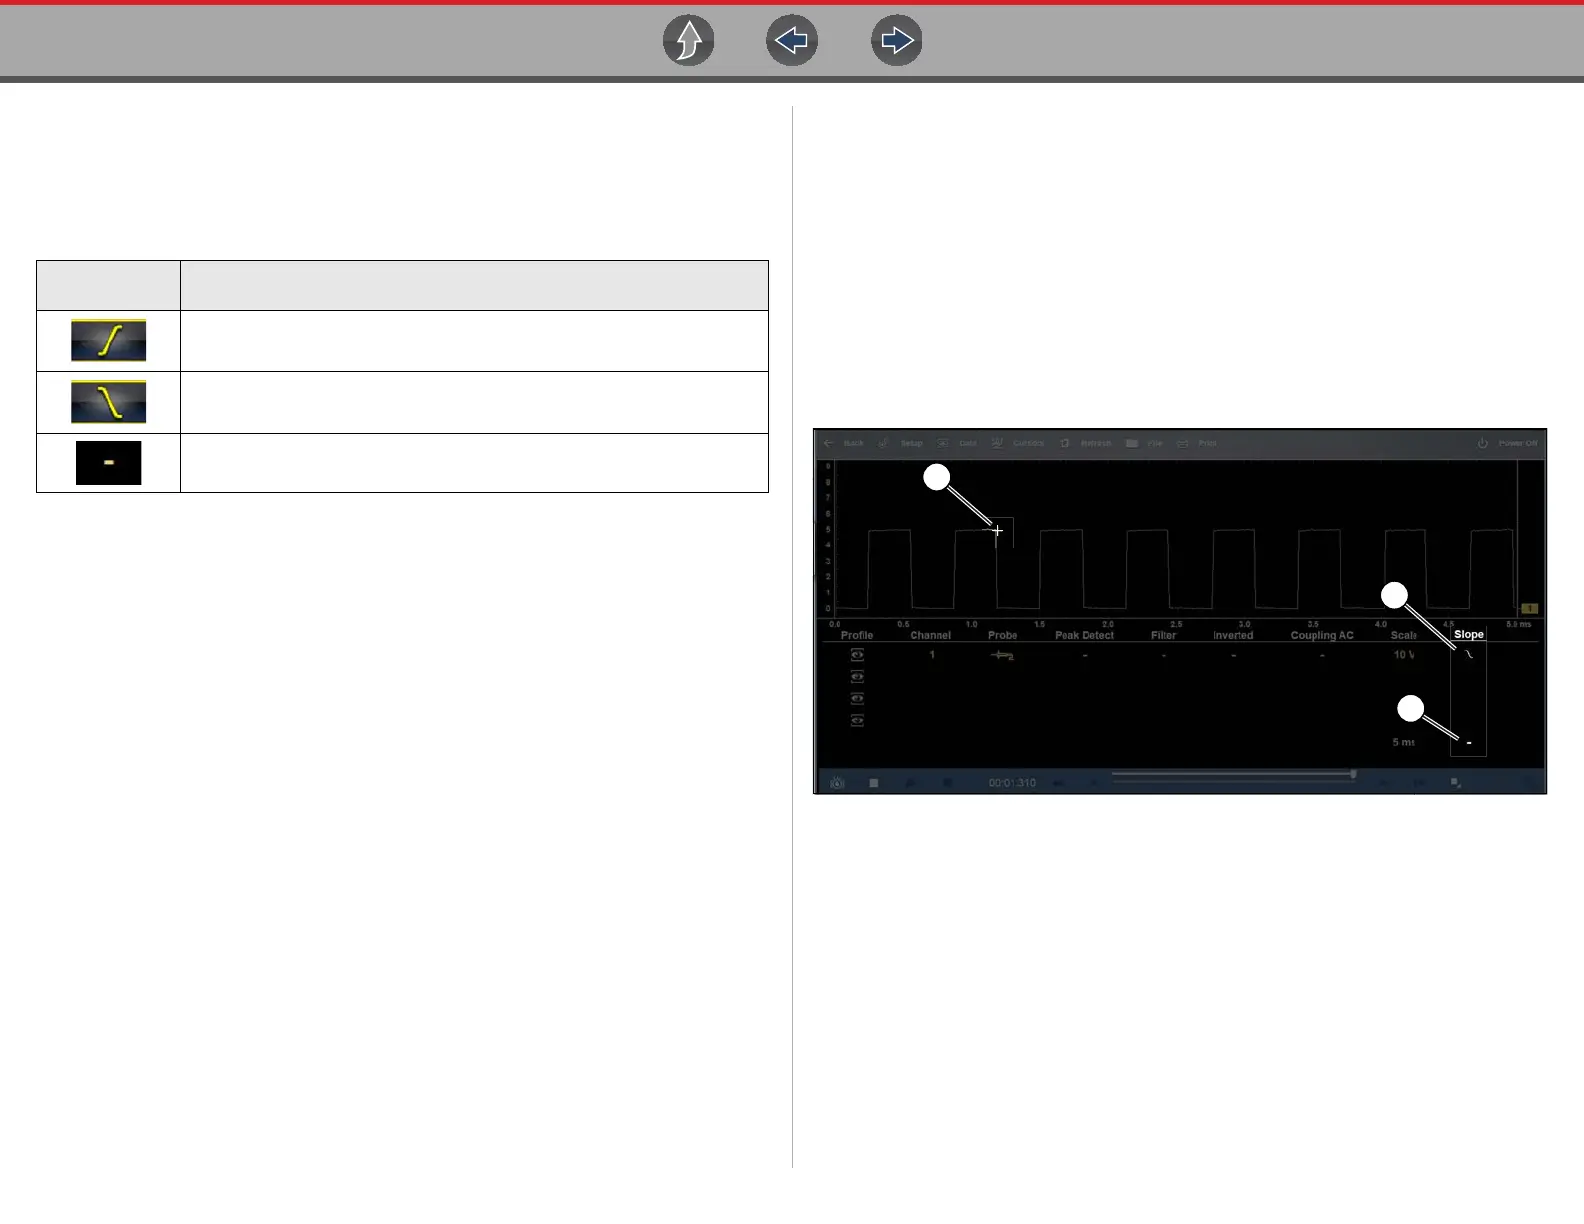
The trigger marker is indicated by a plus graphic (+) on the display (Figure 9-43).
The trigger marker represents the trigger point and is displayed on the screen when
the trigger is turned on.
• To roughly position the trigger marker, select and drag it into position using the
touch screen.
• To position the trigger marker with accuracy, open the trigger setup menu. See
Trigger Setup Menu on page 123, and use the vertical and horizontal slider
controls to adjust the position.
1. Trigger Marker
2. Trigger Slope Icon (falling)
3. Trigger Setup Menu Icon (open setup menu)
Figure 9-43
Trigger Slope
Icon
Description
Rising (up or positive) - Indicates trigger is turned on to start the trace
on the rising edge (as signal begins to rise)
Falling (down or negative) - Indicates trigger is turned on to start the
trace on the falling edge (as signal begins to fall)
Off - Indicates trigger is turned off. (Select to turn trigger on)