ADAS Recalibration Report ADAS Recalibration Report Form
219
18.1.1 Saving the Report (Typical Navigation)
1. Connect the diagnostic tool to the vehicle and identify the vehicle.
The information that is entered during vehicle identification is automatically
entered onto the report form (vehicle make, model, VIN, odometer, license
number, etc). The Shop Information that is associated with the diagnostic tool
is also entered on the form, see Shop Information on page 179 to edit this
information.
2. From the System menu, select the applicable ADAS (Driver Assistance)
system (Lane Departure Alert, Cruise Control Radar, Front Sensing Camera,
Front/Rear Camera Sensor, etc (system names vary by manufacturer)).
3. Select the applicable functional test or adjustment option (Recognition
Camera Axis Adjust, Beam Axis Adjustment, Static Aiming, etc (test names
vary by manufacturer)).
4. Follow and perform all the required setup instructions. Reference and setup
values are located in the OEM service information which is available
separately. If using the ADAS Recalibration System, setup values and
instructions are provided with the unit.
Take screenshots of any setup and or results screens that may be needed for
reference later when filling out the form.
5. Initiate the recalibration test when prompted.
6. Once calibration is completed Exit the test.
7. Select the Back Arrow twice to return to the System menu.
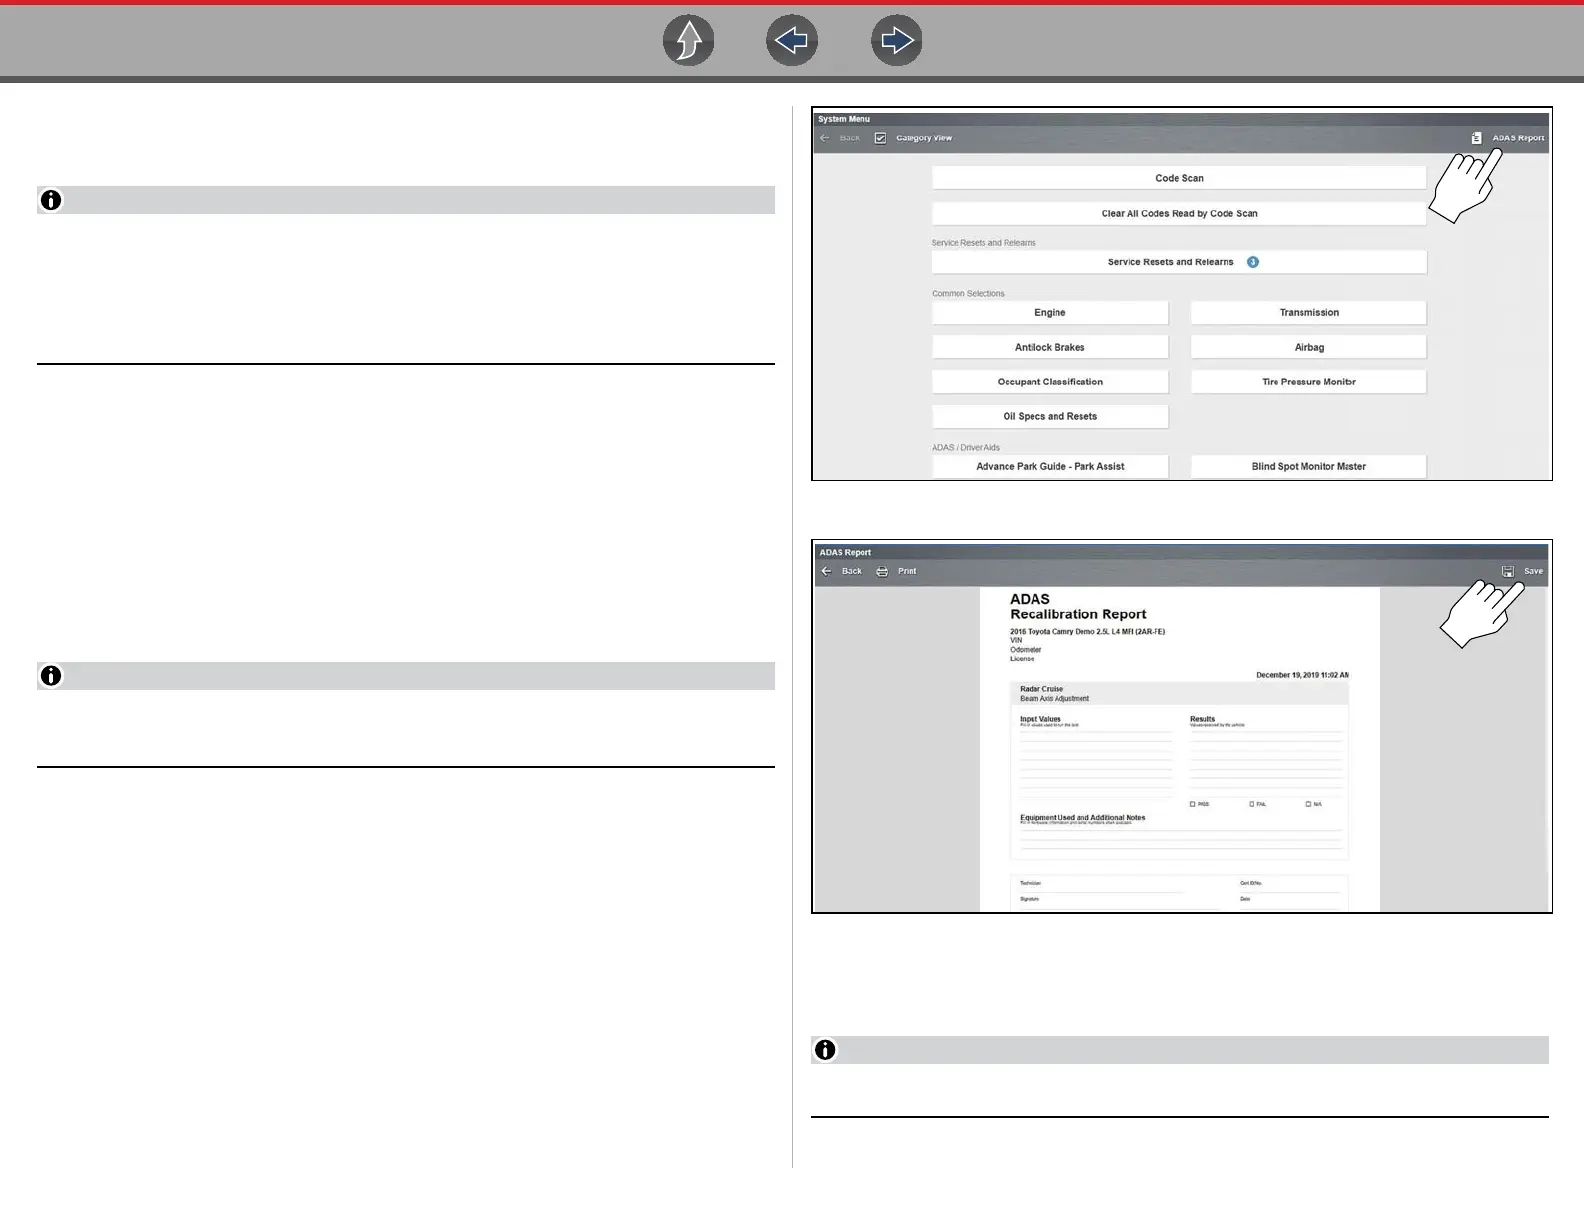
8. From the upper toolbar, select ADAS Report (Figure 18-2). The ADAS Report
form is displayed (Figure 18-3).
Figure 18-2
Figure 18-3
9. Select Save (Figure 18-3) to save the report within the diagnostic tool and
automatically upload it to the Snap-on Cloud.
Selecting Print will not save the report.