84
Section 7 OBD Direct
Introduction
This section describes the basic operation, and navigation of the
OBD Direct function.
OBD Direct allows you to access global OBD-II/EOBD vehicle data
and tests, without having to identify the vehicle.
You can use OBD Direct to:
• Perform an OBD Health Check
• Check and clear OBD-II diagnostic trouble codes (DTCs)
• Check malfunction indicator lamp (MIL) status
• Check readiness monitor status, prior to emissions testing
• Access OBD-II modes (e.g. $01, $02, $06, $09, etc.)
OBD Direct provides global (generic) OBD-II/EOBD information. To access
enhanced OBD-II/EOBD data, select Scanner from the Home screen.
Main Topic Links
• Main Menu page 84
• OBD Diagnose page 84
– Start Communication page 84
- Readiness Monitors page 85
- OBD-II Modes page 86
- MIL Status page 86
- Troubleshooter page 86
– Connector Information page 87
– Manual Protocol Selection page 87
• OBD Health Check page 87
7.1 Main Menu
Selecting OBD Direct from the Home screen opens a menu with two options
(Figure 7-1):
• OBD Diagnose - provides access to available OBD vehicle readiness
monitors, service modes, trouble codes, and data. See OBD Diagnose on
page 84.
• OBD Health Check - provides quick access to check and clear codes, check
the readiness monitors, and check MIL status. See OBD Health Check on
page 87.
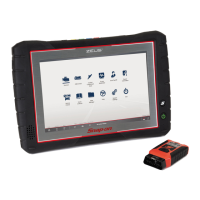
To use the OBD Direct functions the Compact Scan Module (CSM) must be
connected to the vehicle and communicating with the diagnostic tool.
7.2 OBD Diagnose
Selecting OBD Diagnose provides the following menu options (described in the
following sections):
• Start Communication
• Connector Information
• Manual Protocol Selection
7.2.1 Start Communication
Selecting Start Communication, initiates an OBD test session.
z To access OBD data and tests:
1. Select Start Communications.
2. Connect the Compact Scan Module to the vehicle.
3. Select Continue.
The following information may be displayed (Figure 7-1):
– Number of ECM’s detected

 Loading...