12-12 Sysmex XP-300
Cleaning and Maintenance
Revised May 2012
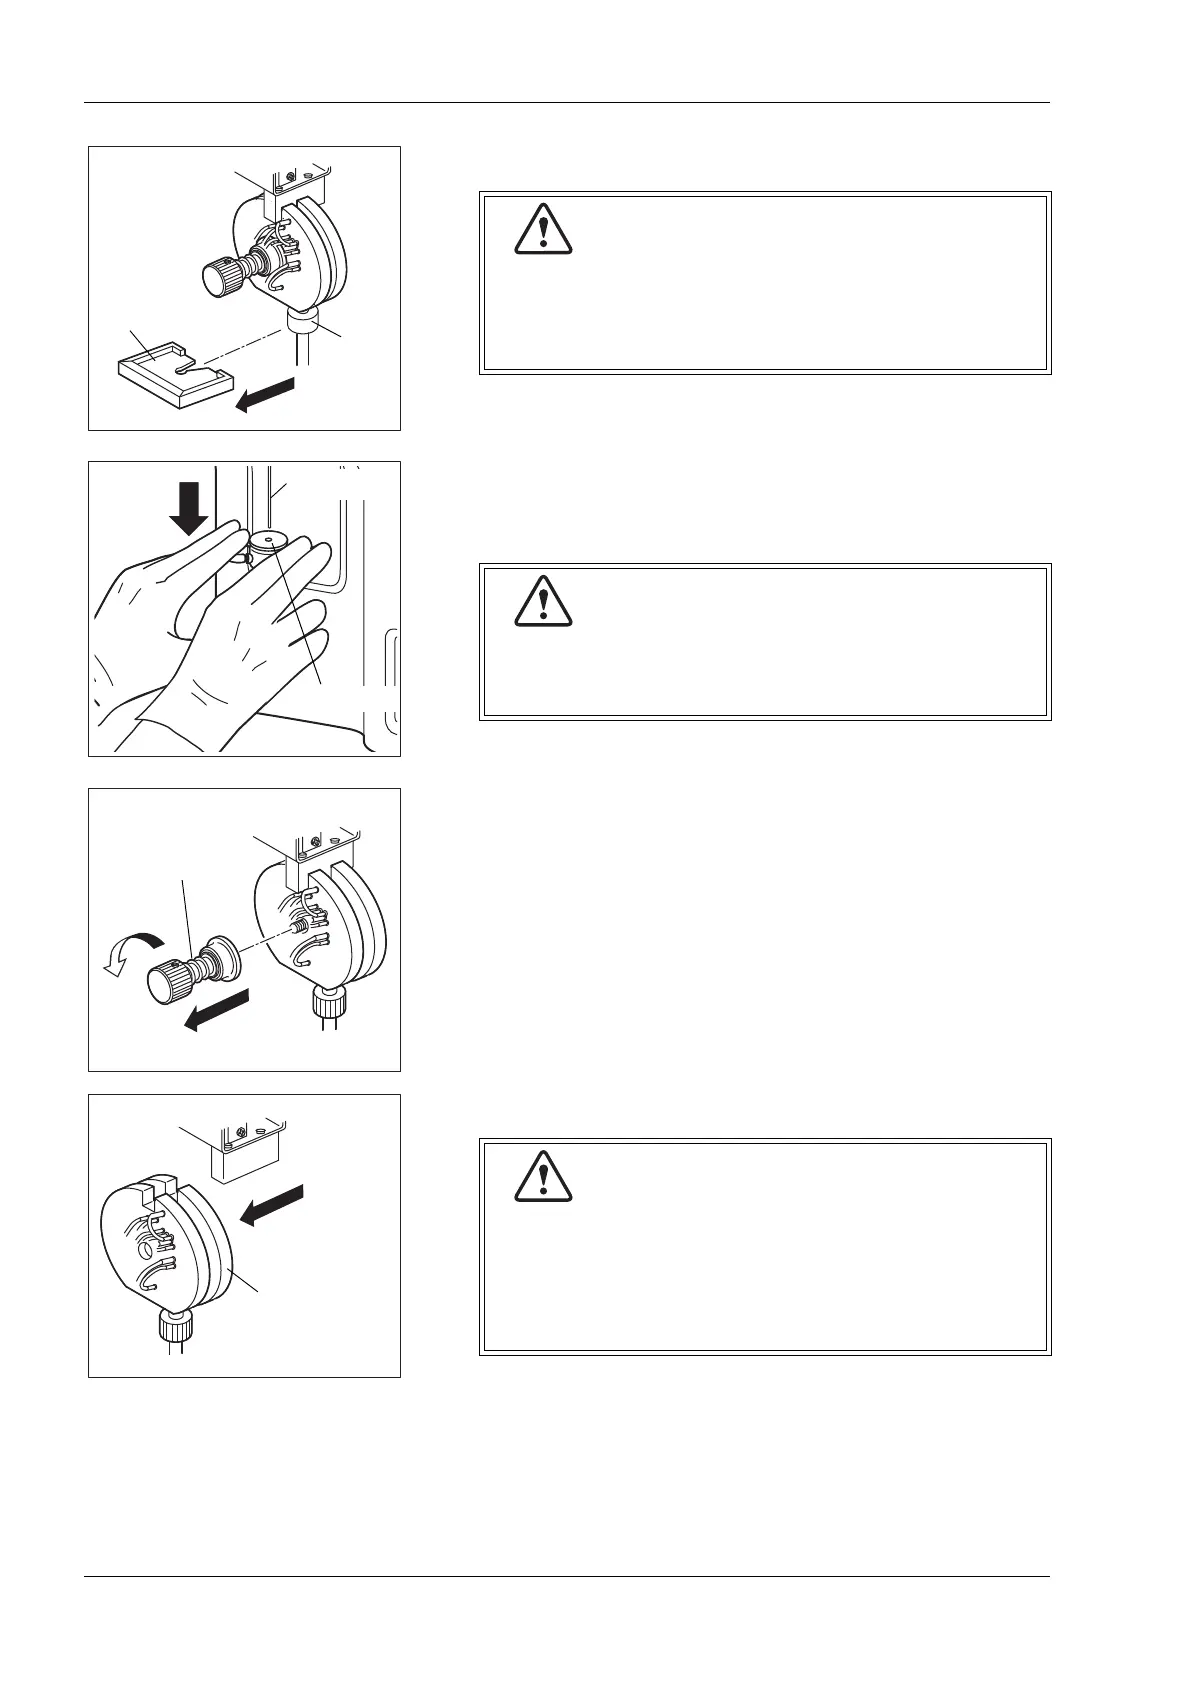
(4) Remove the SRV tray.
(5) Gently push down the rinse cup using both hands.
Make sure the rinse cup is removed completely from the sample
probe.
(6) Remove the SRV fixing screw.
(7) Remove the entire SRV.
SRV tray
Probe
fixing
screw
When removing the SRV tray, take care not to loosen
the probe fixing screw.
If analysis is made with the screw loosened, air can
enter the system and affect the data.
If the rinse cup is not completely removed from the
sample probe, there is a possibility that the sample
probe may bend when the SRV is removed.
• Take care not to pull out the SRV excessively. This is
to prevent applying excess force to the tube
connected to the SRV.
• When removing the SRV, take care not to bend the
sample probe.