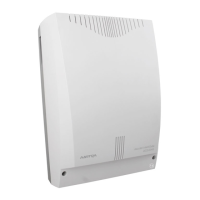
Ascotel IntelliGate 2025/2045/2065
894 Data Maintenance Part 7
If errors are detected in the system software during the time in which the newly
loaded system software is being monitored for fault-free operation, the previous
system software is reactivated.
If the previous software is no longer available, an Emergency Upload has to be ini-
tiated using the AIMS Upload Manager. An triggered Emergency Upload is sig-
nalled by "EUL" on the 7-segment display (see "Emergency Upload of the system
software", page 896). The PBX is not operational during that time.
Successful and failed software uploads are stored as event messages in the PBX
and output at the set signal destinations.
See also:
For information on event messages and signal destinations, see "Event
message concept", page 913.
Initiating an upload process
To ensure a successful software upload, carry out the following preparatory steps:
1. Recommendation: Use AIMS to save the configuration data (see "Saving con-
figuration data with AIMS", page 900).
2. Call up the AIMS Upload Manager.
3. Select the "Configuration" tab.
4. Enter the password for access to the PBX.
5. Select the system type.
6. Click the "Add" button in the "Software Version" field and specify the direc-
tory containing the zip-file with the system software you want to install.
The software version you have added appears in the list box.
7. Select the software version you want from the list box.
8. Select the PBX connection (see "PBX connection", page 891):
– Local access (PC connection to the V.24 interface of the mainboard or PA)
– Via dial-up access (ISDN, PC connection on the S/T interface)
– Via LAN (PC connection to the Ethernet interface on the basic systems)
9. If required, use the "Settings" button to set the connection parameters (see
"Setting", page 892).
10. Select the "PBX" tab.

 Loading...