Gen II User Manual
20-4 – Check Track Chapter 20 Revision 3.00, April 2020
Use the [] key to move down to the “Trkr Inclination” field. Use the Inclinometer to
measure the installed angle and enter it in this field. Valid entries are from 30 thru 90
degrees. (Refer to the Model 550 TraX
TM
operational supplement, P/N 75-900-4043 for
additional details as necessary.)
When all fields are completed to your satisfaction, press [OK].
The process, after setting up the tracking parameters, changes depending on the type of
tracking device you are using.
If using the TraX
TM
- When you press [OK] to accept the configuration above, the TraX
TM
will
automatically begin taking data. As long as the Tach and Ready lights continue to flash, the unit
is actively collecting data. When the Tach and Ready lights extinguish, the “Check Track –
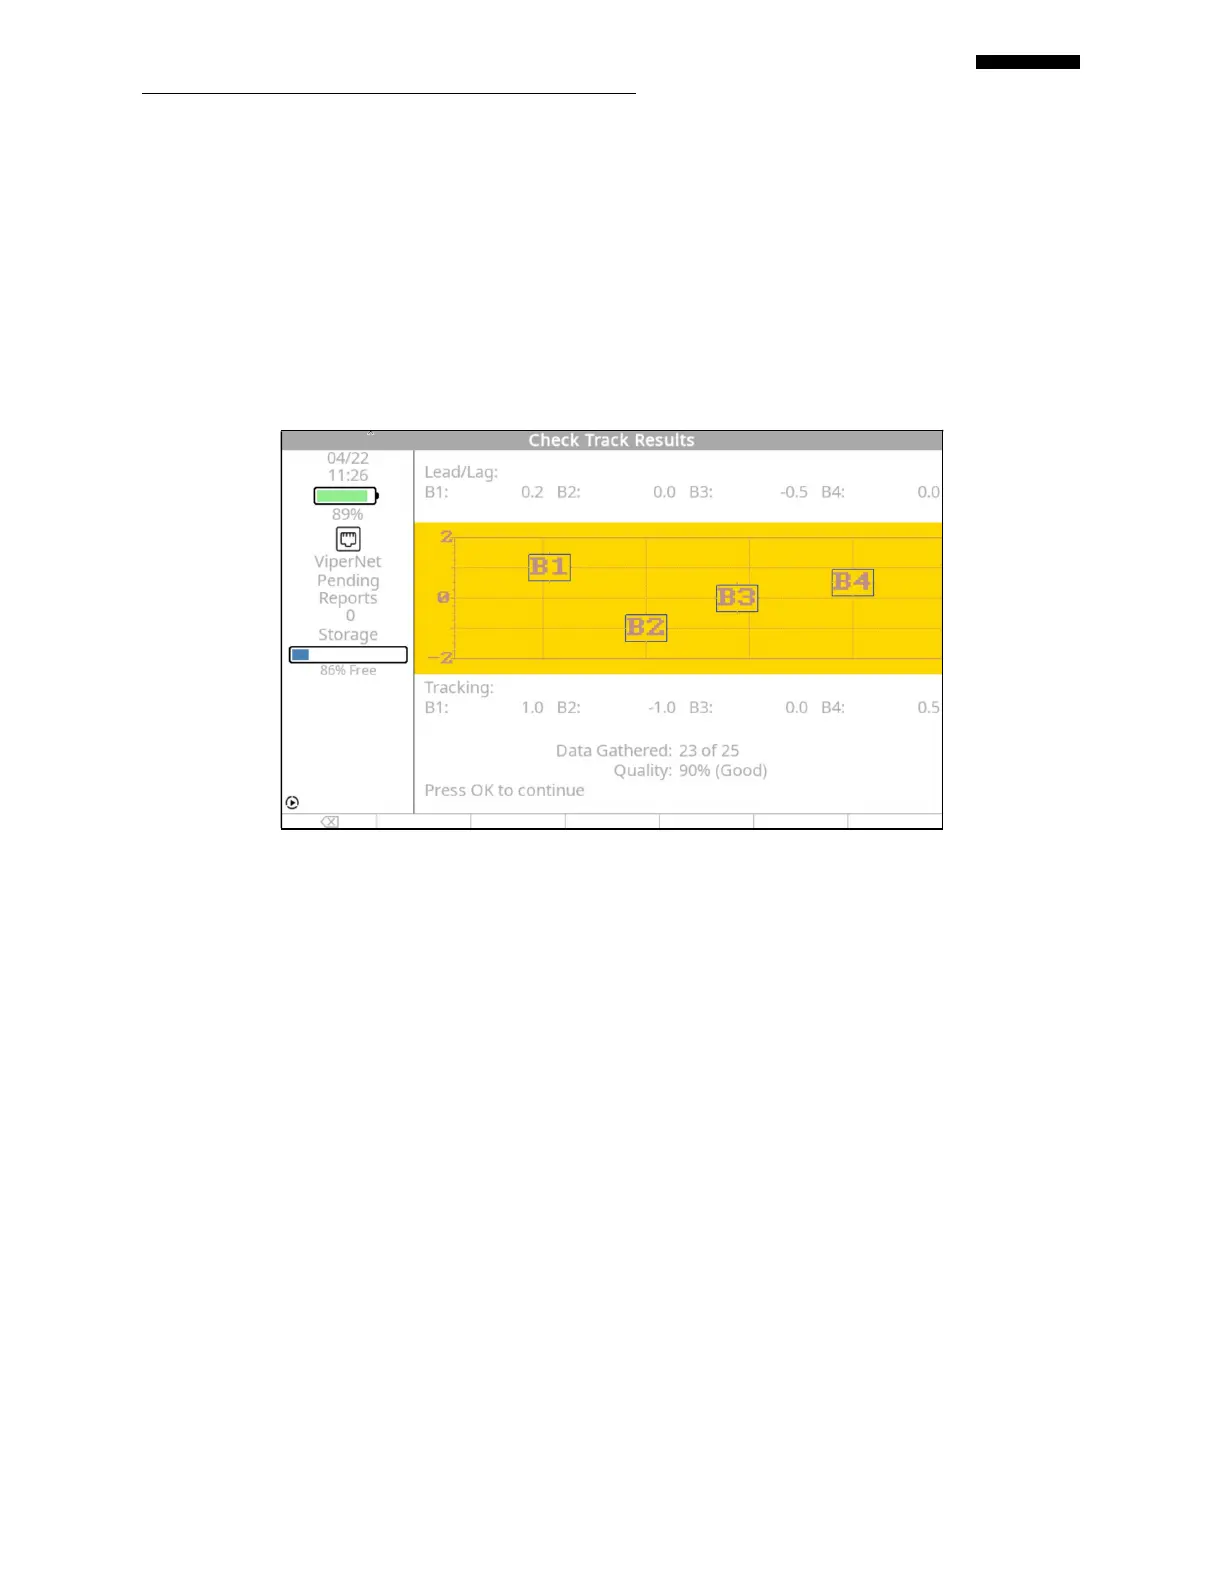
Results” screen will appear as shown in the sample above.
The “Check Track -Results” screen presents the blade-tip-path information in both a graphical
and a numeric format. The final percentage display on the “Data Gathered” line at the bottom of
the screen is an indicator of the quality of data. The higher the percentage, the better the data
quality. When finished, press the [F0] “Back Up” key to exit back to the Main Menu banner
screen. You may retake the track data by simply selecting the “Check Track” function again
from the Main Menu banner screen and taking the measurement again.
 Loading...