Sync Scorer Components 71
8. Mount the replacement to mounting board and tighten the screws that hold the Peripheral
Controller to its mounting board.
9. Carefully feed the cables removed in step 4 through the “feed through” holes. Attach the cables
to the connections as noted in step 4. Refer to gure titled Distribution Board 7 Connections.
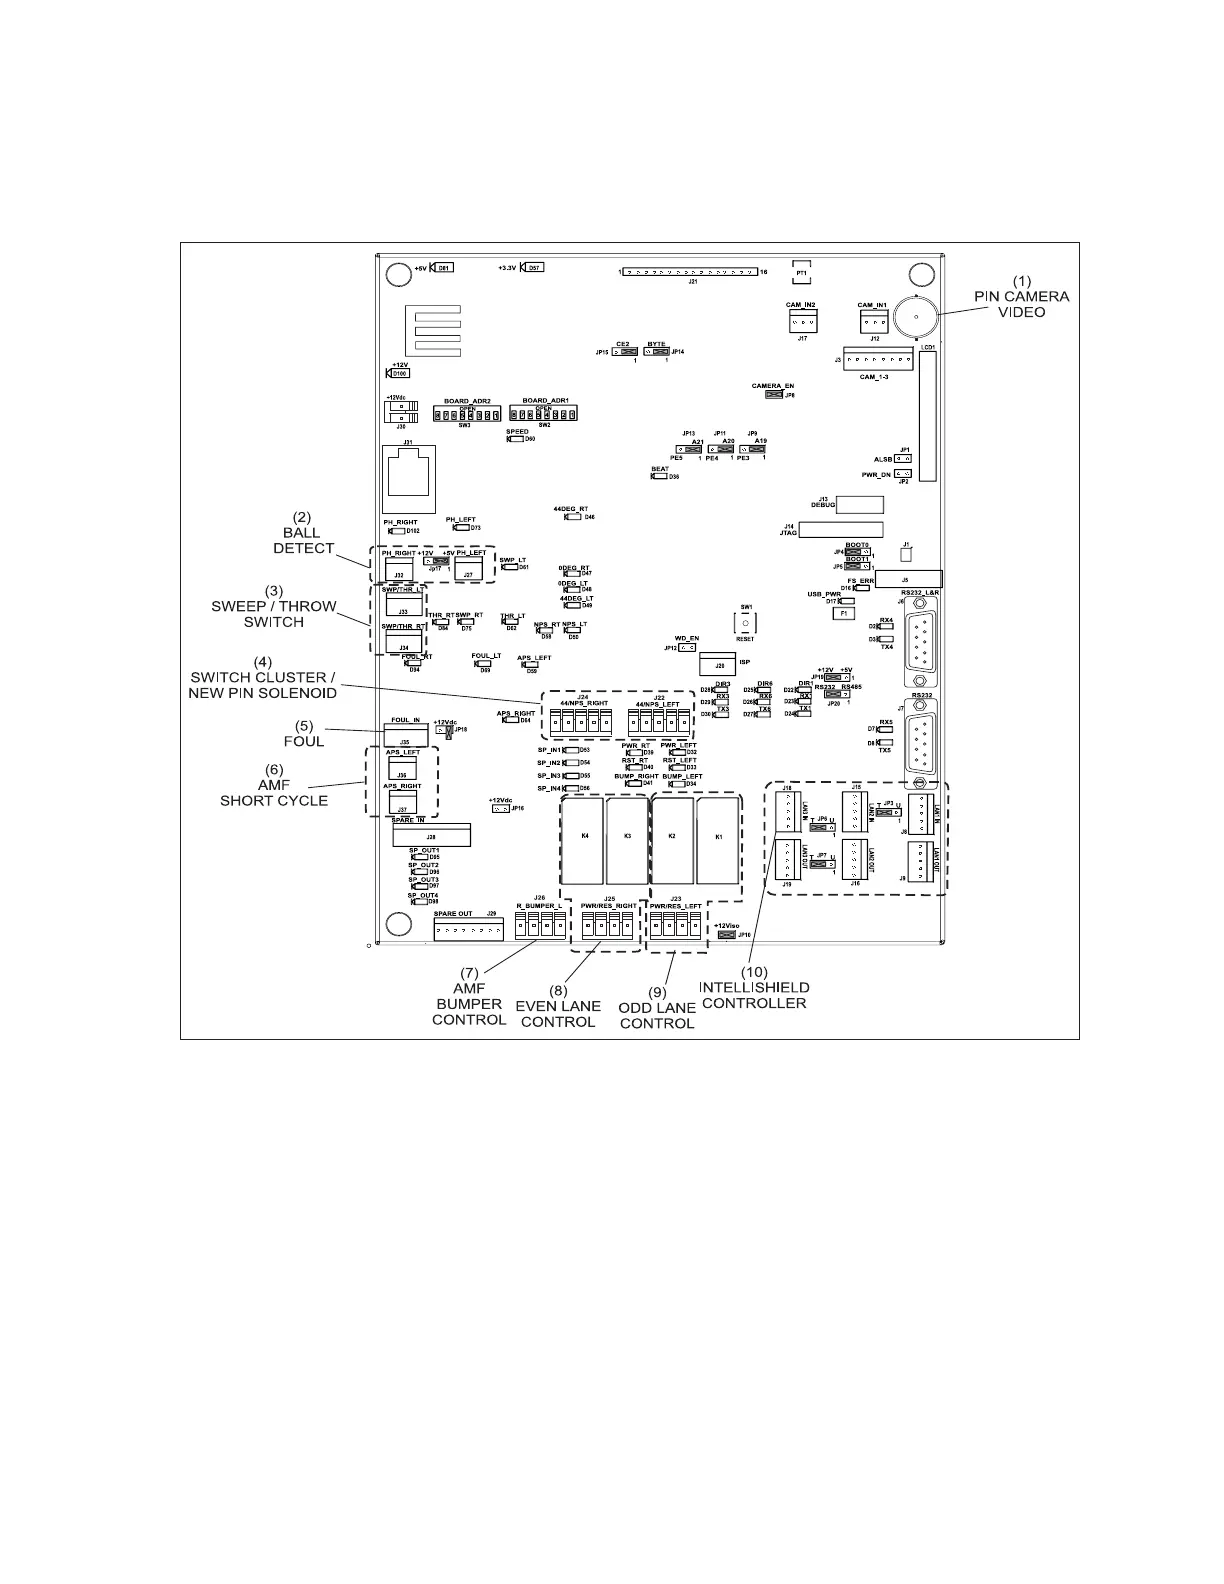
Distribution Board 7 Connections
(1) PIN CAMERA VIDEO (2) BALL DETECT SWITCH (3) SWEEP/THROW
(4) SWITCH CLUSTER/NEW PIN (5) FOUL (6) AMF SHORT CYCLE
SOLENOID
(7) AMF BUMPER CONTROL (8) EVEN LANE CONTROL (9) ODD LANE CONTROL
(10) INTELLISHIELD CONTROLLER
11. Reconnect the external cables removed and noted in step 2. Refer to the gure titled Peripheral
Controller Power and Connections.
12. Place the cover, removed in step 3, and secure it with the cover screws.
13. Reapply power to the Peripheral Controller by connecting the power cable to the unit and
turning the power switch to the “ON” position. Refer to the gure titled Peripheral Controller
Power and Connections.
14. IMPORTANT! Once the Display Controller has completely rebooted, assign 2 bowlers to the
lane pair using “Lite League”. Bowl on the lanes to test for proper functionality.