Maintenance 4. Cable
190 N6 Rev.2
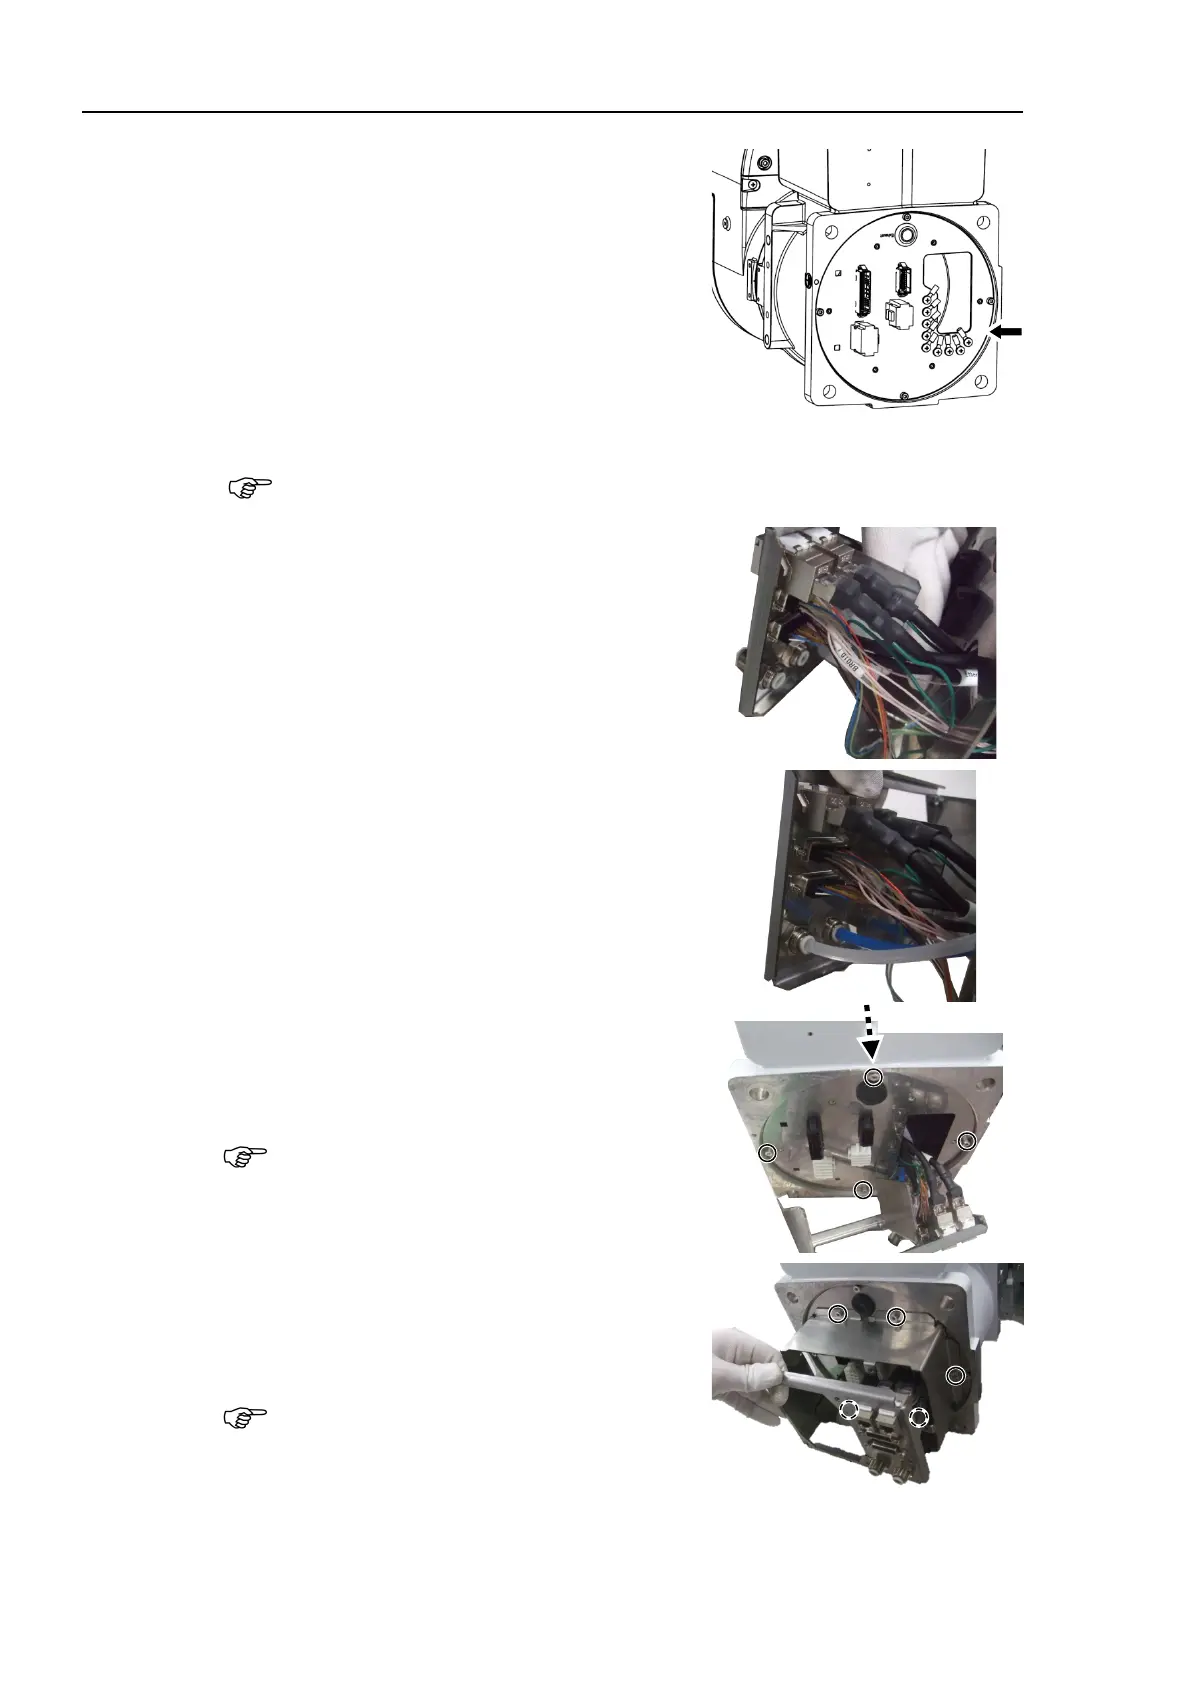
Install the nine ground wire terminals from the
following connectors to the front side of the
plate part 3.
Connectors:
X11, X12, D-sub, Ether1, Ether2
Cross recessed binding head machine screw:
9-M4×8
Tightening torque: 0.9 ± 0.1 N·m
Refer to the right figure for the installation
position.
Pass the connectors through the hole of the
plate
part 3, and install on the the plate part 1.
Connectors: Ether1, Ether2, D-sub, SW1
Connect the two air tubes to fittings.
Air1: White
Air2: Blue
3 to the base.
Hexagon socket head cap bolts: 4-M4×8
Tightening torque: 4.0 ± 0.2 N·m
Refer to the right figure for the installation
position.
Install the plate part 2.
Hexagon socket head cap bolts: 5-M4×8
Tightening torque: 4.0 ± 0.2 N·m
Be careful not to get the cables caught.

 Loading...


