Maintenance 5. Actuator Units
306 N6 Rev.2
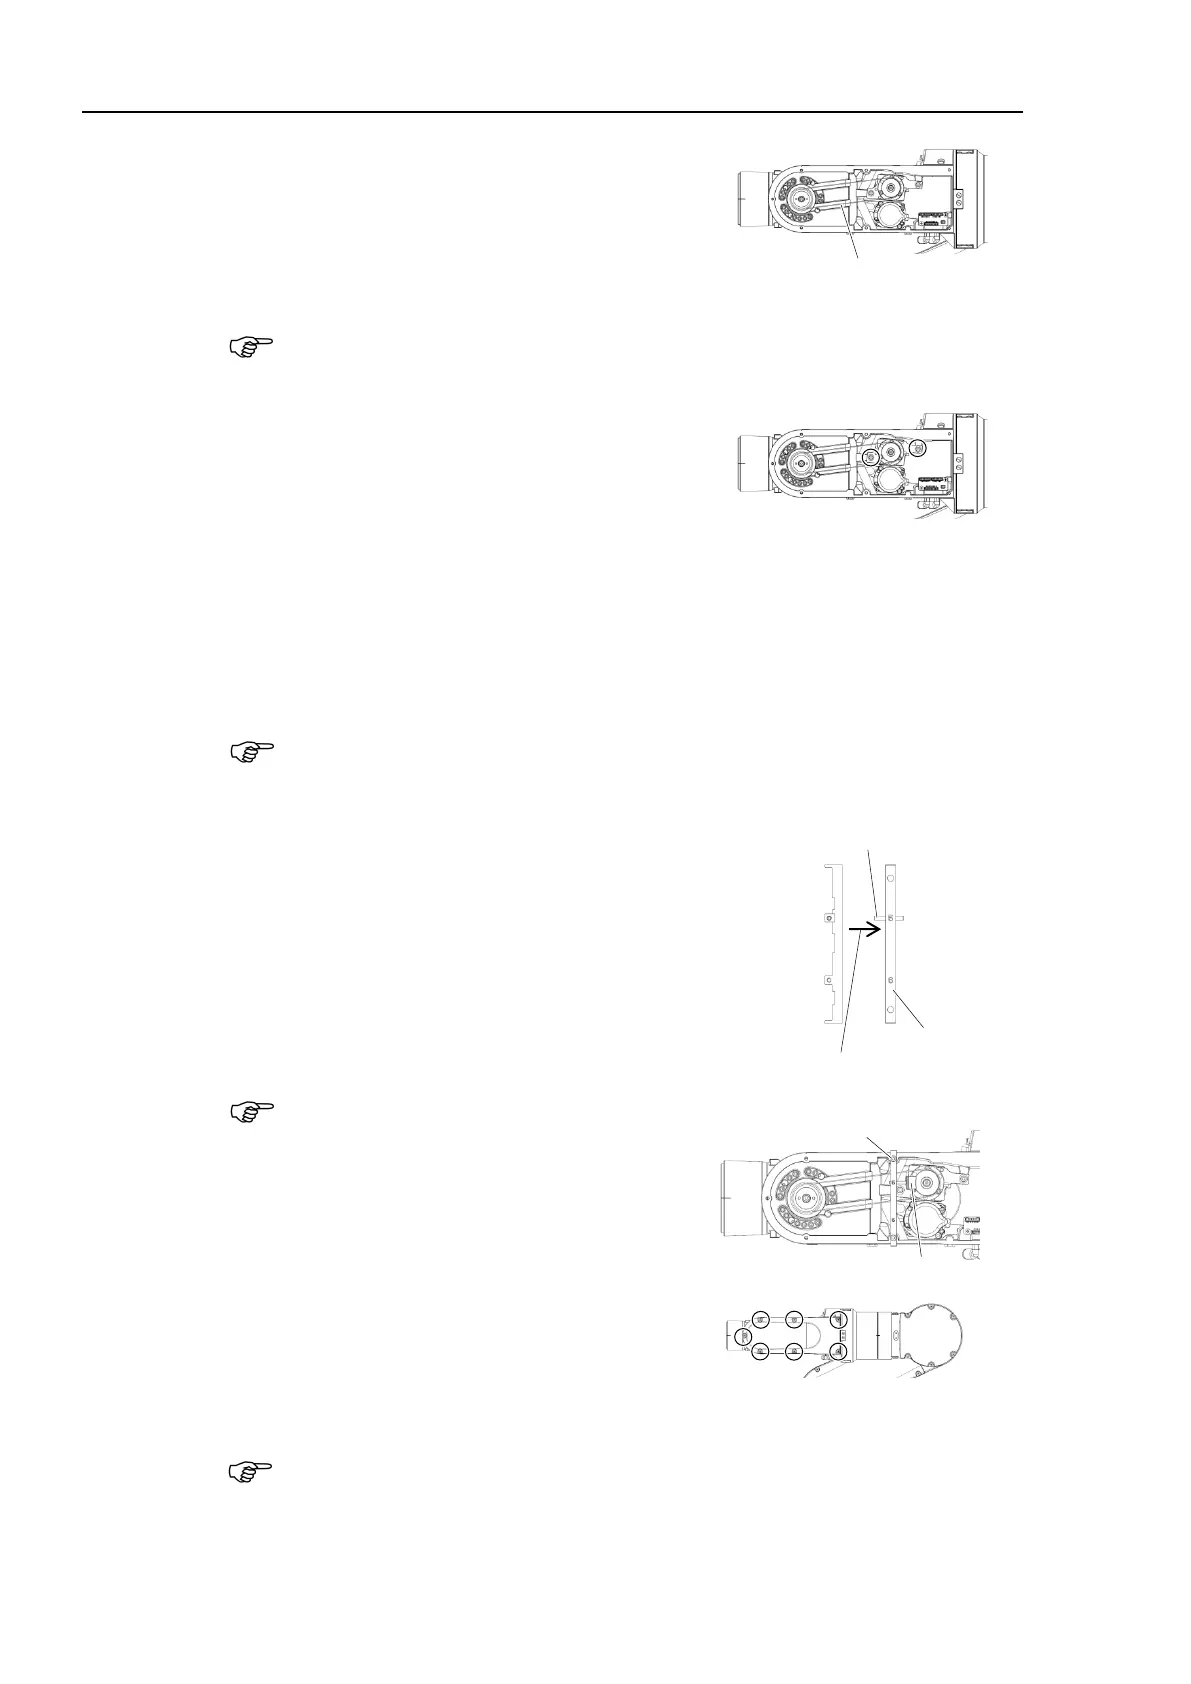
Installation
Joint #5
timing belt:
Install the timing belt and temporarily fix the
Joint #5 motor unit.
Hexagon socket head cap bolts: 2-M4×15
(with plain washer for slotted hole thickness:
When temporary fixing the Joint #5 motor unit, make sure that the motor unit can be
moved by hand and does not tilt when being pulled. If the unit is fixed too loose or
too tight, the belt will not have proper tension.
Apply the proper tension to the Joint #5 timing
belt and fix the Joint #5 motor unit.
Tension of Joint #5 timing belt: 23 ± 5 N
Belt tension meter setting value
Weight: 2.5g/mm Width×m Span, Width:6 mm, Span:142 mm
Hexagon socket head cap bolts:
2-M4
×15 (with plain washer for slotted hole thickness: 1.5mm)
Tightening torque: 4.0 ± 0.2 N·m
Regarding belt tension:
- Jumping (position gap) may occur if the value is below the lower limit.
-
Vibration (abnormal noise) or reduction of life of the parts may occur if the
value exceeds the upper limit.
When using belt tensile jig (maintenance part):
1. Install the hexagon socket set screws (M3×20) to
the holes on inscribed side of “5” on the belt
tensile jig.
2. Fix the belt tensile jig on the Arm #4 with the
hexagon socket head cap bolts (2-M4×15).
3. Push the rubber to the pulley. Push the rubber
with the hexagon socket set screws (M3×20) to
apply tension.
Be careful not to push the set screws forcibly.
Hexagon socket set
screws: M3×20
Install the Arm #4 side cover.
Cross recessed binding head machine screw:
7-M4×8
Tightening torque: 0.45 ± 0.05 N·m
Be careful not to catch the cables. The cables will be disconnected.
Perform calibration for the Joint #5.
For details, refer to Maintenance 8. Calibration.

 Loading...


