Customizing the Control Panel
25
Before Using the Machine
1
3
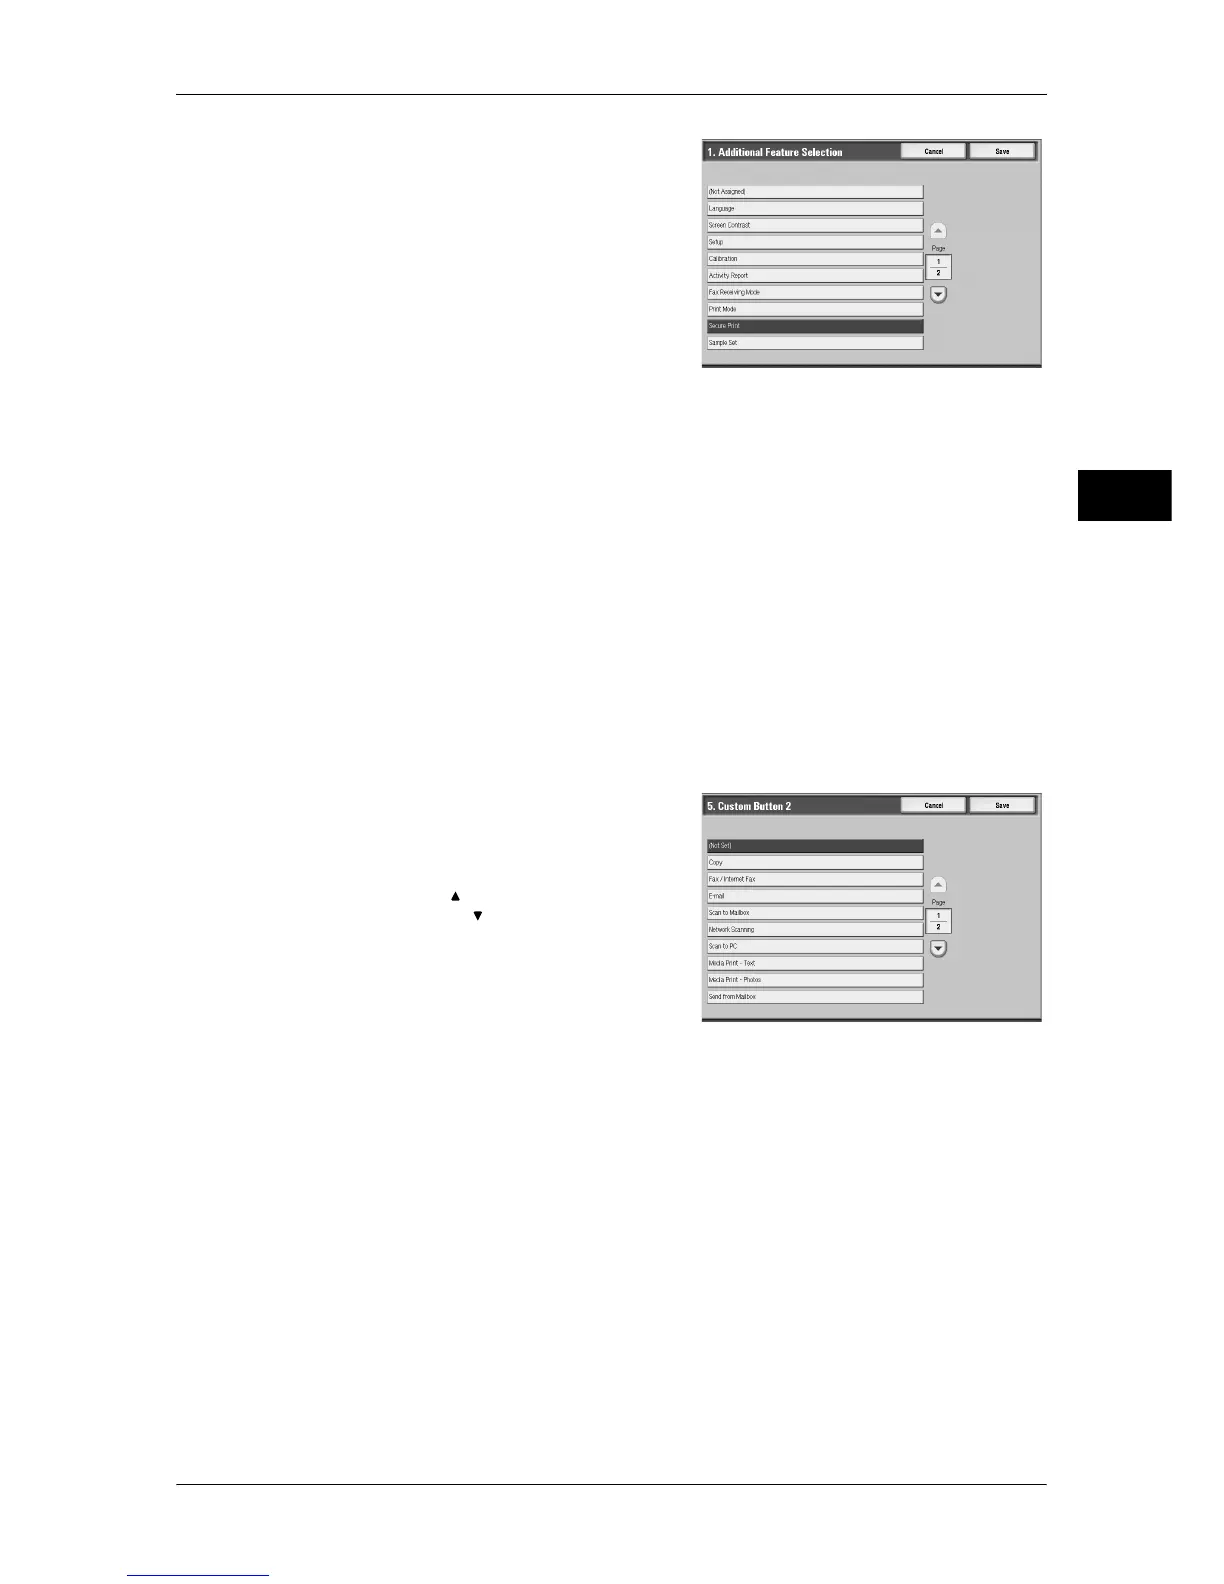
Select [Secure Print].
Note • The layout of buttons in this screen is
corresponding to the layout of those on
the [All Services] screen.
• You cannot assign the same feature to
more than one button.
Assigning Features to <Custom> Buttons
Assign features to the <Custom> buttons on the control panel: Custom 1 to Custom 3.
By assigning features to the <Custom> buttons, you can switch to the features without
returning to the [All Services] screen. If you do not want to assign any feature to a
button, select [Not Set].
By factory defaults, [Copy] is assigned to the <Copy> button and no feature is assigned
to the <Custom 2> or <Custom 3> button. The features assigned to the buttons are
selected from the features displayed on the [All Services] screen and [Language].
Attach the labels included in this product when you have changed the assignment. If
you have used a feature for which no label is provided, use a blank label and write down
the feature using a permanent marker, and then attach the label to the appropriate
button.
The following is the procedure to assign [Send from Mailbox] to the <Custom 2> button,
as an example. The same procedure can be used for the <Custom 3> button.
1
Select [Custom Button 2], and select
[Change Settings].
2
Select [Send from Mailbox].
Note • Select [ ] to return to the previous
screen or [ ] to move to the next screen.
Changing the Feature Screen
You can customize the screen layouts for the following features listed on the [All
Services] screen.
z
Copy
z
Fax/Internet Fax
z
E-mail
z
Scan to Mailbox
z
Network Scanning (ApeosPort series models only)
z
Scan to PC
For information on how to change the settings, refer to "Copy Tab - Features Allocation" (P.148), "First
Tab" (P.181), and "Screen Defaults" (P.187).
Adjusting the Screen Contrast (For Standard Control Panel)
You can adjust the screen contrast on the screen which appears when you select the
[Screen Contrast] button on the [All Services] screen.
 Loading...